Microsoft Entra ID
Let your users sign in to Vipilink with their Microsoft Entra ID account.
You register one app in Microsoft Entra ID and add its client ID and secret in Vipilink.
Before you start
- You're an admin in Microsoft Entra ID and in Vipilink.
- Your company's domain, for example
example.com, is verified in Microsoft Entra ID. You can check it in Entra ID → Domain names. - You know your Vipilink workspace address, for example
https://example.vipilink.com. In the steps below, replaceexamplewith your workspace name. - Every user who signs in with Microsoft must already have a Vipilink account with the same email address. Signing in with Microsoft doesn't create Vipilink users.
Step 1: Register the app
- Sign in to the Microsoft Entra admin center.
-
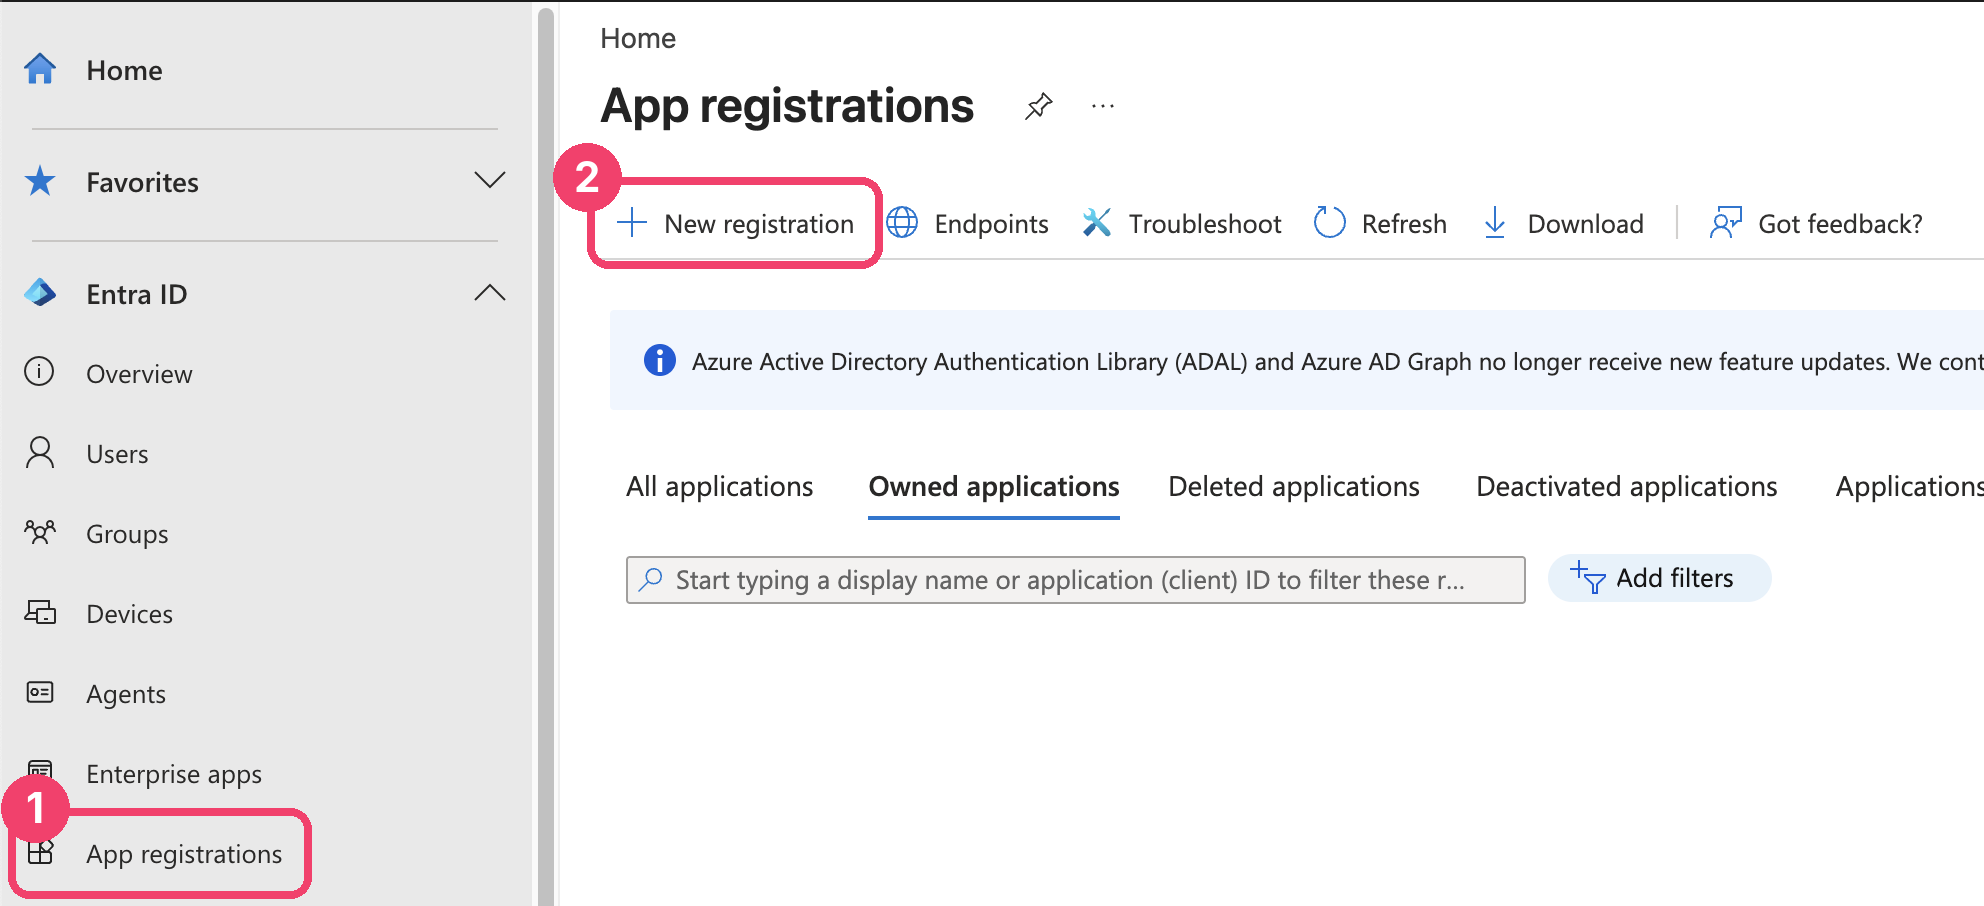
Go to Entra ID → App registrations (1) and click New registration (2).
-
Fill in the form:
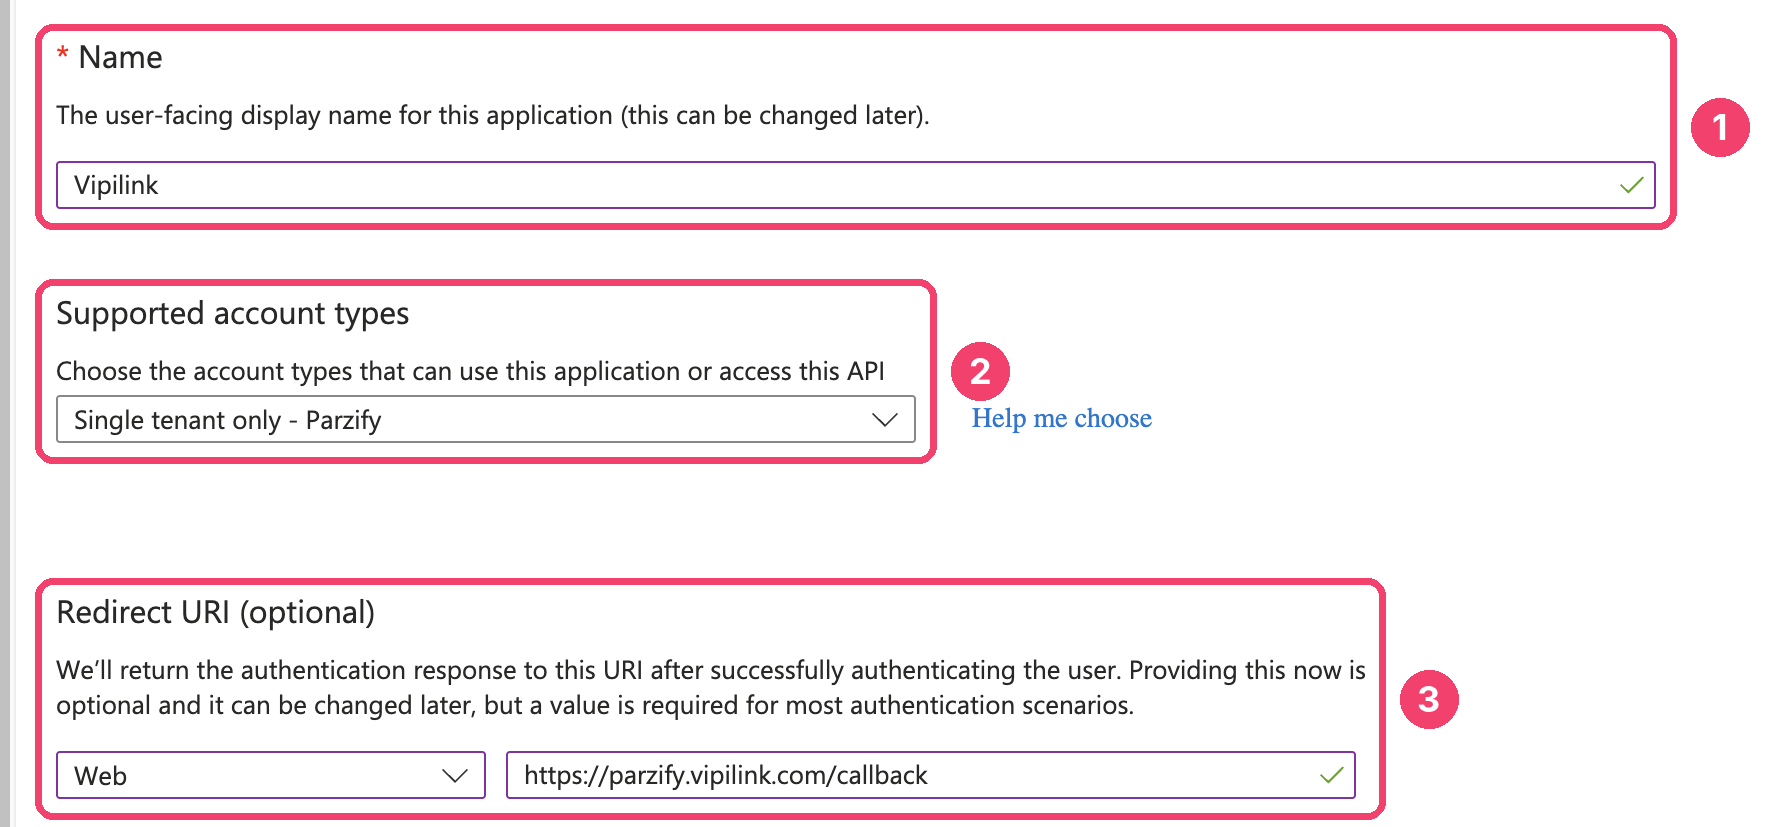
Field Value 1 Name Vipilink2 Supported account types Single tenant only, followed by your tenant name 3 Redirect URI Web, then https://example.vipilink.com/callback -
Click Register at the bottom of the page. The app's Overview opens.
Step 2: Copy the client ID
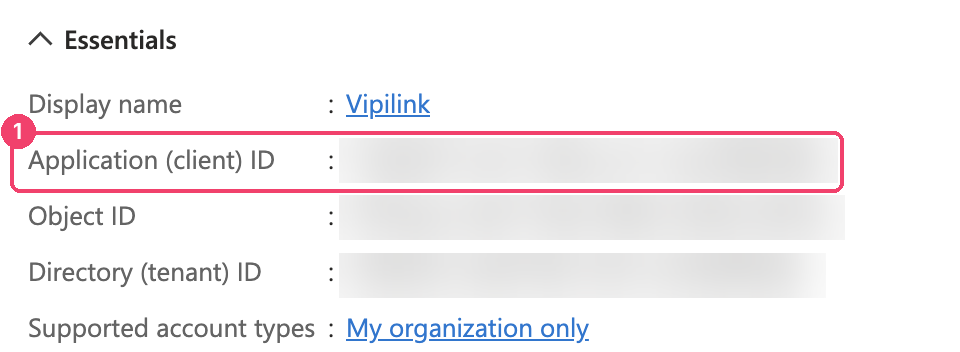
On the app's Overview, under Essentials, copy the Application (client) ID (1). You need it in Vipilink.
Step 3: Create a client secret
-
In the app's menu, click Certificates & secrets (1). On the Client secrets tab (2), click New client secret (3).

-
In Add a client secret, enter a Description, for example
Vipilink(1), and choose when it Expires (2). Click Add.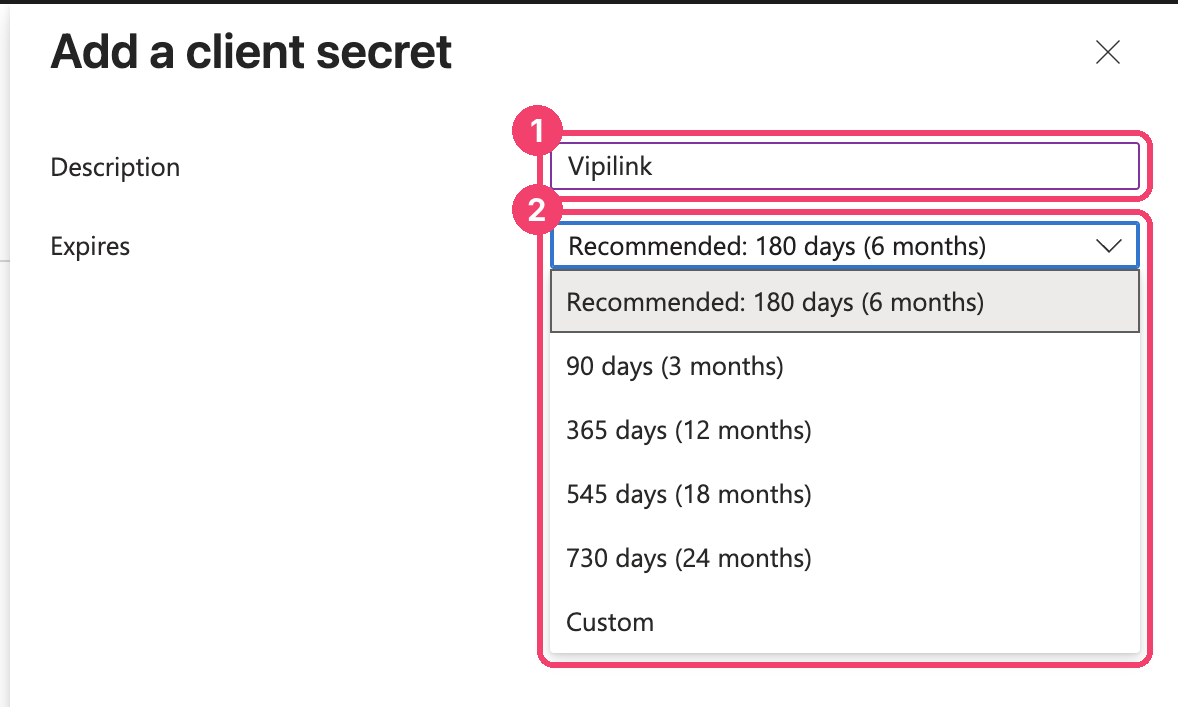
-
In the list, copy the Value of the new secret (1). Copy the Value, not the Secret ID.
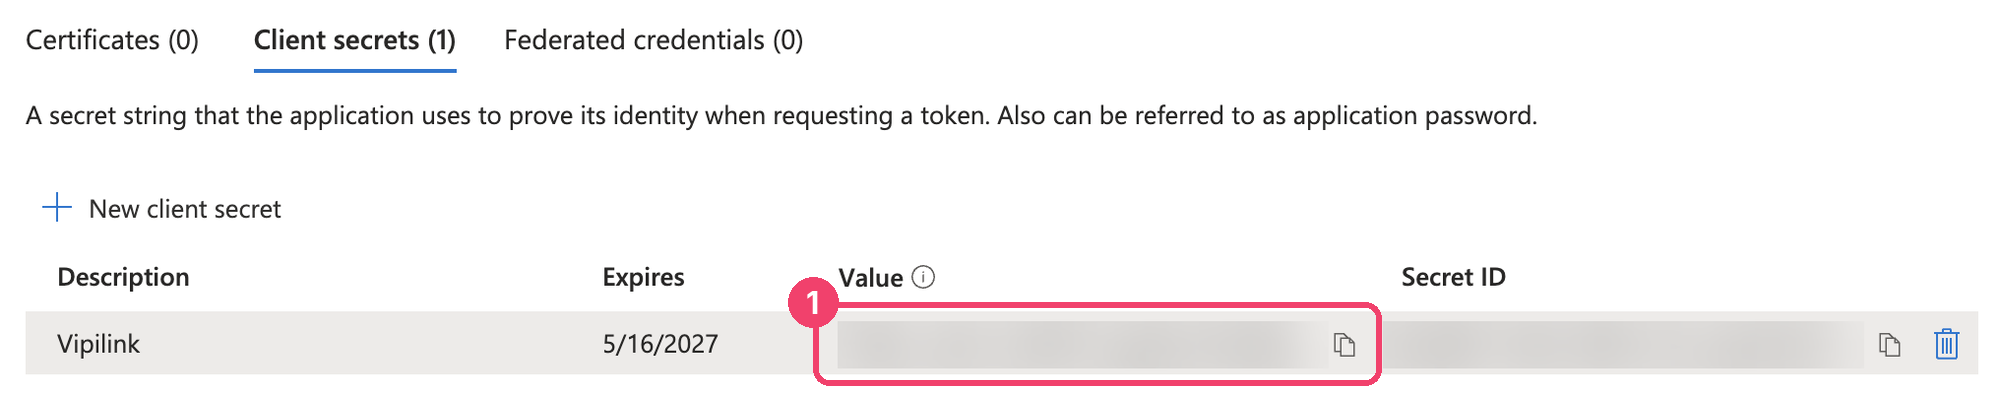
Copy the value now
Microsoft Entra ID shows the secret's Value only right after you create it. If you lose it, create a new client secret.
Before the secret expires
When the client secret expires, users can't sign in with Microsoft anymore. Before that date, create a new client secret and add it in Vipilink: in the Microsoft Entra ID card's ... menu, click Edit Provider and enter the new Client Secret.
Step 4: Check your users' email
Vipilink finds the user by the email address that Microsoft Entra ID sends at sign-in. Microsoft Entra ID sends it only when the user's Email property is filled in. Users with a mailbox usually have it already.
For each user who signs in to Vipilink:
- Go to Entra ID → Users and open the user.
- On the Properties tab, check Email under Contact Information.
- If it's empty, click Edit properties, enter the user's email address under Contact Information, and save. Use the same address as the user's Vipilink account.
Step 5: Add Microsoft Entra ID in Vipilink
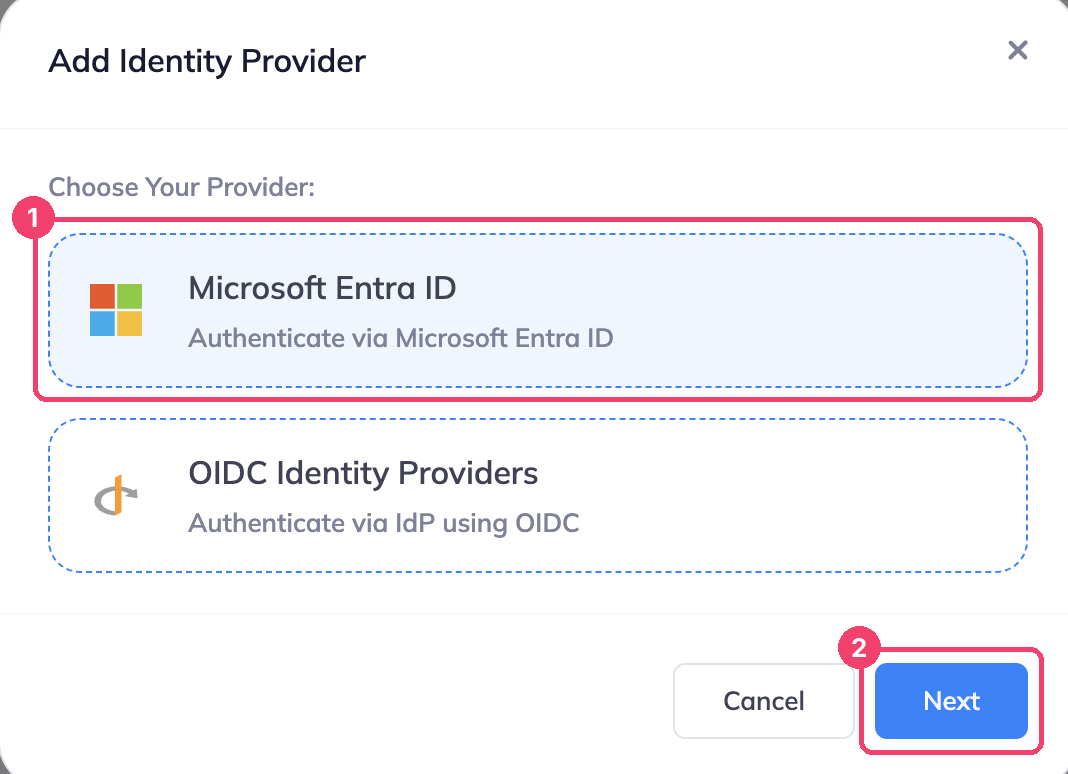
- In Vipilink, go to Settings → Identity Providers and click Add Provider.
-
Choose Microsoft Entra ID (1) and click Next (2).
-
Fill in the form:
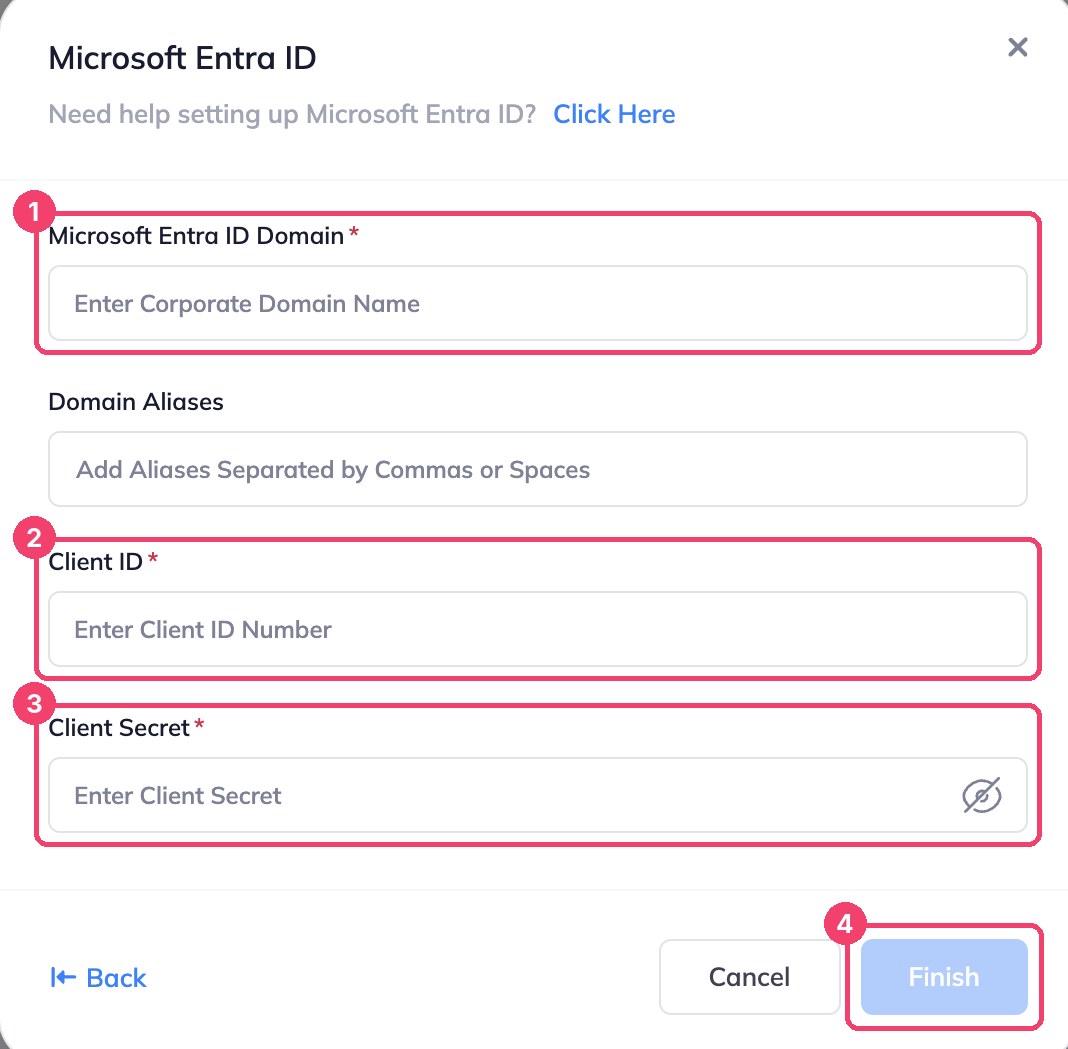
Field What to enter 1 Microsoft Entra ID Domain Your company's domain that is verified in Microsoft Entra ID, for example example.com. Enter only the domain, not a URL.2 Client ID The Application (client) ID from Step 2. 3 Client Secret The secret Value from Step 3. Domain Aliases is optional: other email domains of your company that should sign in with Microsoft Entra ID, for example
example.co.uknext toexample.com. -
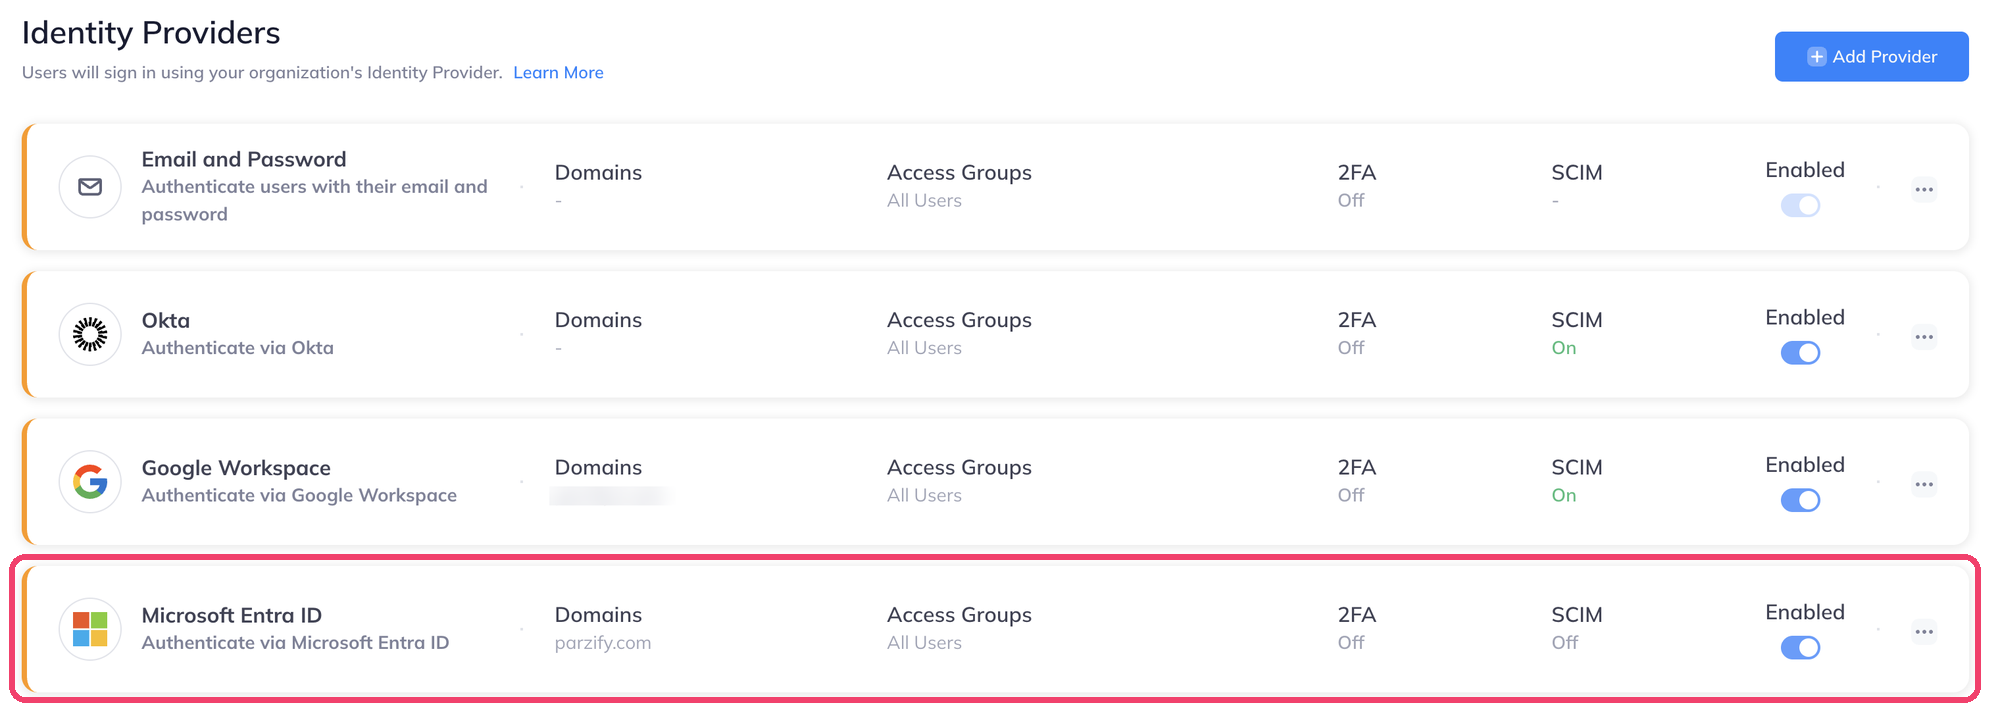
Click Finish (4). Microsoft Entra ID appears on the Identity Providers page with your domain under Domains.
Step 6: Test the sign-in
-
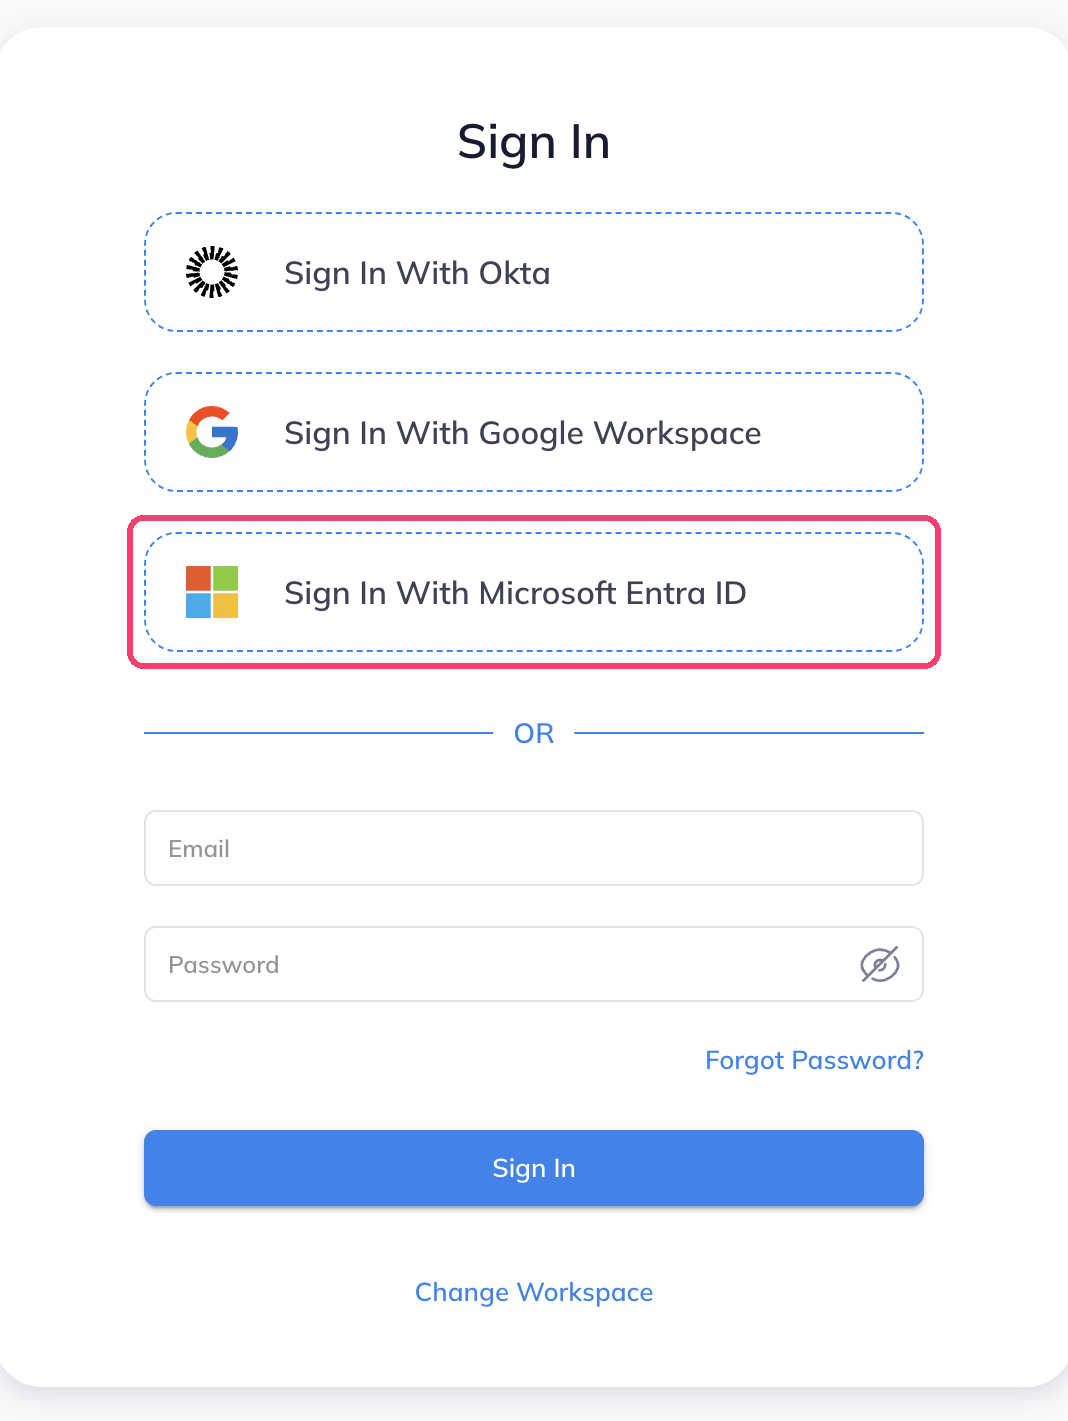
Open your workspace address in a private browser window. The sign-in page now has a Sign In With Microsoft Entra ID button. Click it.
-
Sign in with a Microsoft Entra ID account that has a Vipilink account.
-
The first time, Microsoft asks for Permissions requested. Click Accept.
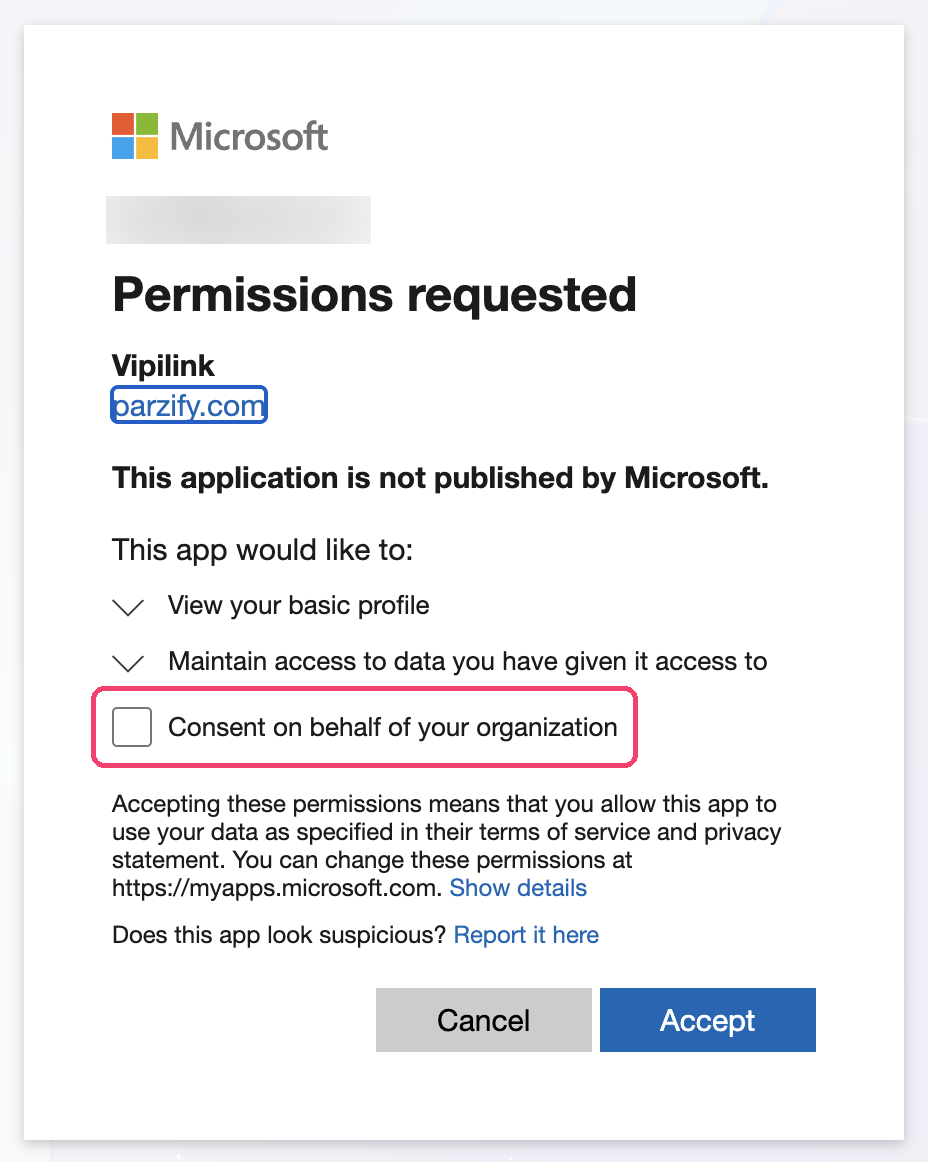
If you're an admin, you can select Consent on behalf of your organization before you click Accept. Then your other users don't see this screen.
Troubleshooting
| Problem | What to check |
|---|---|
| An error after you sign in with Microsoft | The user's Email property in Microsoft Entra ID is empty. See Step 4. |
| The user can't sign in although the email is set | The user needs a Vipilink account with the same email address. To add users, see Users. |
| "Unable to find a registered Entra ID domain." when you save the provider | Microsoft Entra ID Domain must be a domain that is verified in Microsoft Entra ID, for example example.com, not a URL. |
| Sign-in stopped working for everyone | The client secret may have expired. Create a new one and update it in Vipilink with Edit Provider. |
SCIM provisioning
SCIM provisioning is available on the Enterprise plan. The setup guide for Microsoft Entra ID is coming soon. Contact support if you'd like help setting it up now.
Two-factor authentication and access
In the Microsoft Entra ID card's ... menu you can also:
- Manage 2FA: ask Microsoft Entra ID users for a code from an authenticator app. See Two-factor authentication.
- Manage Access: choose which Vipilink groups can sign in with Microsoft Entra ID. See Access groups.