UniFi
Connect an office behind a UniFi gateway to a Vipilink network with one IPsec tunnel between a Vipilink gateway and the UniFi gateway. The tunnel is route-based: UniFi sends traffic for the Vipilink network into the tunnel, and Vipilink sends traffic for the office subnet back through it.
Before you start
- A Vipilink network with at least one active gateway.
- A UniFi gateway with a public IP on its WAN, managed in the UniFi Network app, and an admin account.
- The Vipilink network subnet and the office subnet must not overlap.
The screens on this page are from UniFi Network 10.0 on a UniFi Gateway (UXG Fiber).
Example used on this page
| Item | Example value |
|---|---|
| Vipilink network | Cloud, subnet 10.14.0.0/16 |
| Vipilink gateway | New Jersey |
| Office subnet behind the UniFi gateway | 172.20.50.0/24 |
| Tunnel name in Vipilink | HQUniFi |
| Site-to-site VPN name in UniFi | vipilink-cloud |
Replace these with your own values.
Settings that must match
Both sides of the tunnel must use the same values. This page uses the Vipilink defaults. UniFi's Auto settings use IKEv1, AES-128 and SHA1, so you set UniFi to Manual.
| Setting | Vipilink | UniFi |
|---|---|---|
| IKE version | V2 | Key Exchange Version IKEv2 |
| Phase 1 encryption and integrity | aes256, sha256 | IKE AES-256, SHA256 |
| Phase 1 Diffie-Hellman group | 14 | IKE DH Group 14 |
| Phase 1 lifetime | IKE Lifetime 8h | IKE Lifetime 28800 |
| Phase 2 encryption and integrity | aes256, sha256 | ESP AES-256, SHA256 |
| Phase 2 Diffie-Hellman group | 14 | ESP DH Group 14, Perfect Forward Secrecy (PFS) on |
| Phase 2 lifetime | Tunnel Lifetime 1h | ESP Lifetime 3600 |
| Pre-shared key | Pre-Shared Key | Pre-Shared Key |
Step 1: Add the tunnel in Vipilink
- In the Vipilink console, go to Networks → Networks and open your network. Copy the public IP shown on the gateway card. You need it in UniFi.
- On the gateway card, click the ... menu and choose Add Tunnel.
- Choose IPsec Site-to-Site Tunnel and click Continue. Then choose Single-Tunnel and click Continue.
-
Fill in the form:
Field Value Tunnel Name HQUniFi. Letters and numbers only.Pre-Shared Key Click Generate and copy the key. You enter the same key in UniFi. Remote Public IP The UniFi gateway WAN IP Remote ID The UniFi gateway WAN IP Vipilink Side Subnets Any Remote Side Subnets Any A route-based UniFi tunnel uses
0.0.0.0/0on both sides, so both subnet settings stay on Any. You tell Vipilink which subnet is behind the tunnel in Step 3. -
Keep the Advanced Settings defaults.
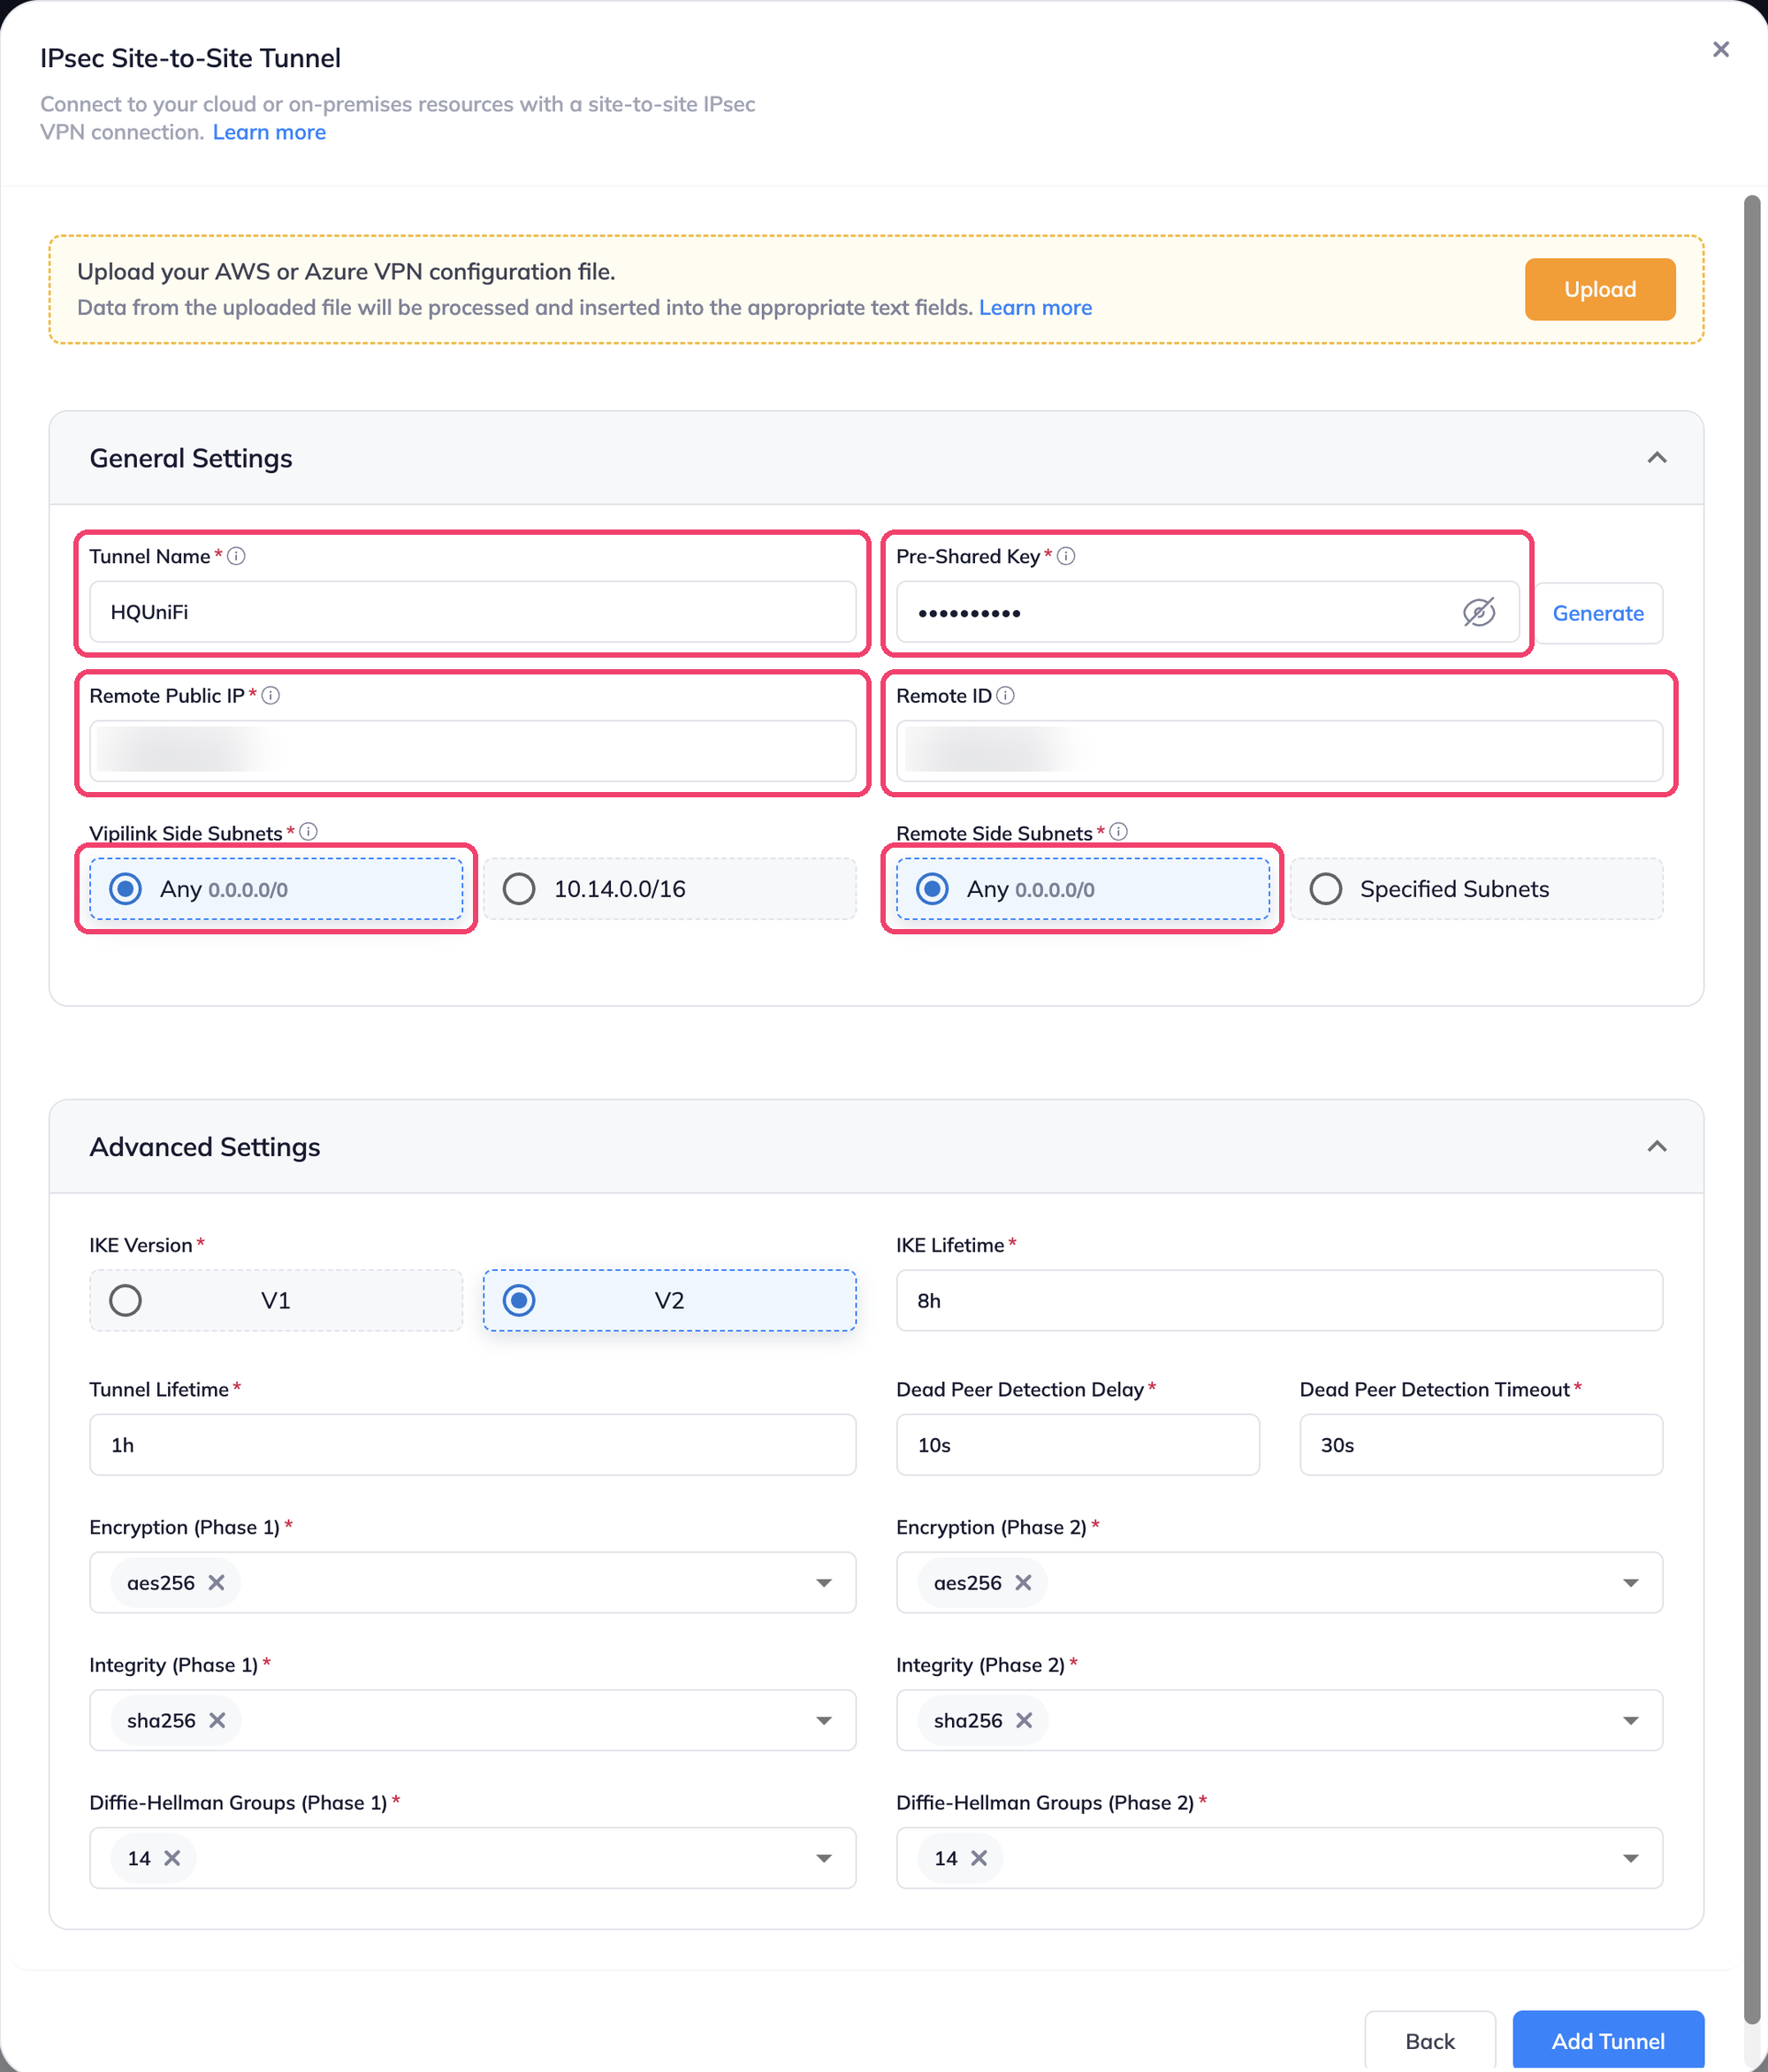
-
Click Add Tunnel. The tunnel card shows Down until the UniFi side is set up.
Step 2: Create the site-to-site VPN in UniFi
-
In the UniFi Network app, open Settings → VPN, choose the Site-to-Site VPN tab and click Create New.

-
Fill in the form:
Field Value VPN Type IPsec Name vipilink-cloudPre-Shared Key Replace the generated key with the key from Vipilink Local IP Your WAN. UniFi fills in its IP. Remote IP / Hostname The Vipilink gateway public IP from Step 1 VPN Method Route Based Tunnel IP Off Remote Networks Static, then enter the Vipilink network subnet, for example 10.14.0.0/16, and click Add -
Under Advanced, choose Manual and set:
Field Value Key Exchange Version IKEv2 IKE Encryption AES-256, Hash SHA256, DH Group 14, Lifetime 28800ESP Encryption AES-256, Hash SHA256, DH Group 14, Lifetime 3600Perfect Forward Secrecy (PFS) On Keep Local Authentication ID, Remote Authentication ID and Maximum Transmission Unit on Auto, and Route Distance at its default.
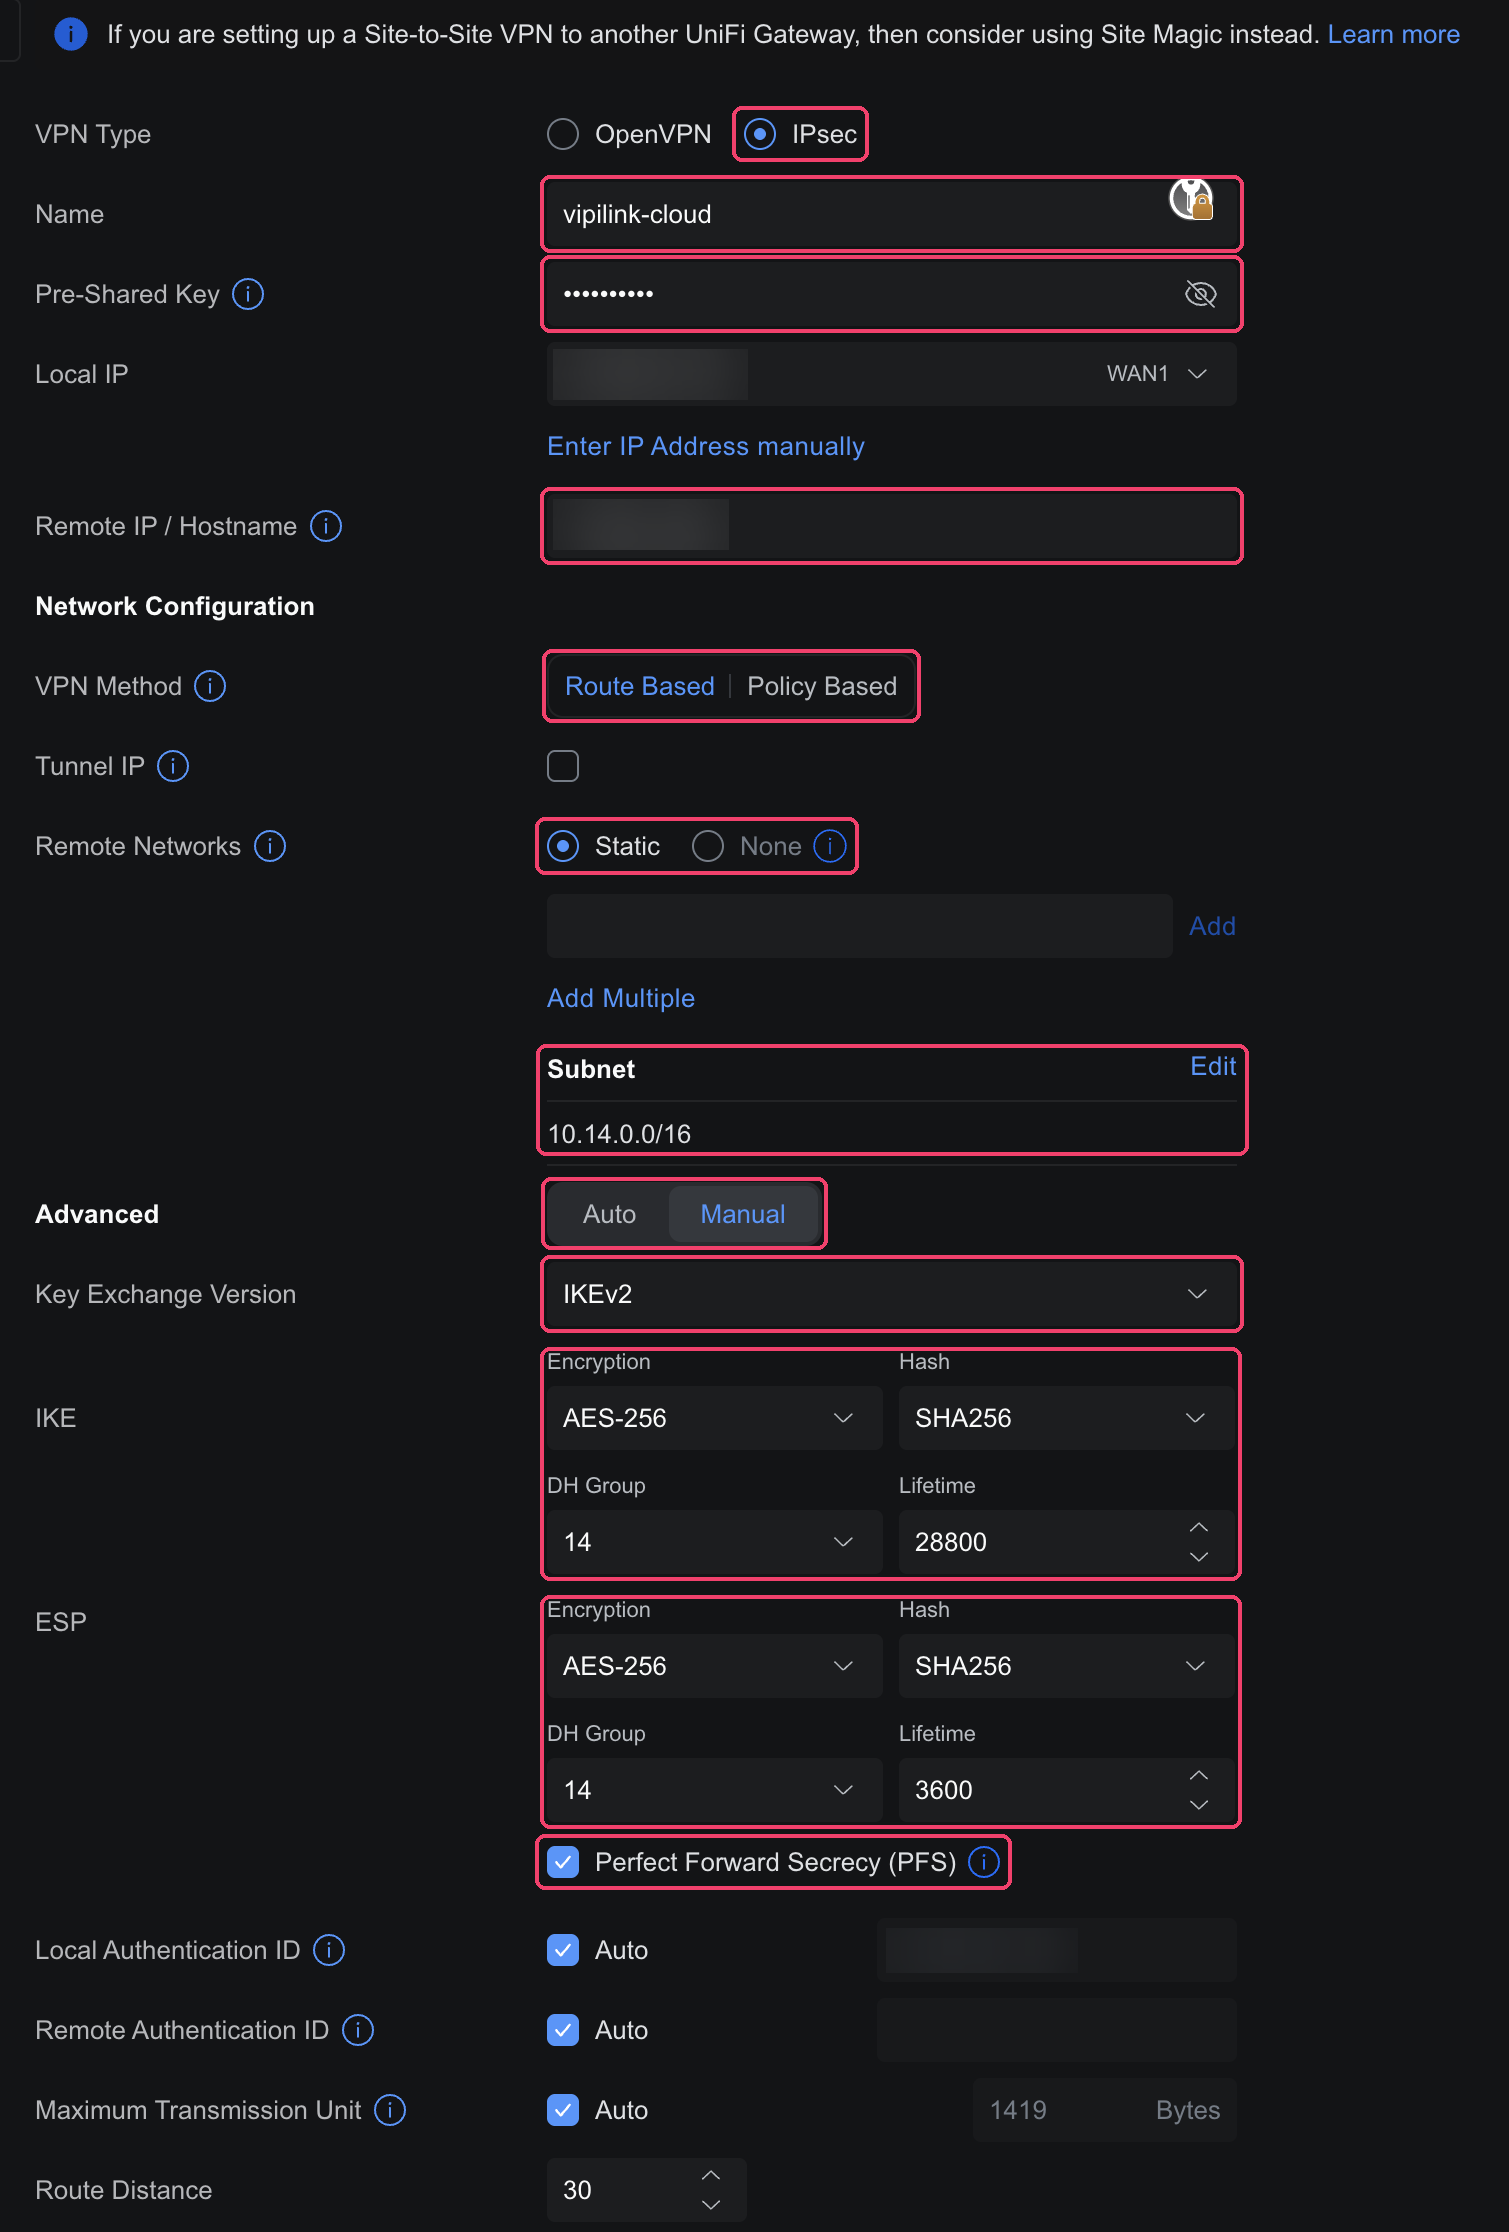
-
Click Add. The VPN shows in the list. Its Status changes to Online when the tunnel is up.

Step 3: Add the route in Vipilink
Tell Vipilink which subnet is behind the tunnel.
- On the network card, click the ... menu and choose Route Table.
-
Click Add Routes, choose the
HQUniFitunnel, enter the office subnet, for example172.20.50.0/24, and click Add Routes.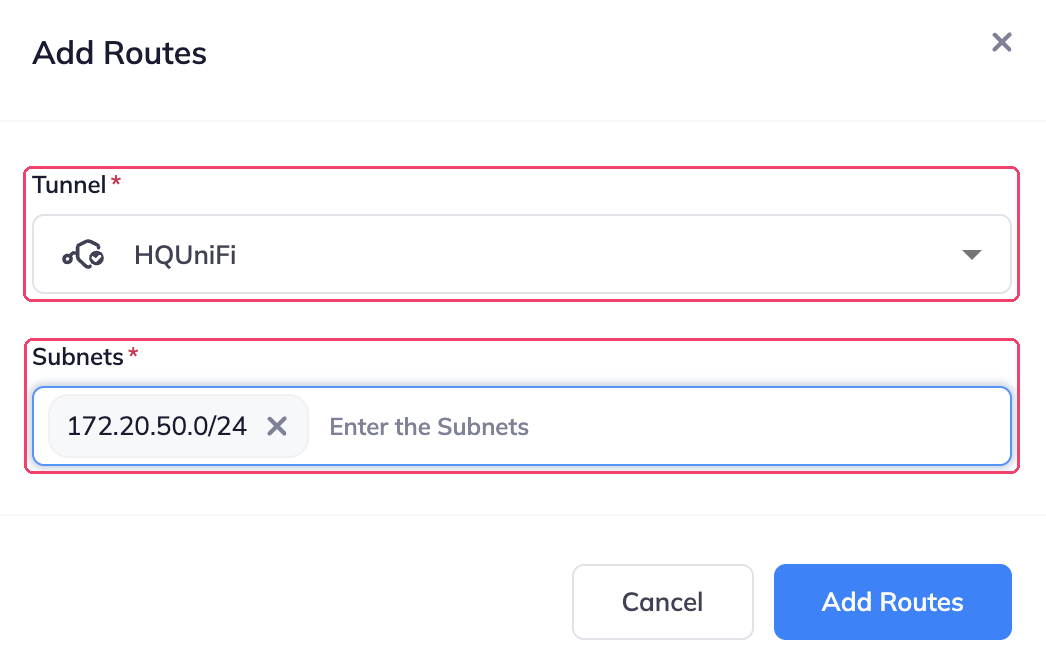
-
The route appears in the table with the type Manual.

Step 4: Let users reach the office subnet
If the network uses split tunneling in Manual mode, add the office subnet so connected users send that traffic through Vipilink:
- On the network card, click the ... menu and choose Split Tunneling.
- Under Manual, enter the office subnet, for example
172.20.50.0/24, and press Enter. - Click Apply.
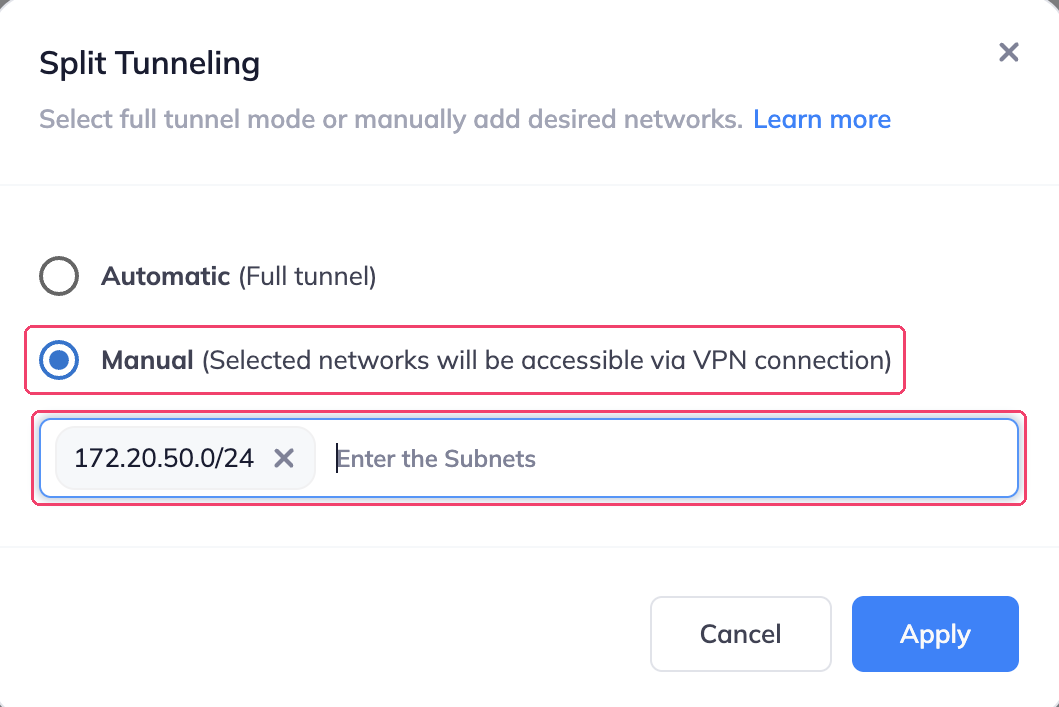
In Automatic (Full tunnel) mode there is nothing to change.
If the network's firewall is on, add a rule that allows users to reach the office subnet.
Step 5: Allow the traffic in the UniFi firewall
UniFi puts site-to-site VPNs in the VPN zone, and its default policies allow traffic between the VPN and Internal zones. If you or someone else changed those policies, Vipilink users can't reach the office. Add an explicit policy so the access doesn't depend on the defaults:
- Go to Settings → Policy Engine → Policy Table and click Create New Policy.
-
Fill in the form:
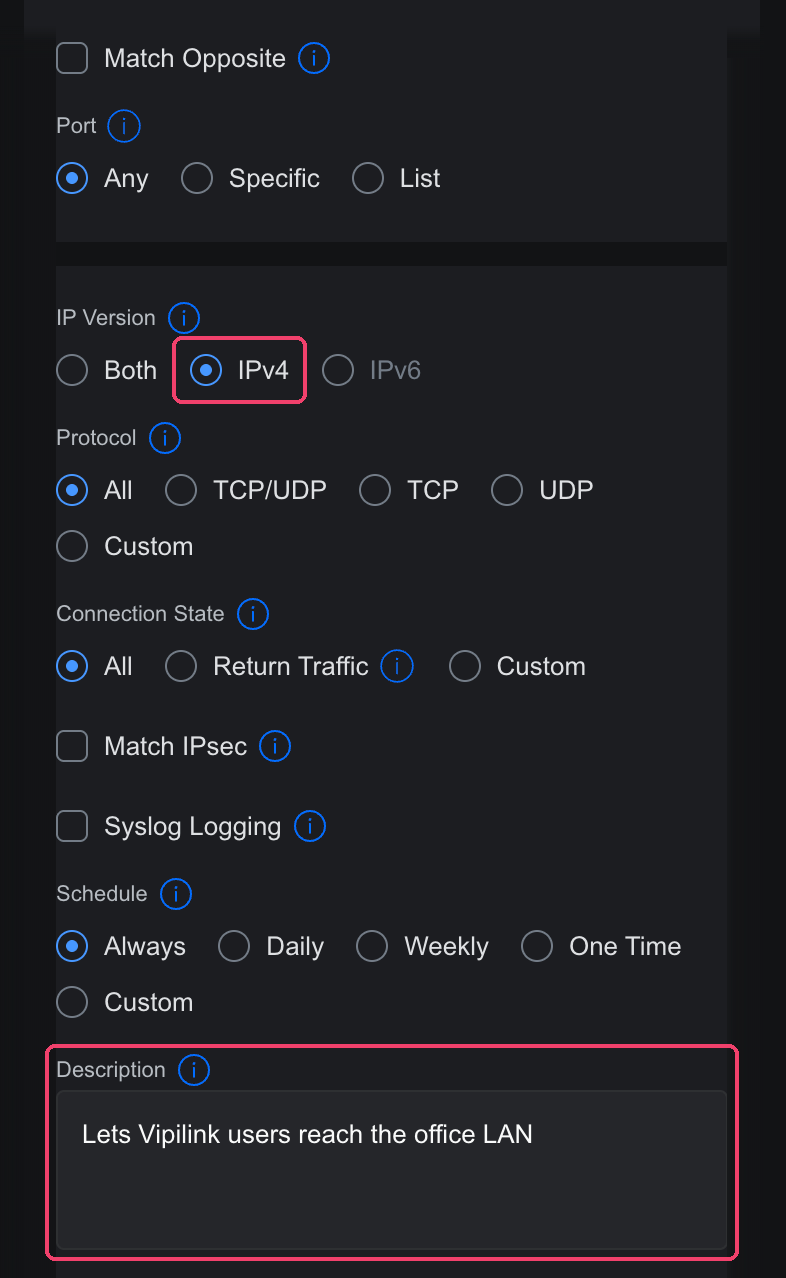
Field Value Type Firewall Name Allow Vipilink to Office LANSource Zone VPN, then IP, Specific, the Vipilink network subnet, for example 10.14.0.0/16Action Allow, with Auto Allow Return Traffic on Destination Zone Internal, then IP, Specific, the office subnet, for example 172.20.50.0/24Port (source and destination) Any Match Opposite Off IP Version IPv4 Protocol All Connection State All Match IPsec Off Schedule Always Description For example Lets Vipilink users reach the office LAN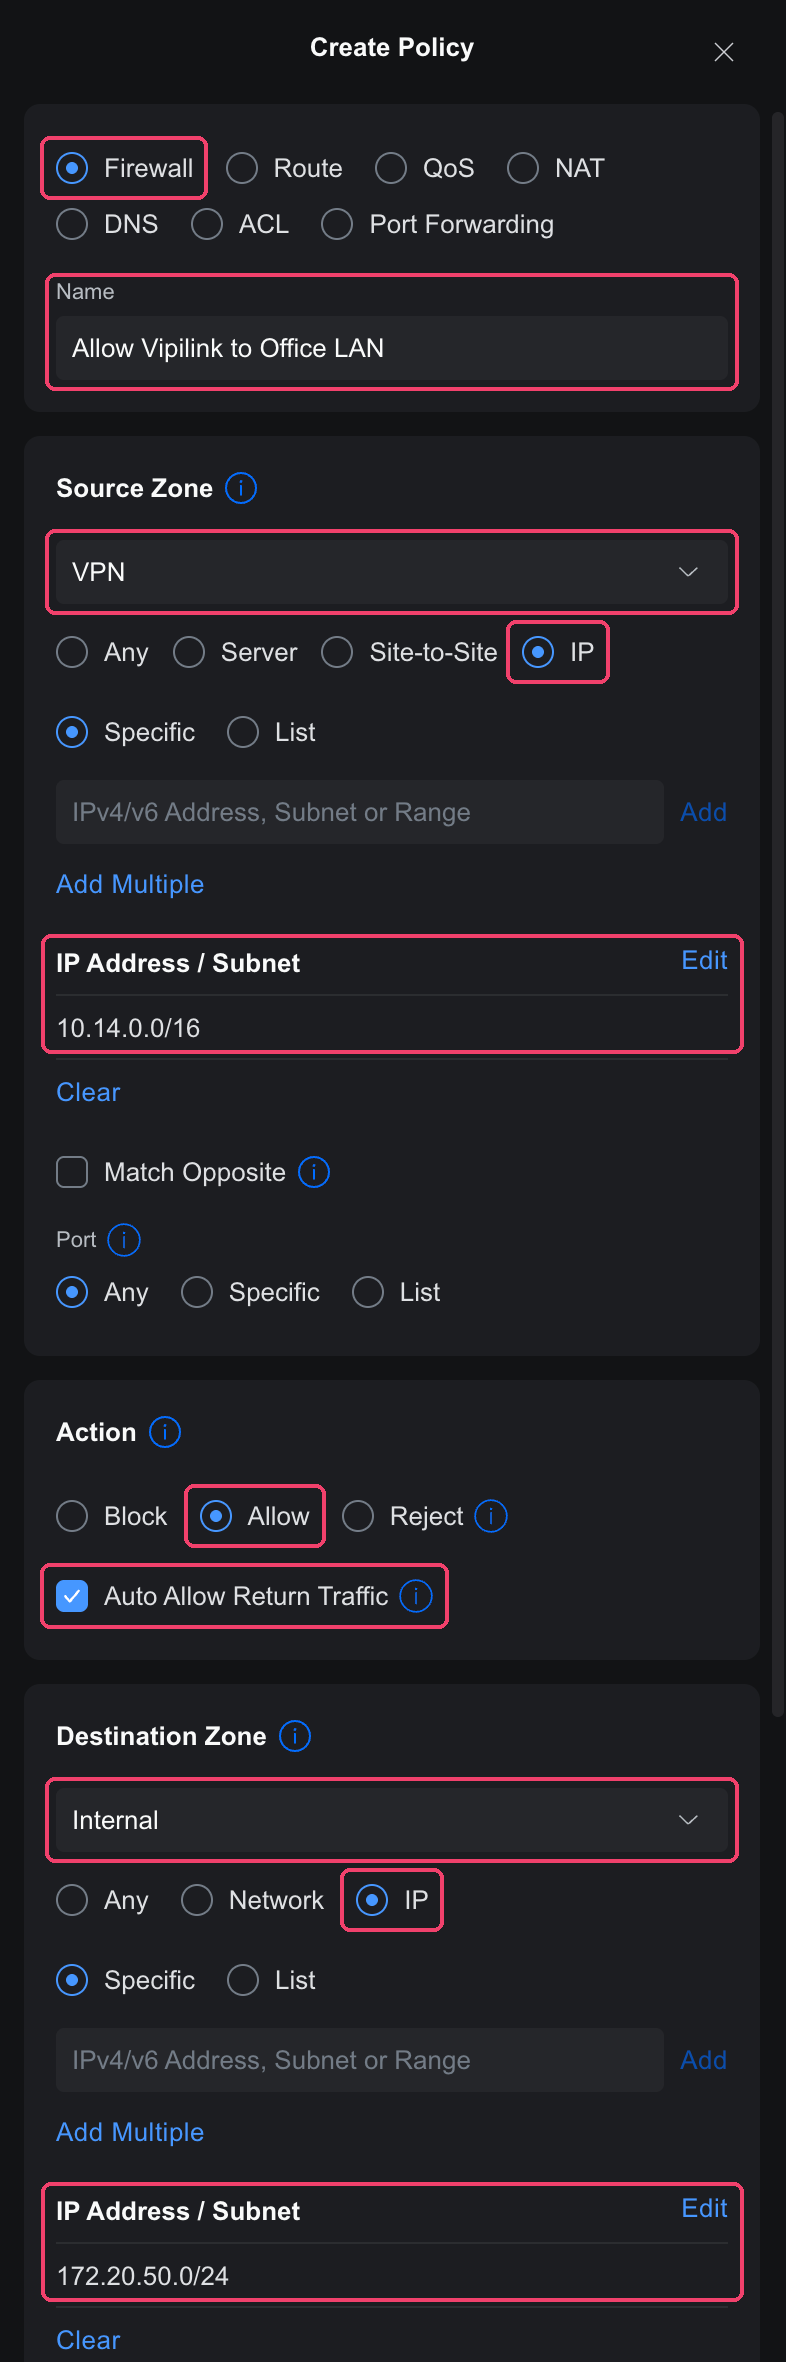
-
Click Apply Policy at the bottom of the form. The policy table shows your policy and a second one for the opposite direction, which UniFi adds on its own for the return traffic.

Step 6: Exclude Vipilink traffic from intrusion prevention (optional)
Do this only if Intrusion Prevention is on and it blocks traffic between Vipilink users and the office.
- Go to Settings → CyberSecure, open the Protection tab, and under Detection Exclusions click Create New.
-
Fill in the Detection Exclusion:
Field Value Traffic Direction Both Type Subnet Subnet The Vipilink network subnet, for example 10.14.0.0/16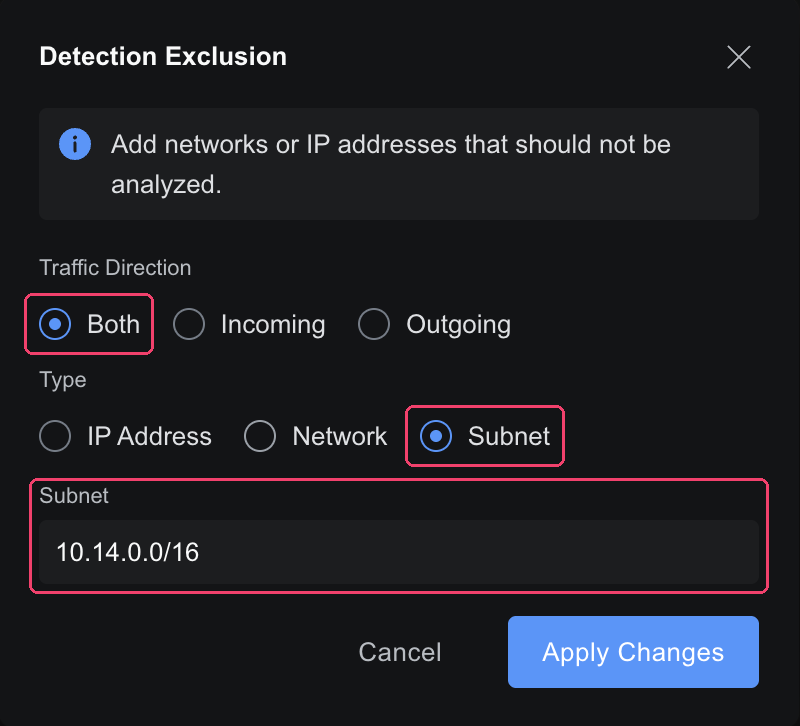
-
Click Apply Changes in the dialog, then Apply Changes at the bottom of the page.

Excluded traffic is not checked by intrusion prevention.
Step 7: Check the connection
- In UniFi, the
vipilink-cloudVPN shows Online in the Site-to-Site VPN list (see Step 2). -
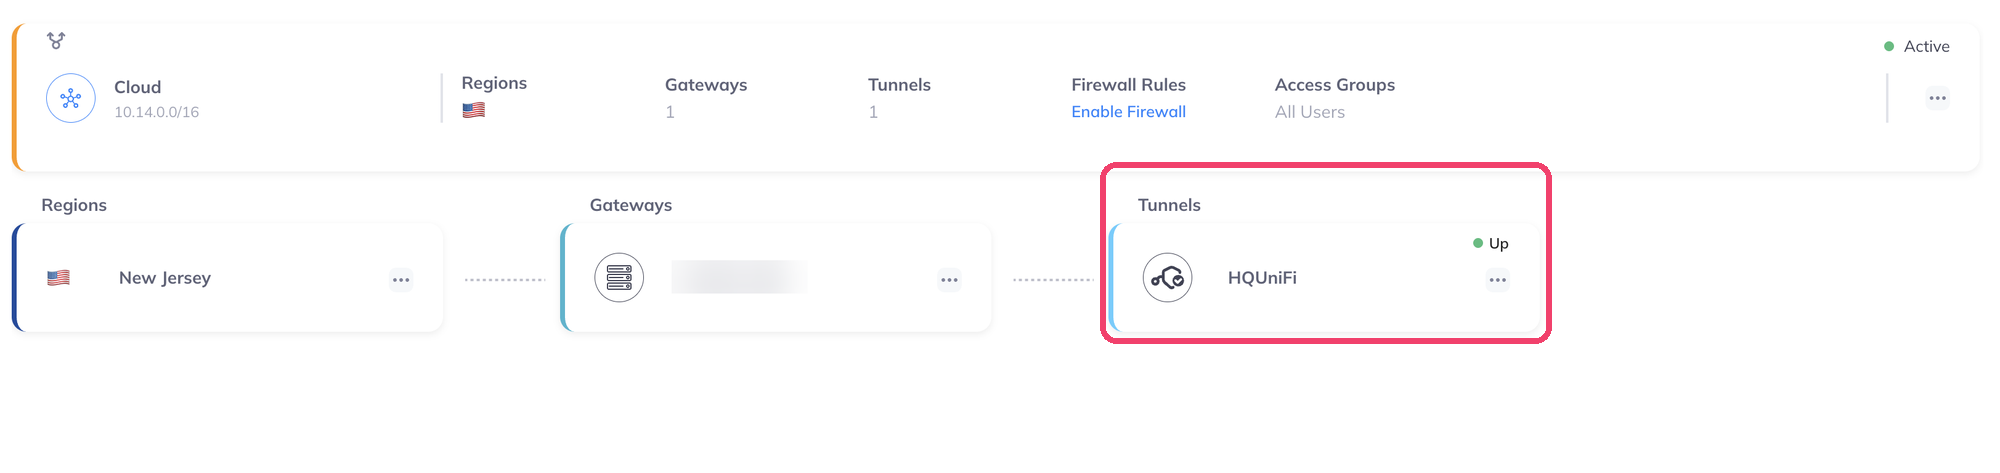
In the Vipilink console, the tunnel card shows Up.
-
Connect a device to the network with the Vipilink agent and reach a device in the office, for example with
pingto a private IP.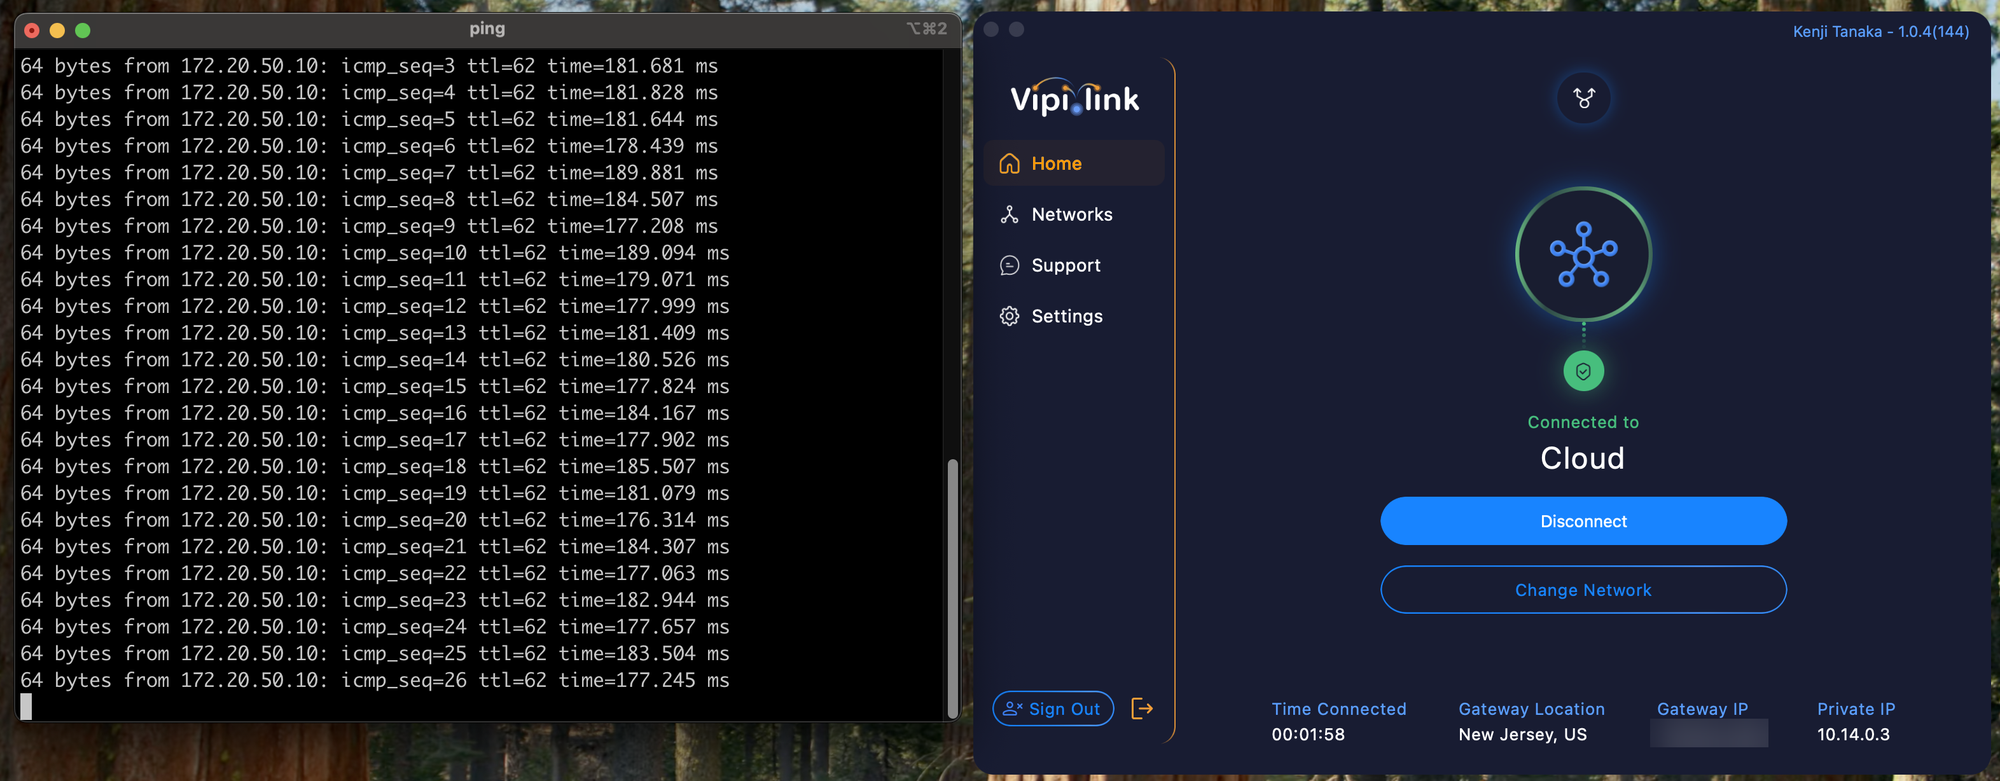
Troubleshooting
| Problem | What to check |
|---|---|
| Tunnel stays Down | The pre-shared key is the same on both sides. In Vipilink, Remote Public IP and Remote ID are the UniFi WAN IP. In UniFi, Remote IP / Hostname is the Vipilink gateway public IP, Advanced is Manual, and the values match the table above. |
| Tunnel is Up but nothing responds | The Vipilink route table has the office subnet. UniFi Remote Networks has the Vipilink network subnet. If split tunneling is Manual, the office subnet is in the list. No UniFi policy blocks the VPN zone. |
| Some traffic is dropped | Intrusion prevention may be blocking it. See Step 6. |
For every field of the Vipilink tunnel form, see IPsec tunnel.