IPsec tunnel
An IPsec tunnel connects a Vipilink gateway to a firewall, router or cloud VPN gateway that supports IPsec, for example in your office or your AWS account. This page explains every field of the IPsec tunnel form. For step-by-step guides for a specific device, see Site-to-site VPN.
Add an IPsec tunnel
- Open the network. On the gateway card, click the ... menu and choose Add Tunnel.
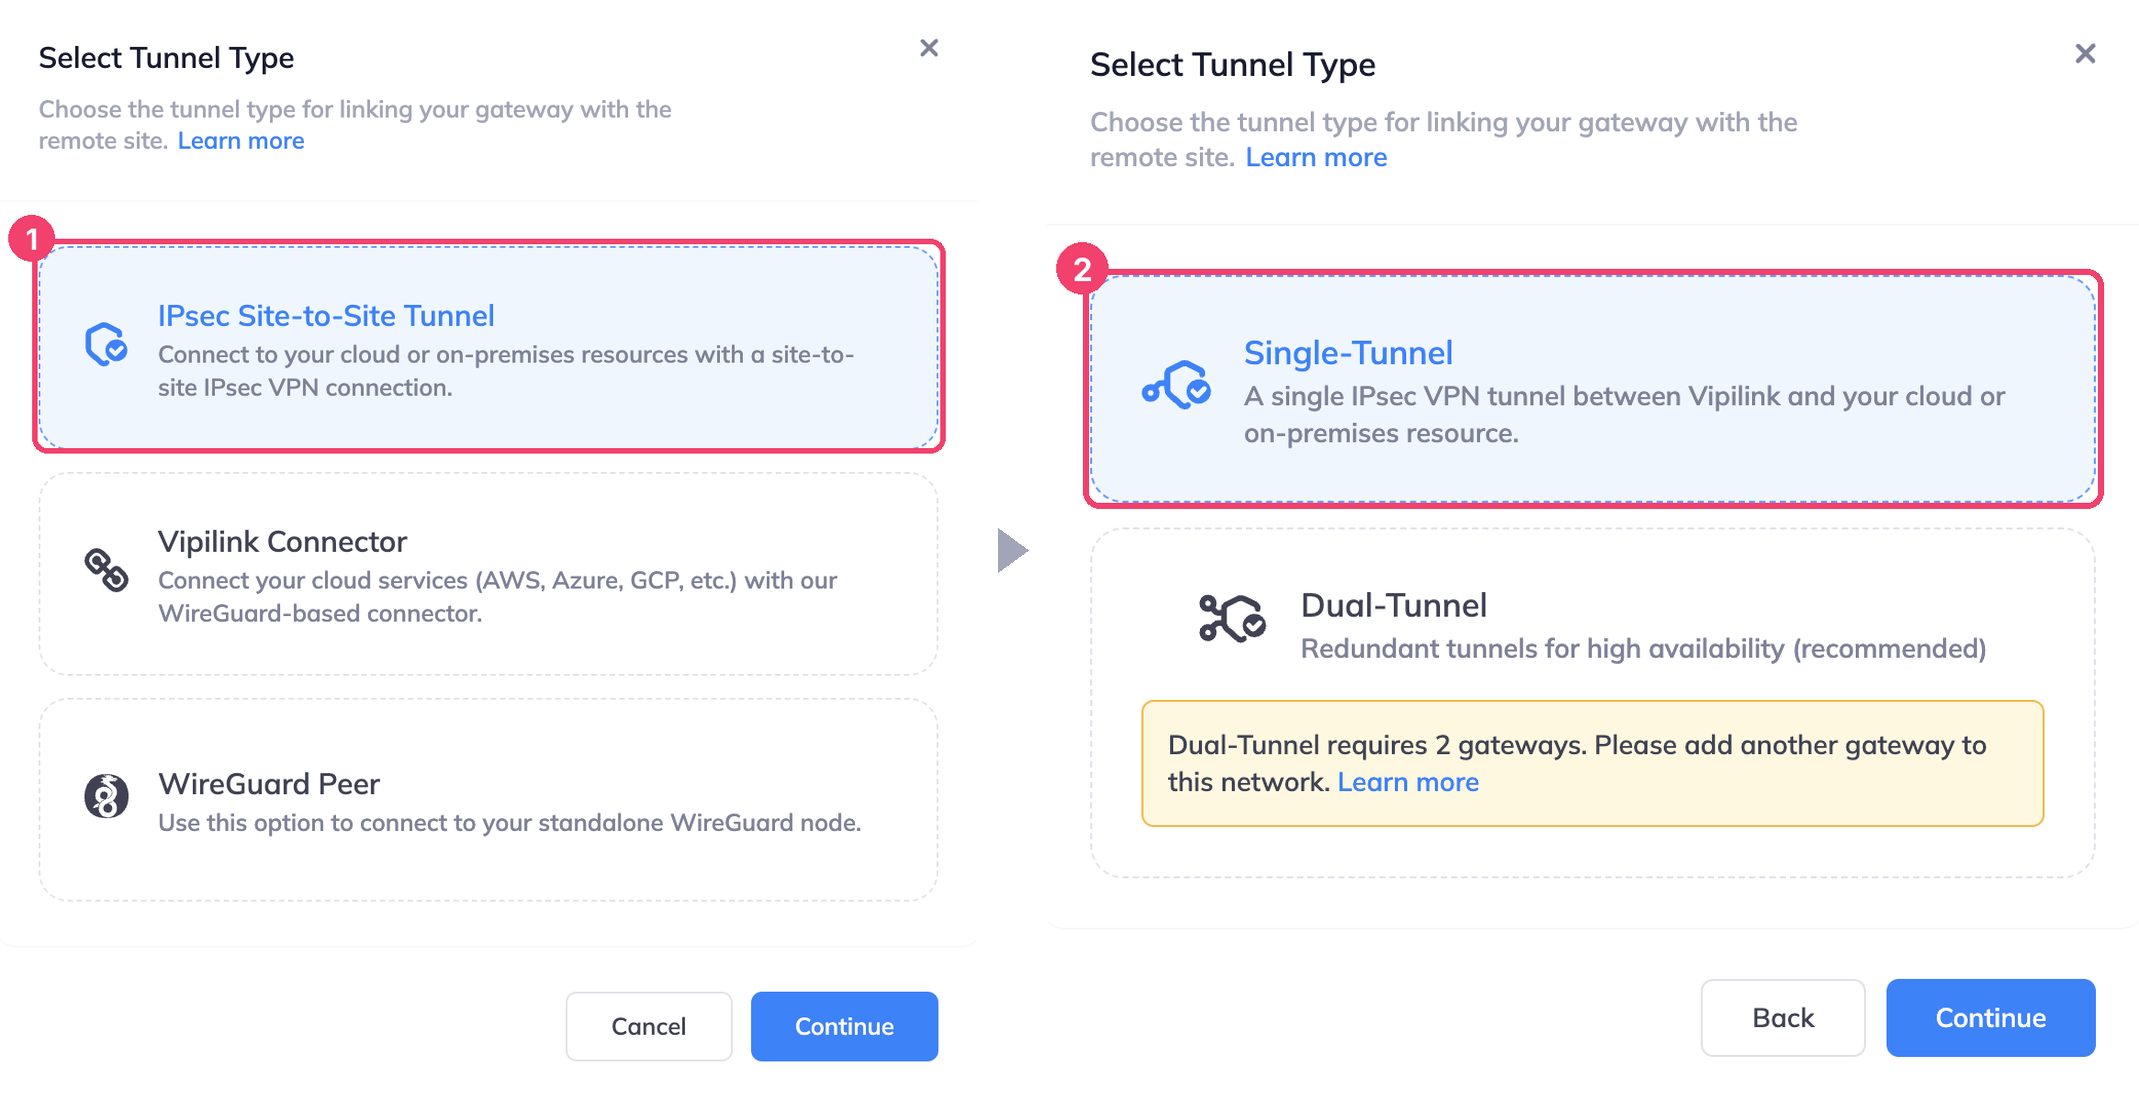
- Choose IPsec Site-to-Site Tunnel (1) and click Continue.
-
Choose Single-Tunnel or Dual-Tunnel (2) and click Continue.
| Type | What it is | Use it when |
|---|---|---|
| Single-Tunnel | One tunnel from one Vipilink gateway. | One gateway is enough, or the remote side supports one tunnel. |
| Dual-Tunnel | Two tunnels from two Vipilink gateways, with BGP for automatic failover. | You need the connection to keep working if a gateway or tunnel goes down. Recommended. |
Single tunnel
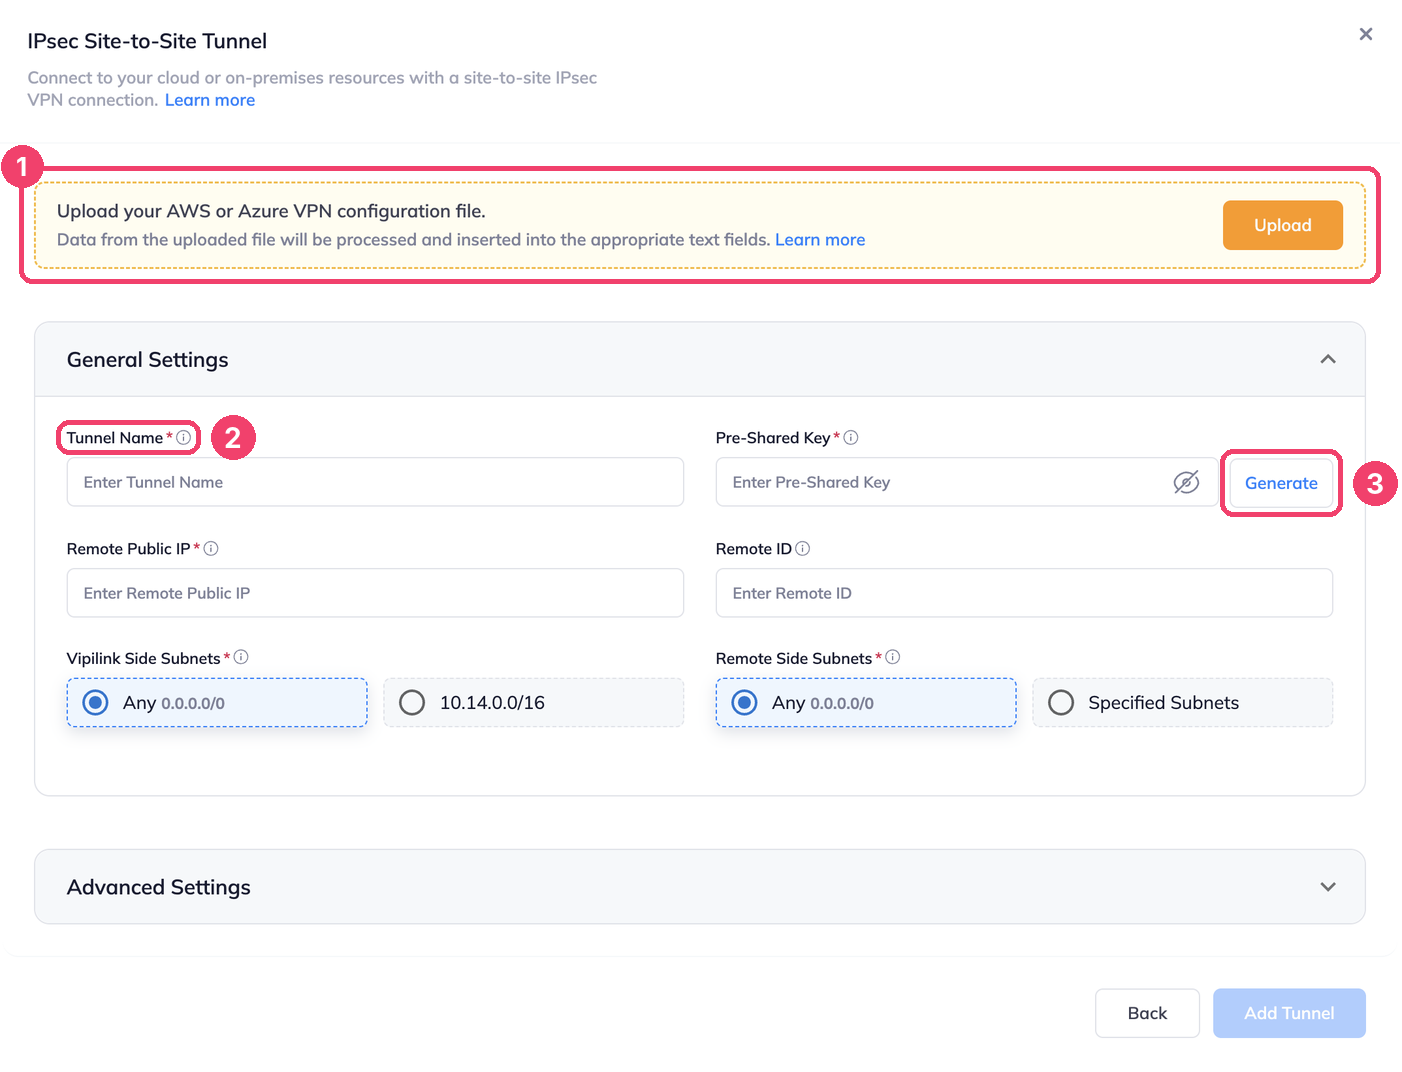
Import an AWS or Azure configuration file
If the remote side is AWS or Azure, click Upload (1) and choose the VPN configuration file you downloaded there. Vipilink fills in the Pre-Shared Key, Remote Public IP and Remote ID for you. See AWS virtual private gateway for where to get the file.
General settings
| Field | What to enter |
|---|---|
| Tunnel Name (2) | A name for the tunnel. Use letters and numbers only. |
| Pre-Shared Key | The secret both sides use to trust each other. Enter the key from the remote device, or click Generate (3) to create a strong one and copy it to the remote device. |
| Remote Public IP | The public IP address of the remote device. |
| Remote ID | How the remote device identifies itself. Usually its public IP. |
| Vipilink Side Subnets | What the remote side can reach through the tunnel: Any (0.0.0.0/0) or only the network subnet, for example 10.14.0.0/16. |
| Remote Side Subnets | What Vipilink users can reach on the remote side: Any, or Specified Subnets to list them. |
Advanced settings
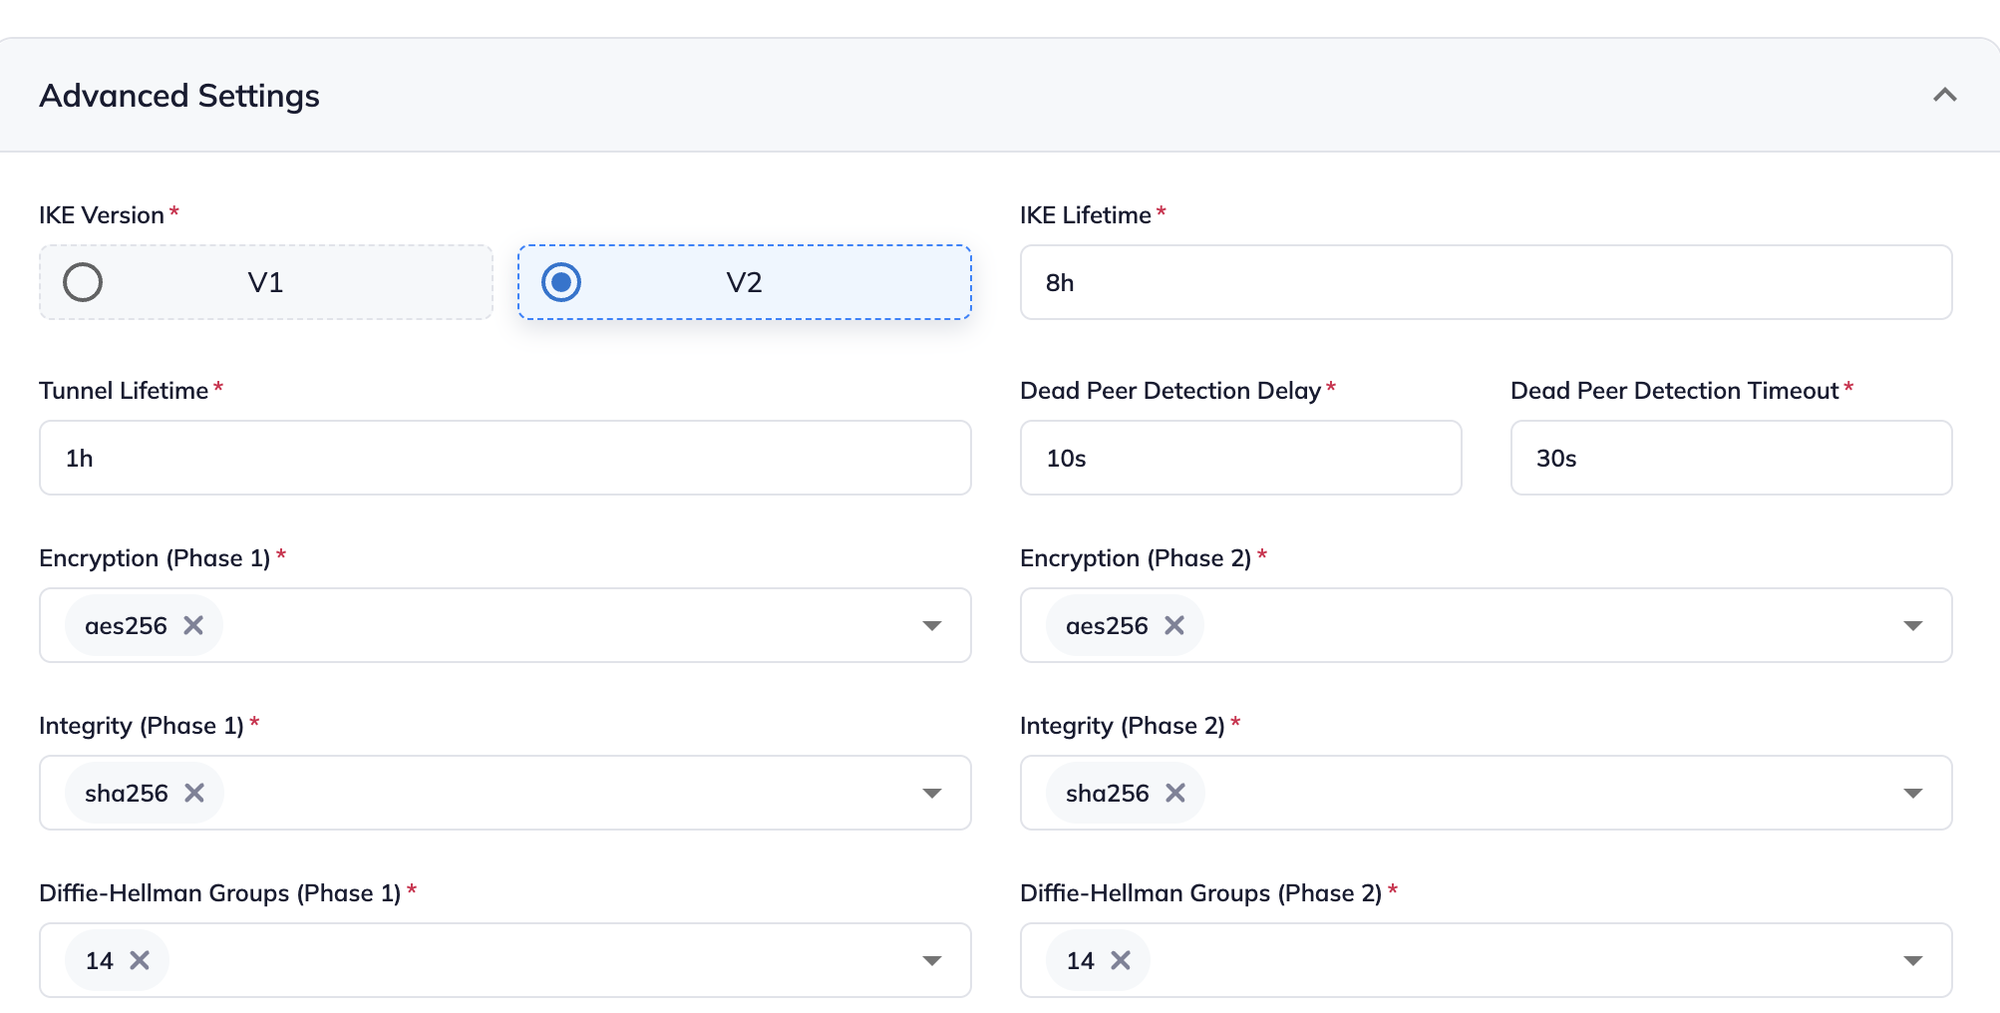
These must match the remote device. The defaults work with AWS and most modern devices.
| Setting | Default | Notes |
|---|---|---|
| IKE Version | V2 | Use V1 only if the remote device doesn't support IKEv2. |
| IKE Lifetime | 8h | How long the phase 1 keys last. |
| Tunnel Lifetime | 1h | How long the phase 2 keys last. |
| Dead Peer Detection Delay | 10s | How often Vipilink checks that the remote side is alive. |
| Dead Peer Detection Timeout | 30s | How long without an answer before the tunnel is restarted. |
| Encryption (Phase 1 and 2) | aes256 | You can choose more than one. |
| Integrity (Phase 1 and 2) | sha256 | You can choose more than one. |
| Diffie-Hellman Groups (Phase 1 and 2) | 14 | You can choose more than one. |
Click Add Tunnel. Then add a route to the remote subnets in the network's route table.
Dual tunnel
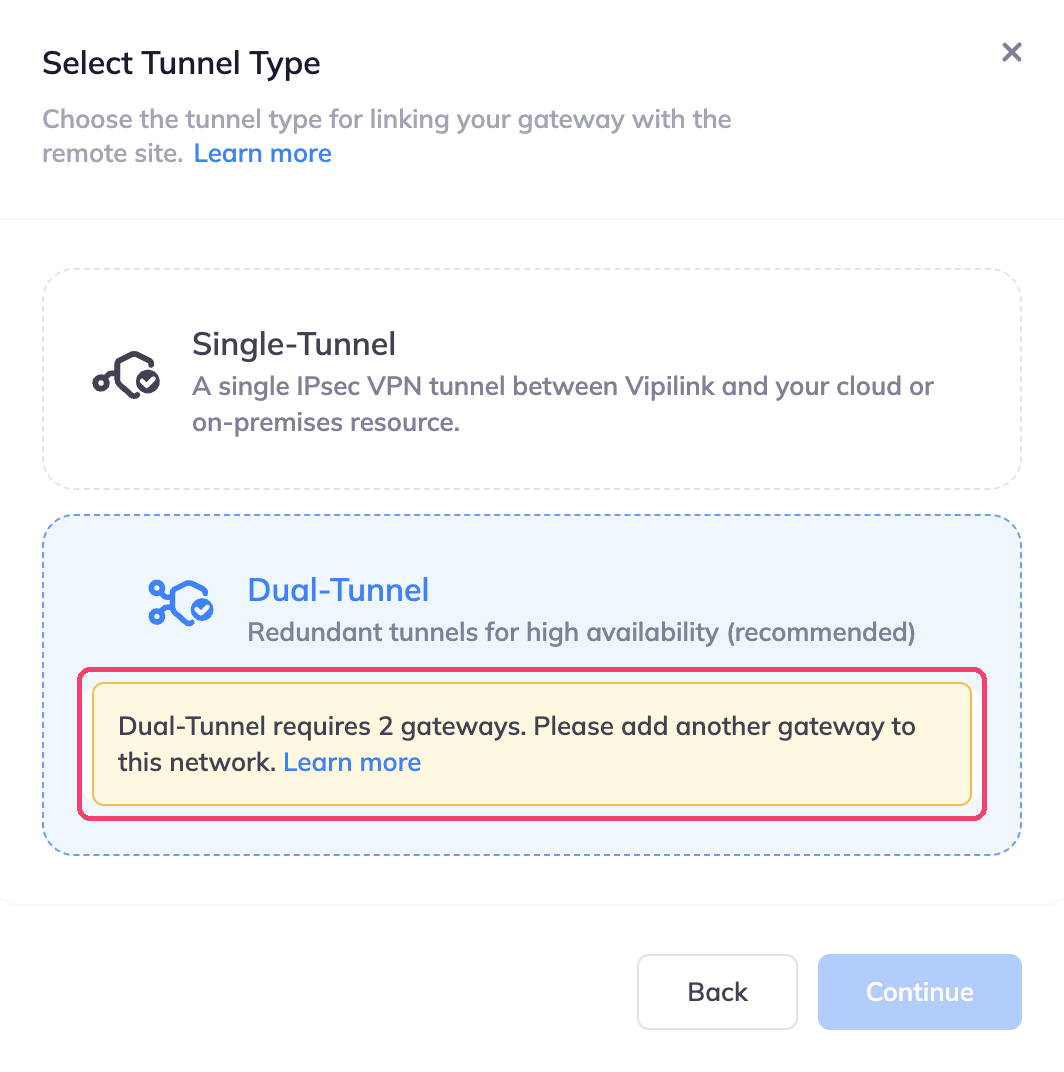
A dual tunnel needs two gateways in the network. If the network has only one, Vipilink tells you to add another first. See Add regions and gateways.
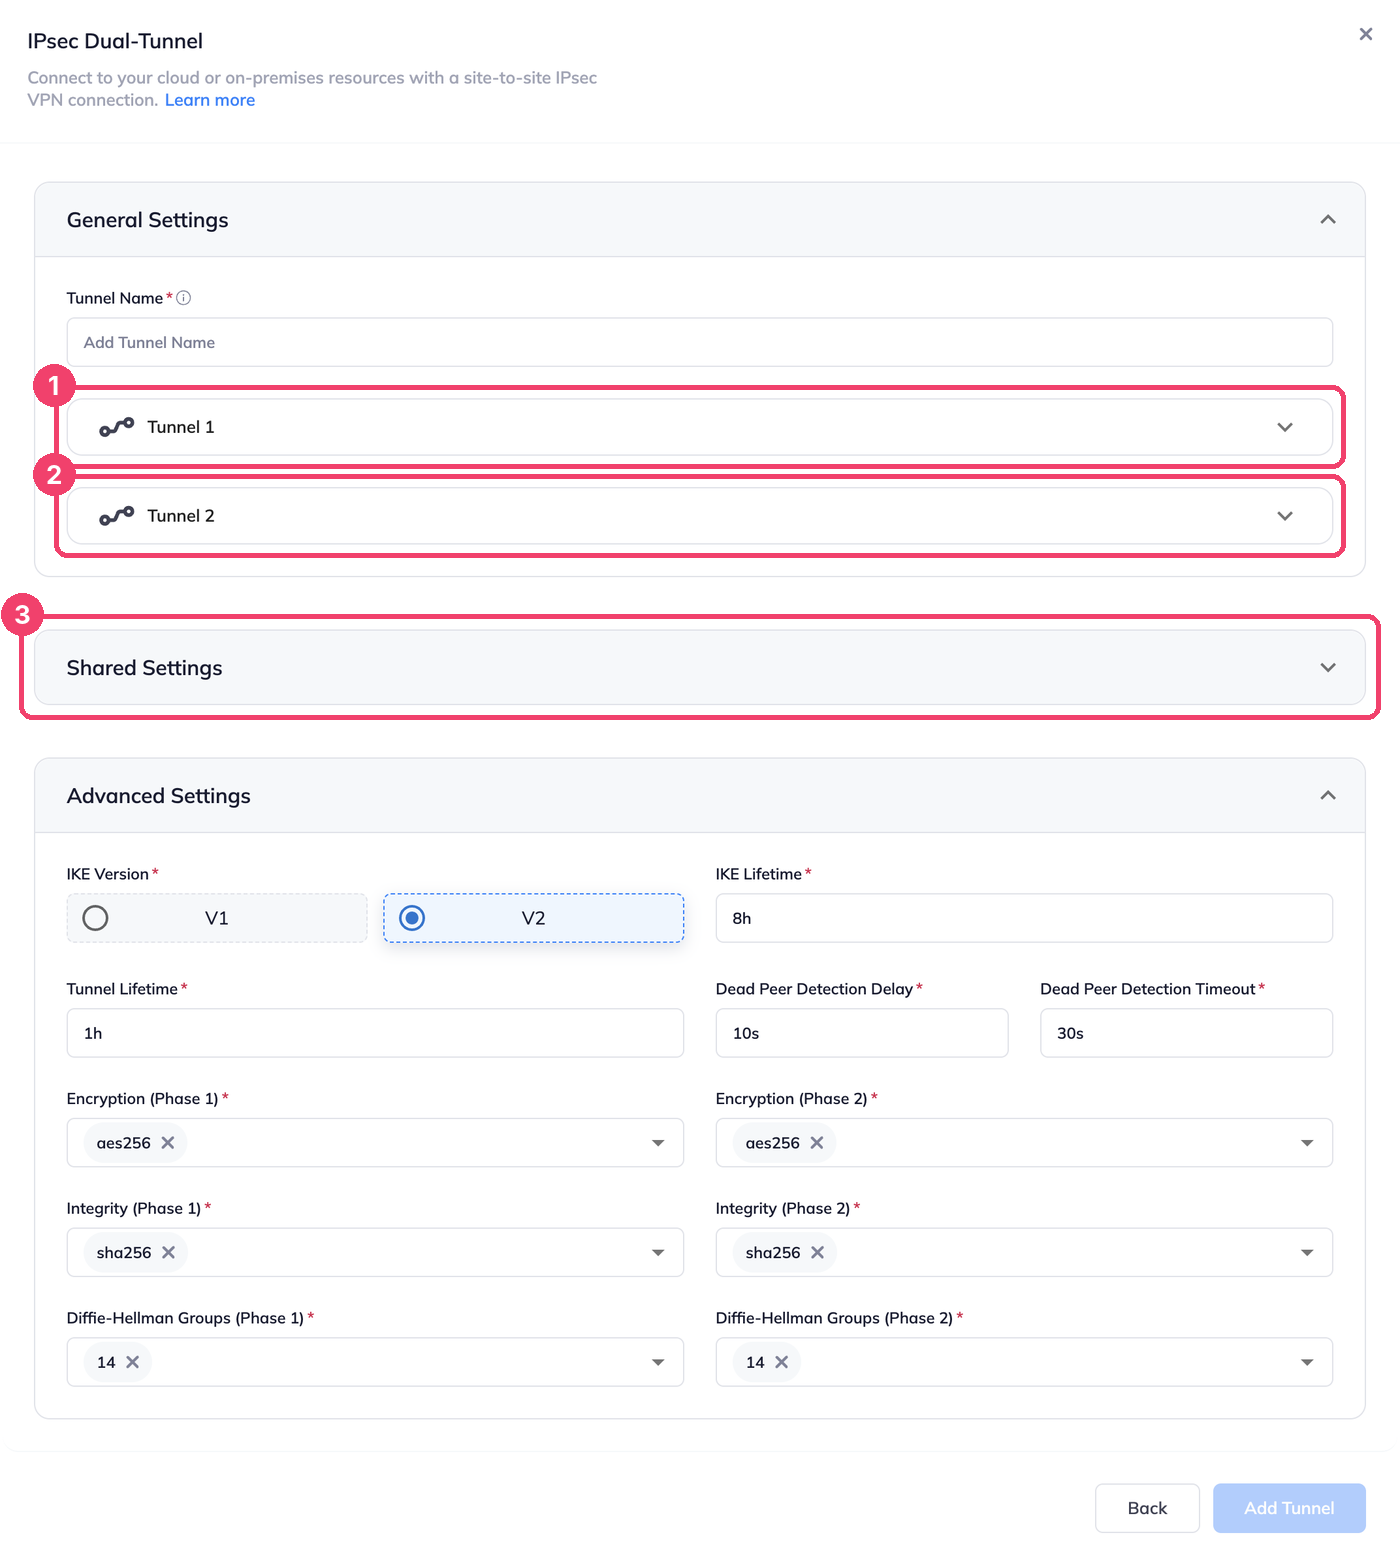
- Enter a Tunnel Name, up to 13 characters, letters and numbers only. Vipilink adds
1and2to it for the two tunnels. - Open Tunnel 1 (1). Choose its Vipilink Gateway, then upload the configuration file or fill in the pre-shared key, internal IPs, remote public IP, remote AS number and remote ID.
- Do the same in Tunnel 2 (2) with the other gateway.
- In Shared Settings (3), set the subnets for both tunnels. The Vipilink AS number is fixed at
64520. - Check the Advanced Settings and click Add Tunnel.
For a full example, see AWS virtual private gateway with redundant tunnels. To fill in the tunnel fields by hand from an AWS file, see Enter the tunnel values by hand.
Troubleshooting
| Problem | What to check |
|---|---|
| Tunnel stays Down | The remote public IP, pre-shared key and remote ID match the remote device. The advanced settings match on both sides. The remote firewall allows IPsec (UDP 500 and 4500) from the Vipilink gateway's public IP. |
| Tunnel is Up but nothing responds | A route to the remote subnets exists, and the remote side has a route back to the Vipilink network subnet. Firewall rules allow the traffic. |