Okta
Let your users sign in to Vipilink with their Okta account, in the web platform and in the agent. You can also let Okta create, update and deactivate Vipilink users for you with SCIM.
You set up two things in Okta:
| Okta app | What it's for | Required |
|---|---|---|
| Vipilink | Sign-in with Okta (OpenID Connect). | Yes |
| Vipilink Provisioning | Creates and updates users in Vipilink (SCIM). | Only for SCIM provisioning, Enterprise plan |
Before you start
- You're an admin in both Okta and Vipilink.
- You know your Vipilink workspace address, for example
https://example.vipilink.com. In the steps below, replaceexamplewith your workspace name.
Step 1: Create the sign-in app in Okta
-
In the Okta admin console, go to Applications and Resources → Applications and click Create App Integration.

-
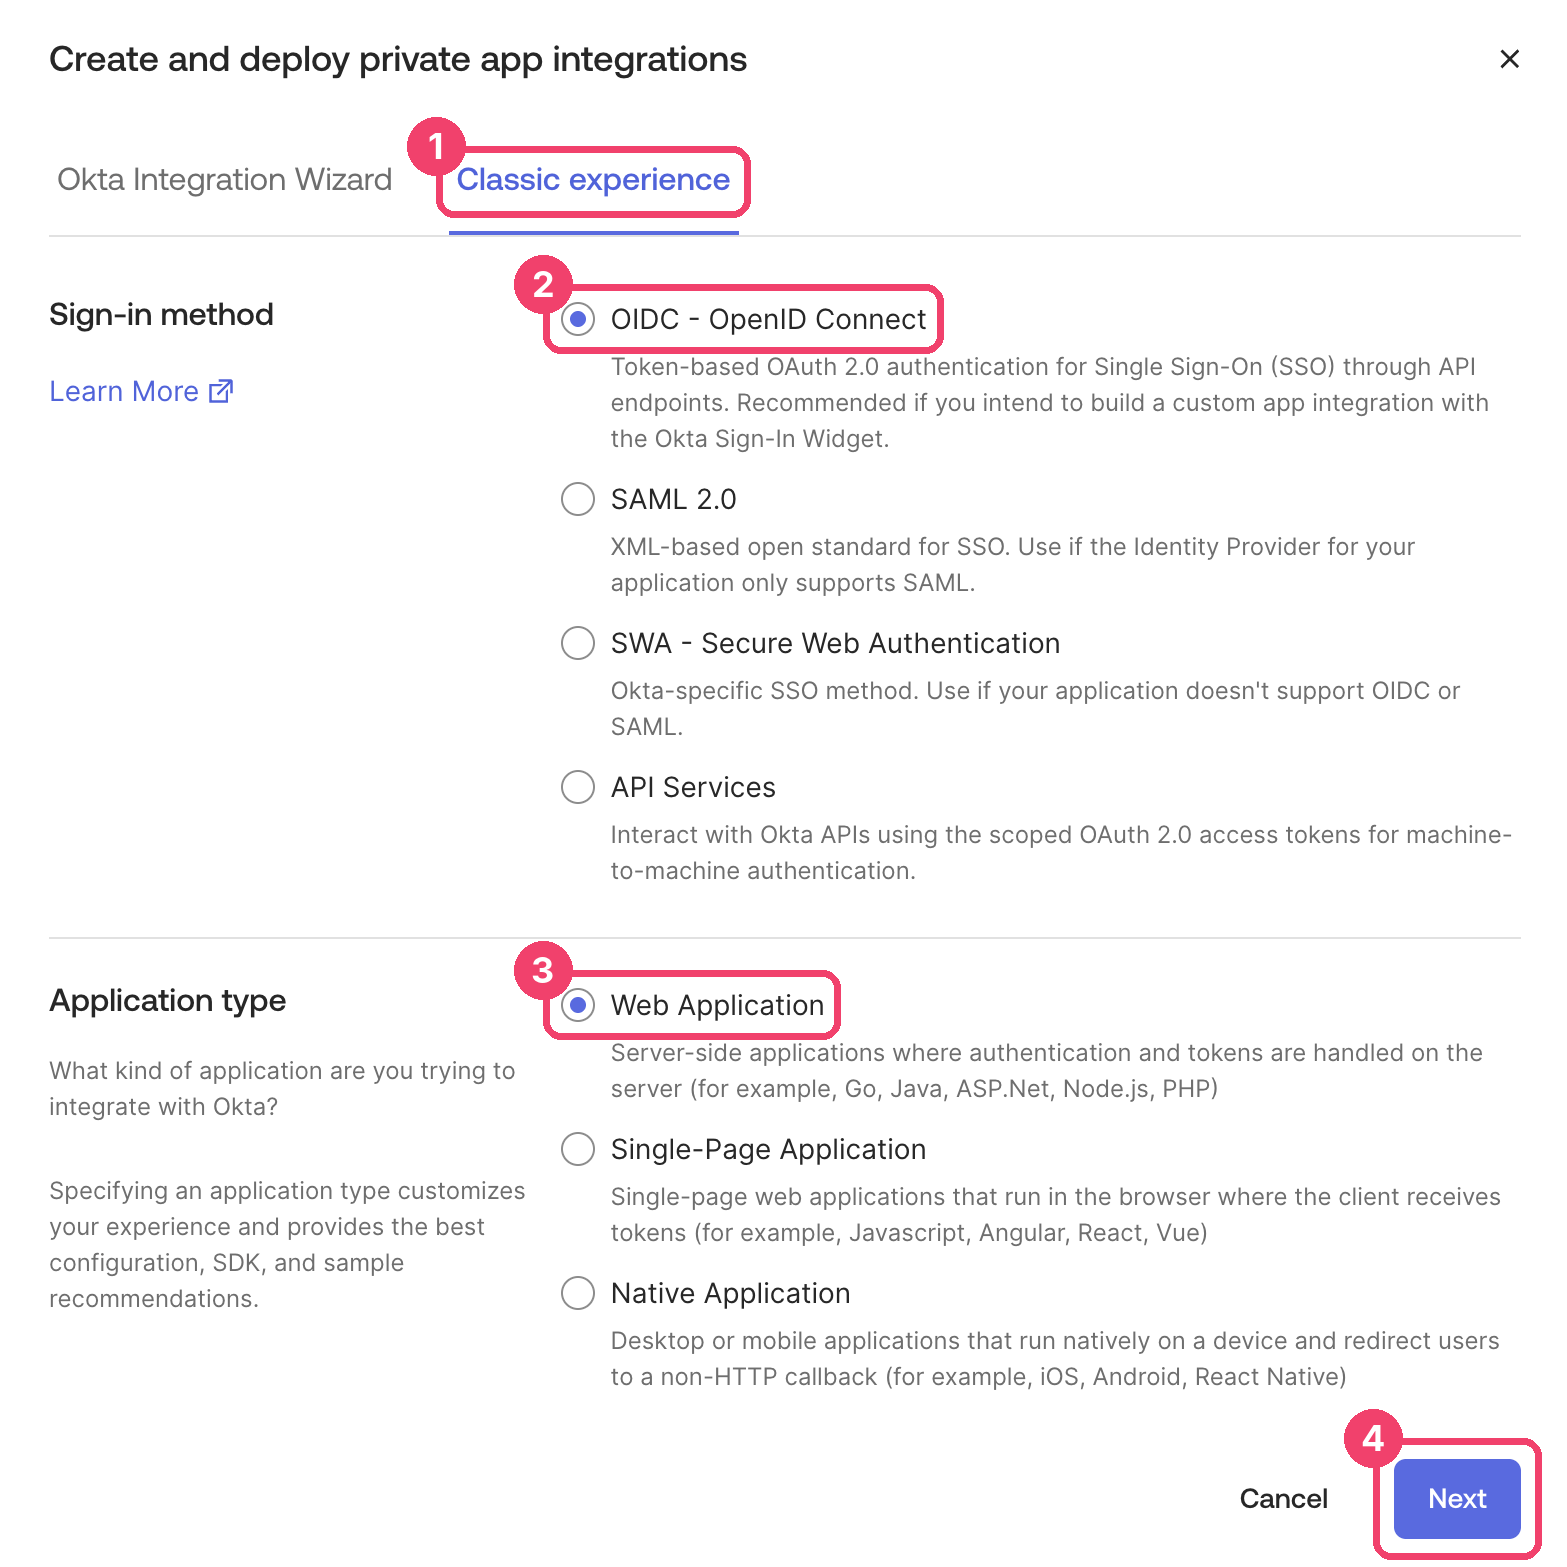
Open the Classic experience tab (1), choose OIDC - OpenID Connect (2) and Web Application (3), and click Next (4).
-
Fill in the form:
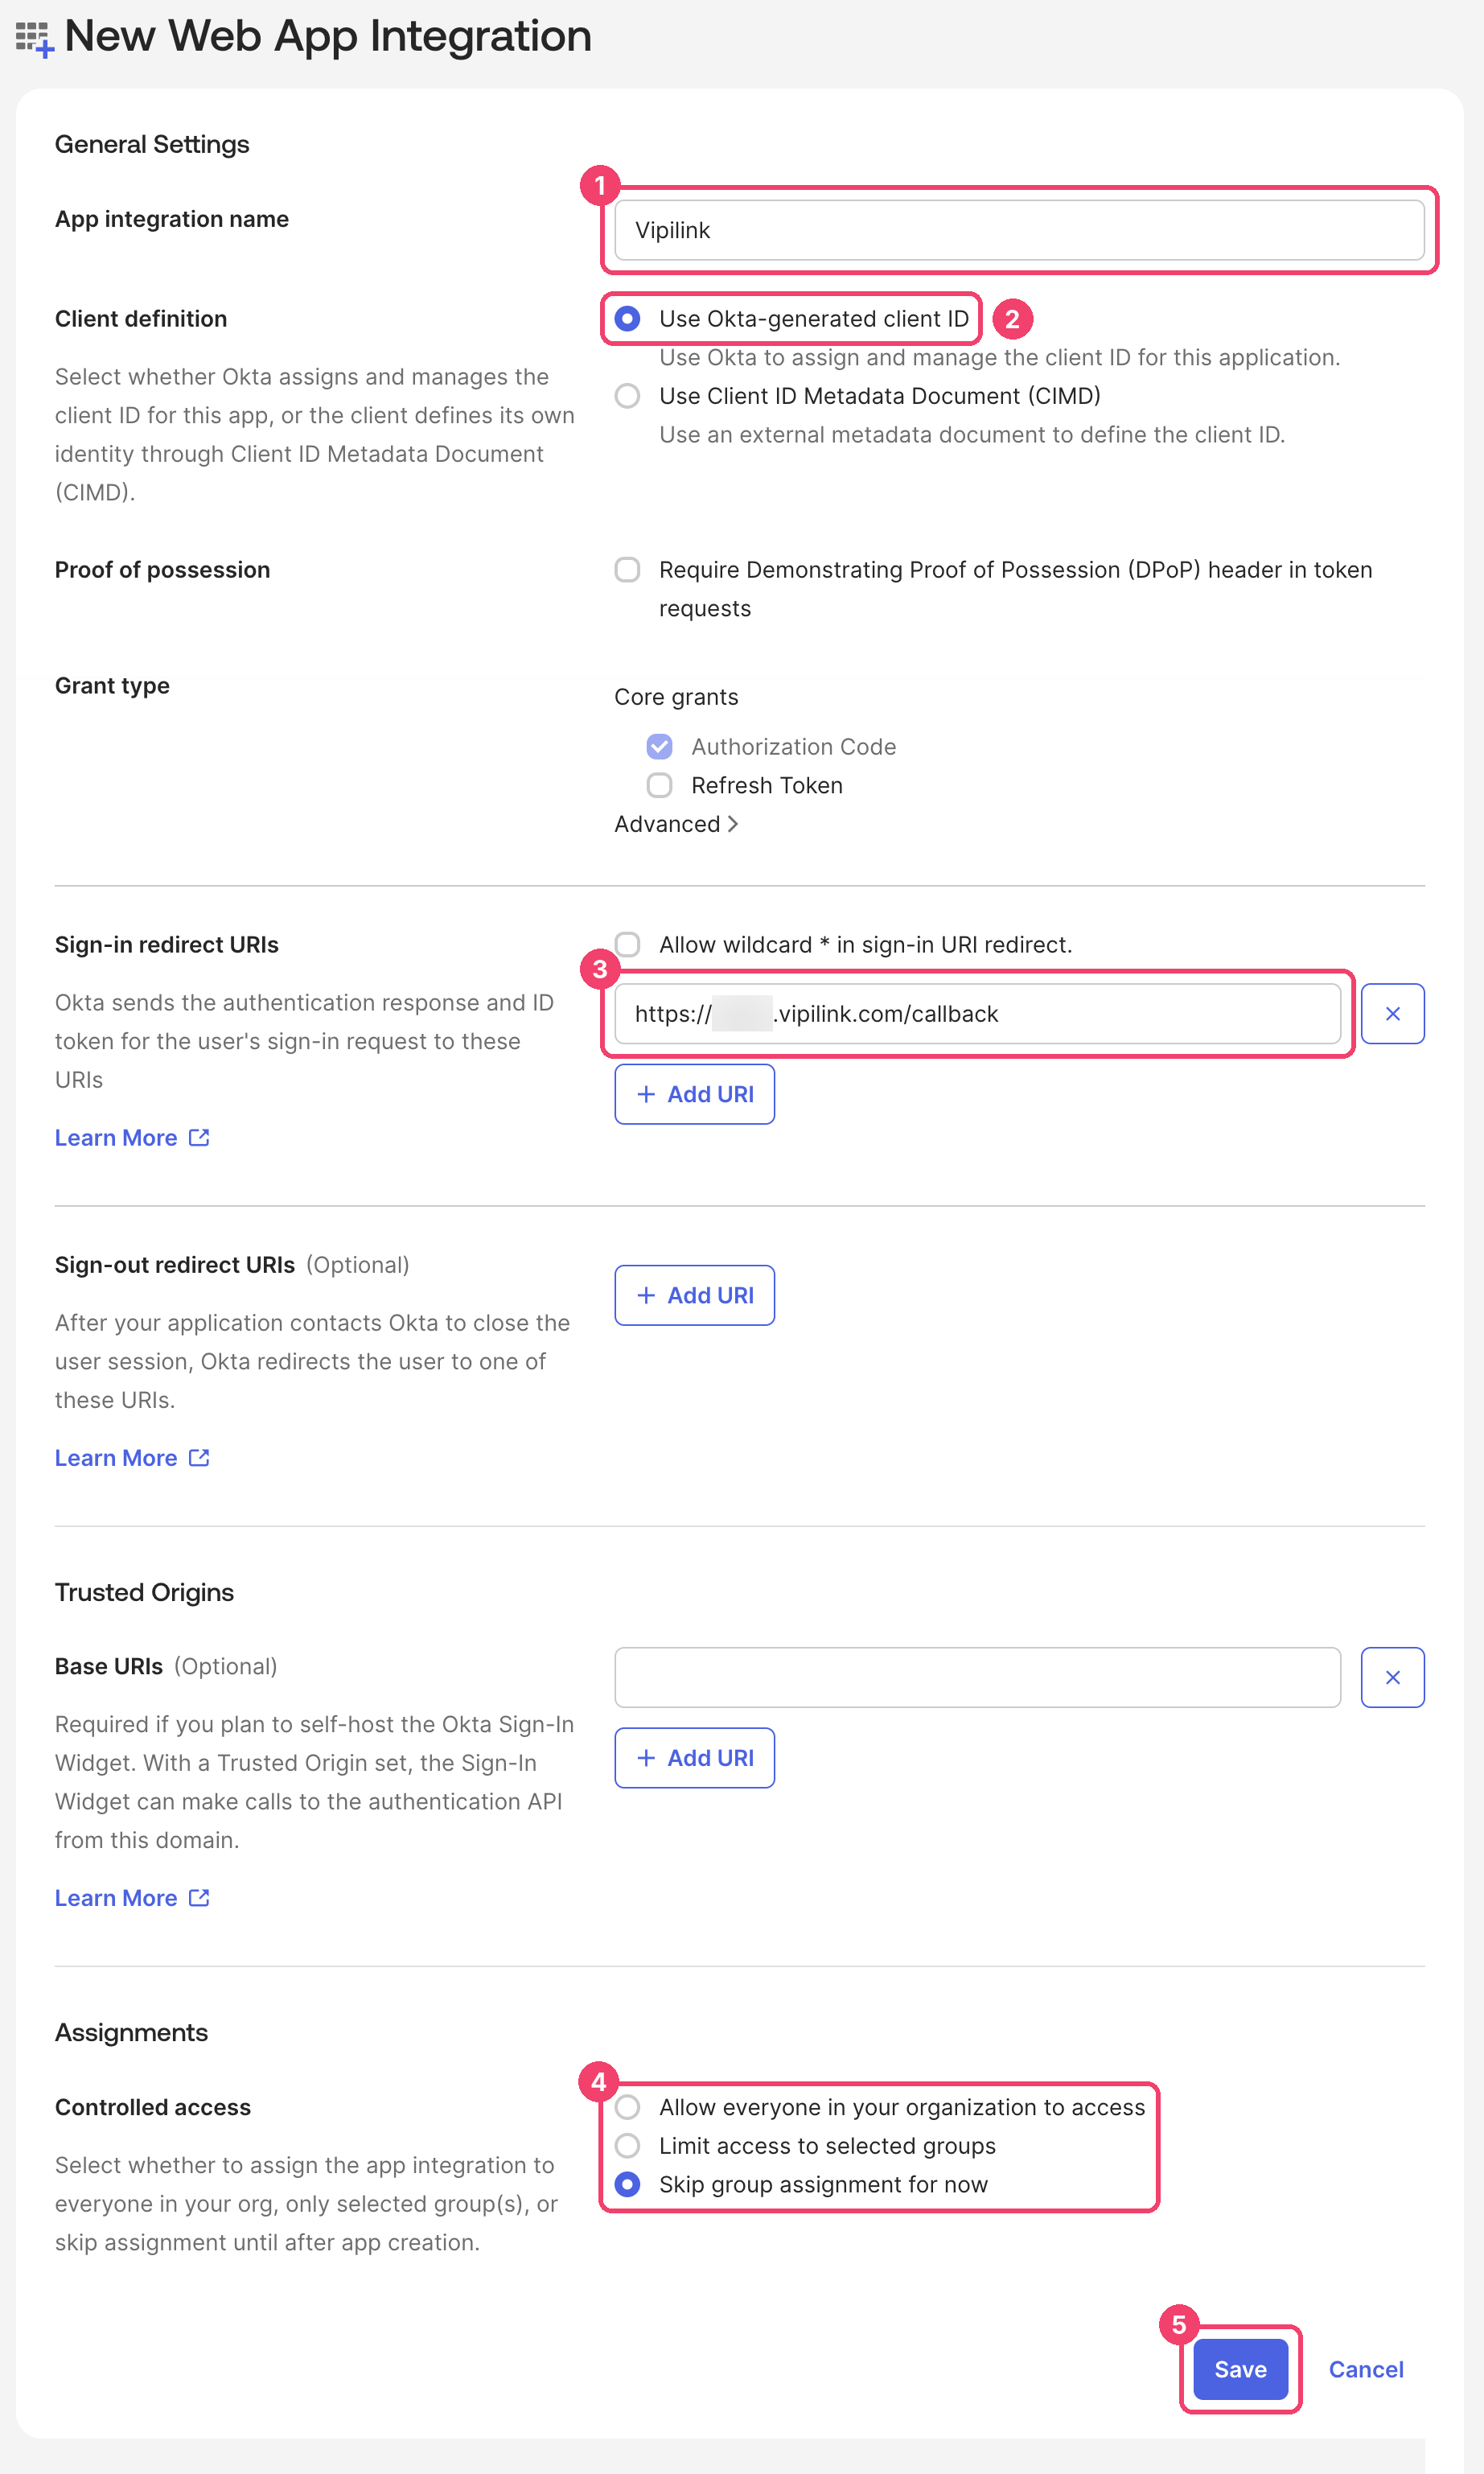
Field Value 1 App integration name Vipilink2 Client definition Use Okta-generated client ID 3 Sign-in redirect URIs https://example.vipilink.com/callback4 Controlled access Skip group assignment for now. You assign a group in Step 4. You don't need Sign-out redirect URIs. Remove the example URI with the × or leave it as it is.
-
Click Save (5).
Step 2: Let users open Vipilink from Okta
These settings add a Vipilink tile to your users' Okta dashboard, so they can sign in from either place.
- In the new app, open the General tab and click Edit in General Settings.
-
Set the login options:
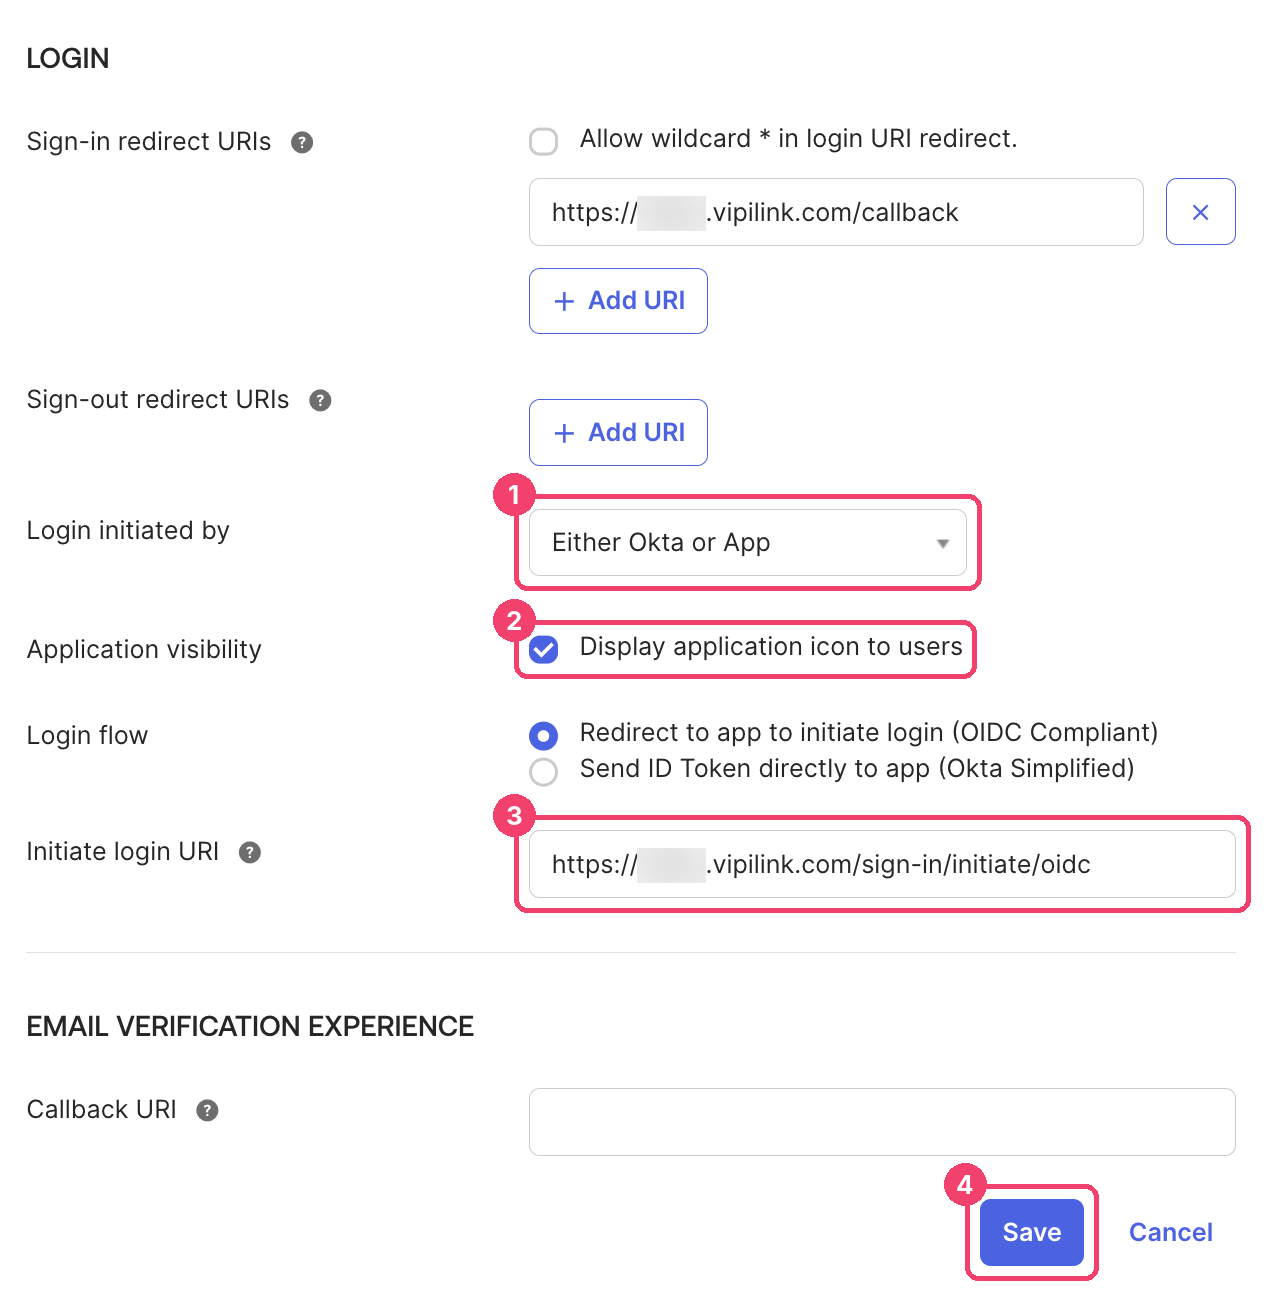
Field Value 1 Login initiated by Either Okta or App 2 Application visibility Select Display application icon to users. 3 Initiate login URI https://example.vipilink.com/sign-in/initiate/oidc -
Click Save (4).
Step 3: Add the Vipilink logo
Apps you create yourself show a grey gear icon in Okta. Replace it with the Vipilink logo so users can find the app.


- Download the logo above.
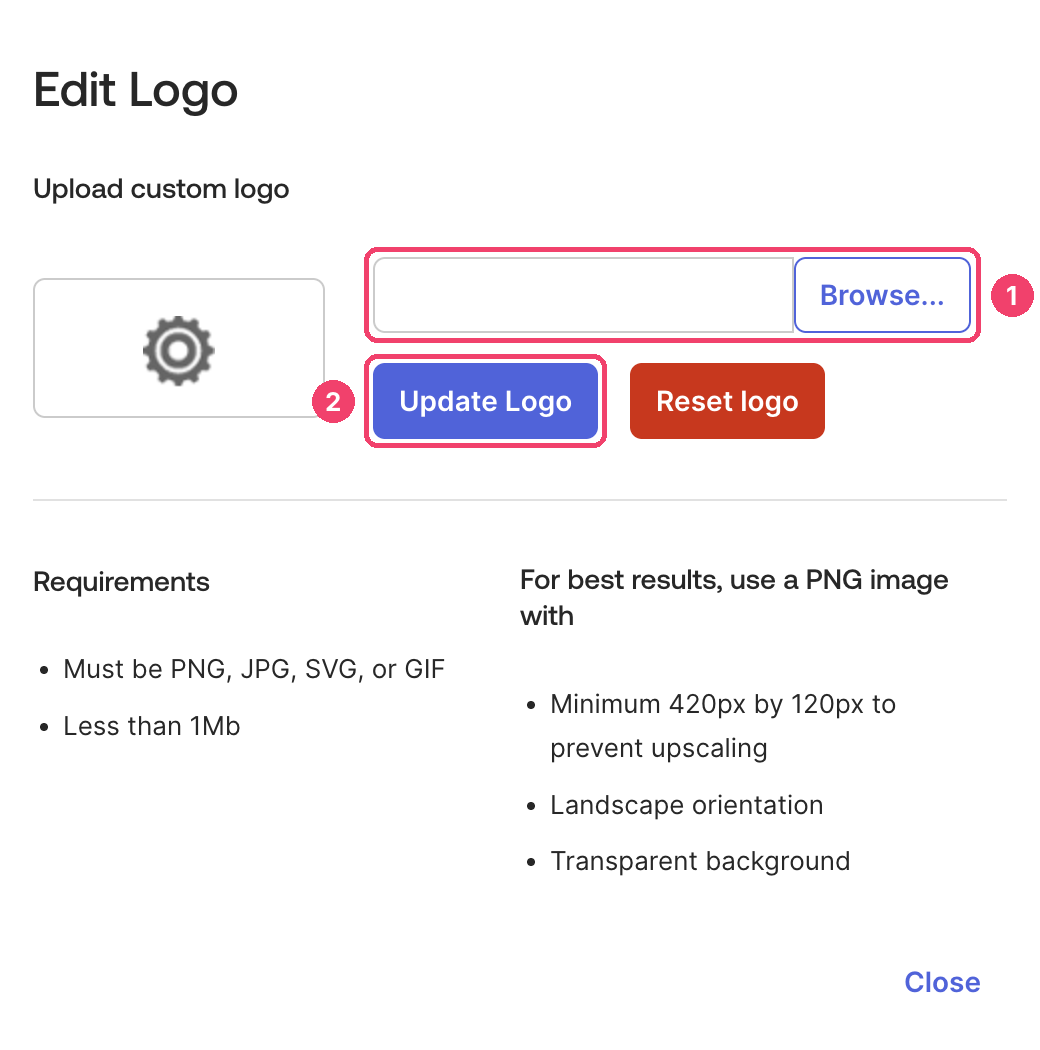
- In the app, click the pencil icon on the app's logo, next to the app name.
-
Click Browse... (1), choose the downloaded logo and click Update Logo (2).
Step 4: Assign a group to the app
Only users you assign to the app can sign in to Vipilink with Okta. The easiest way is one group for all Vipilink users.
-
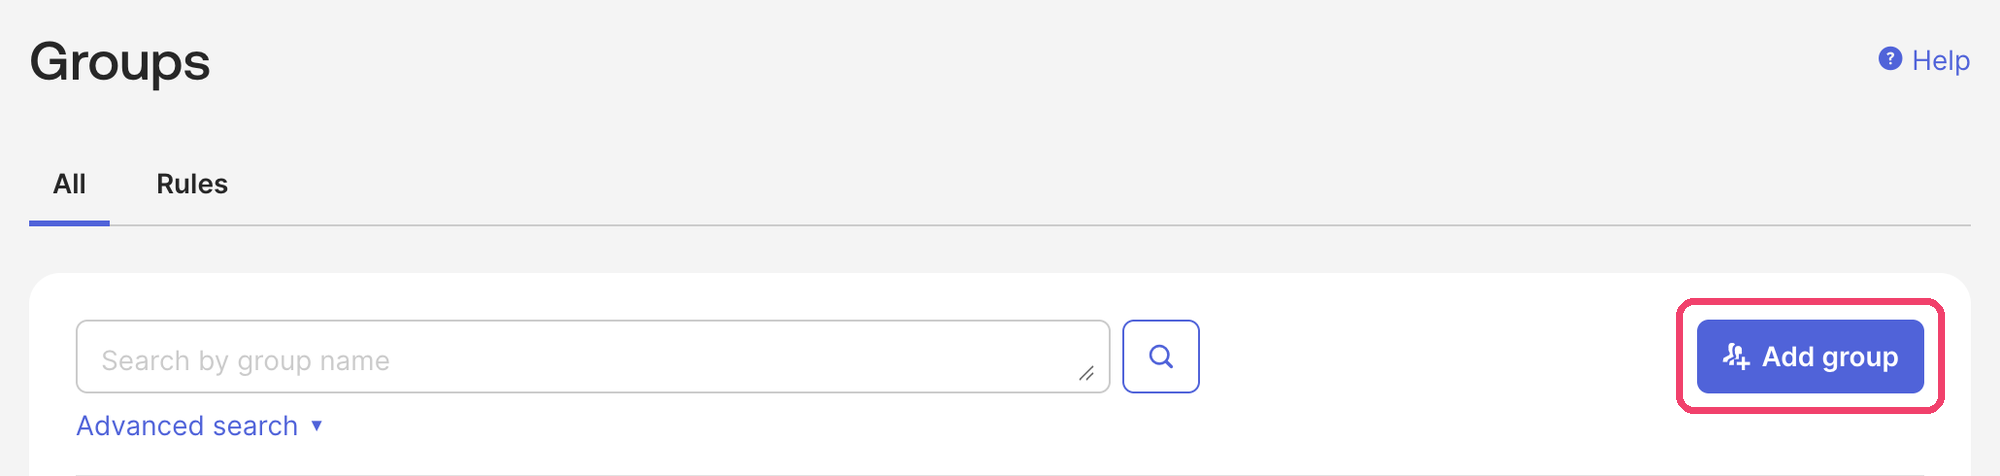
Go to Directory → Groups and click Add group.
-
Enter a Name, for example
Vipilink, and a description (1), then click Save (2). Add your Vipilink users to the group.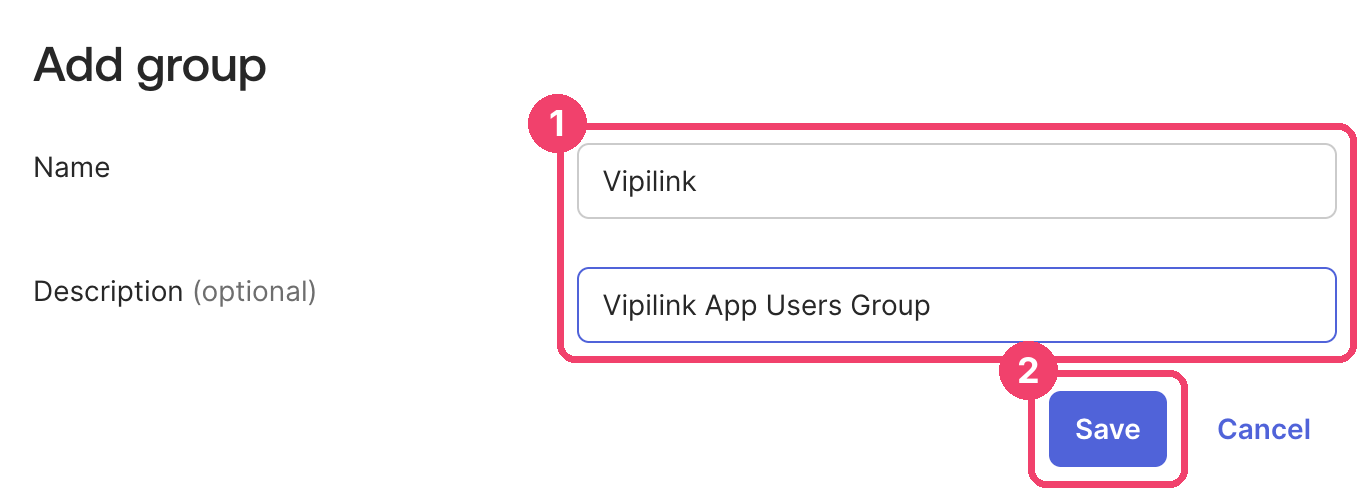
-
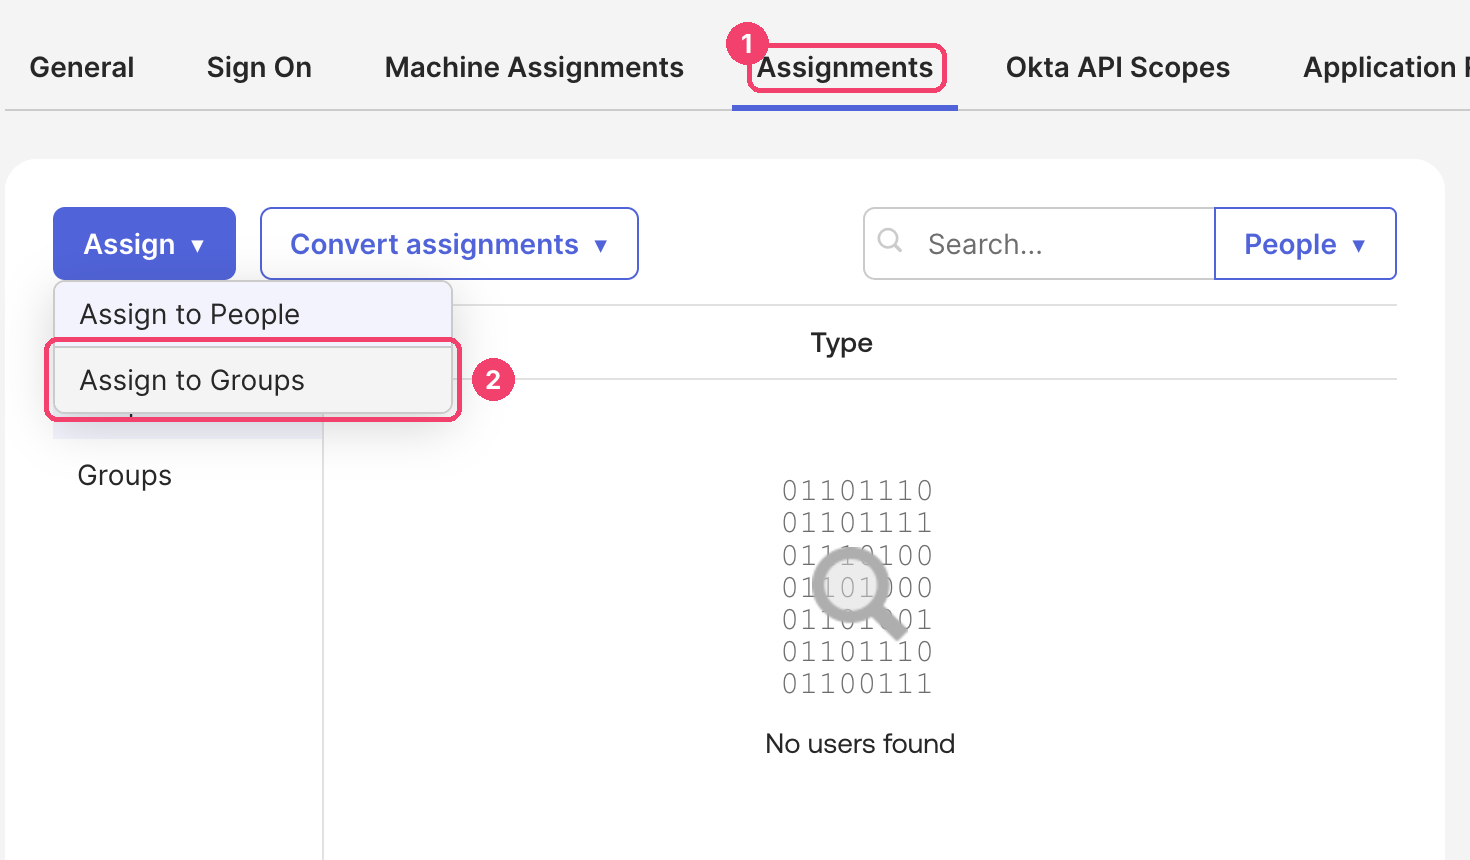
Go back to Applications and Resources → Applications and open the Vipilink app. On the Assignments tab (1), click Assign and choose Assign to Groups (2).
-
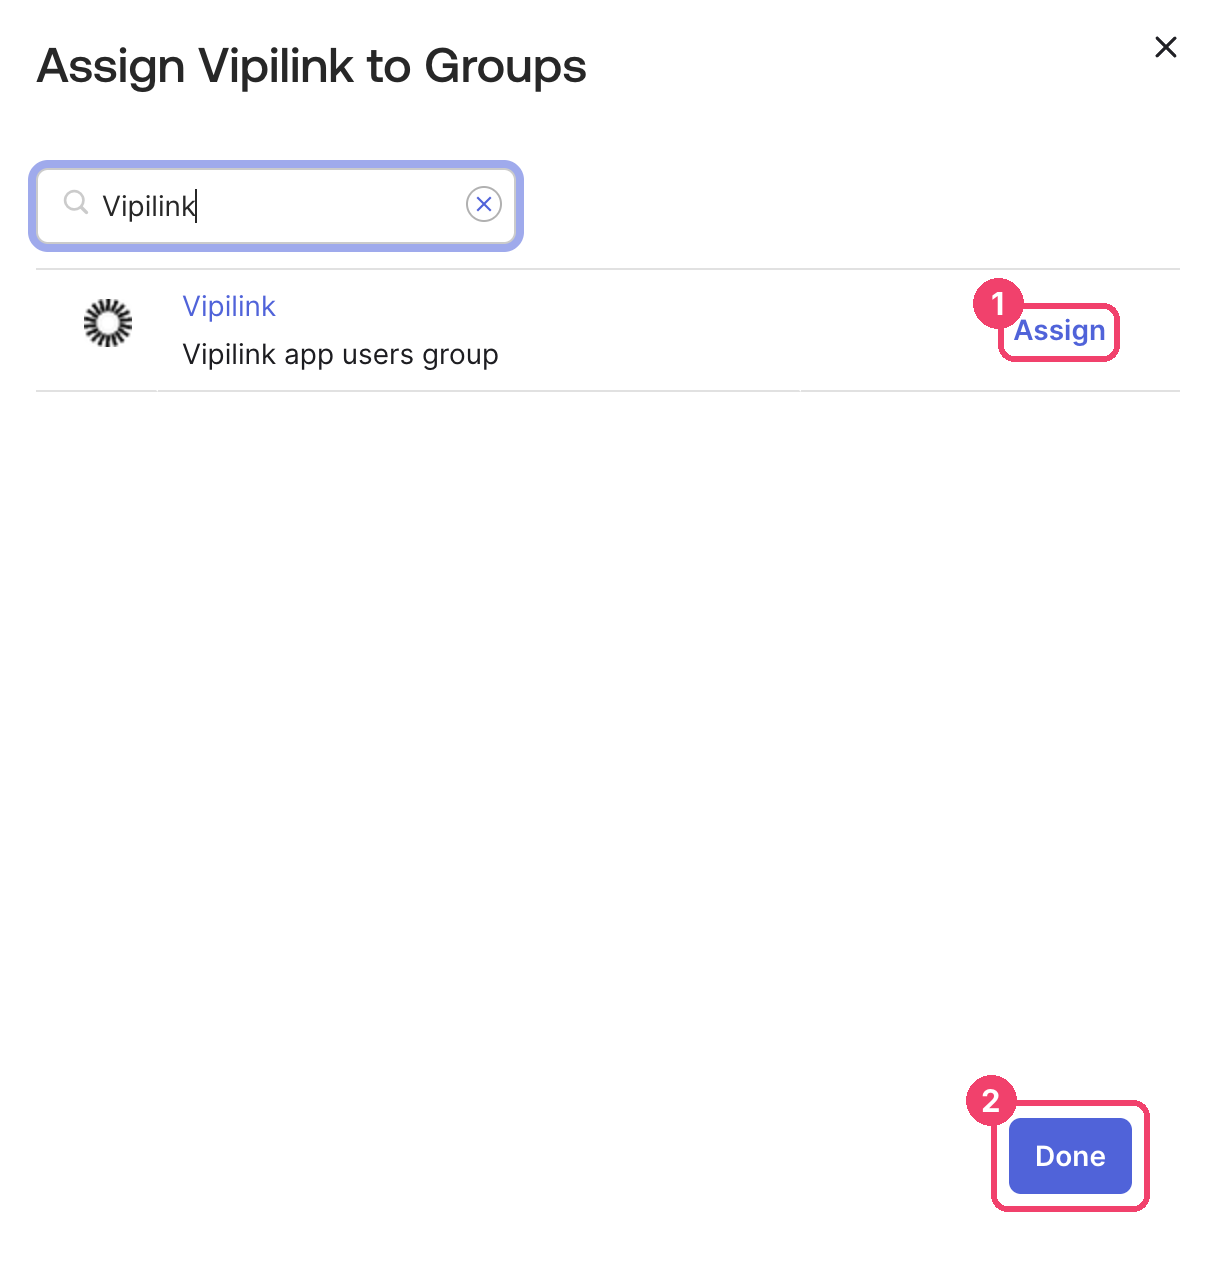
Click Assign next to the group (1), then Done (2).
Step 5: Add Okta in Vipilink
-
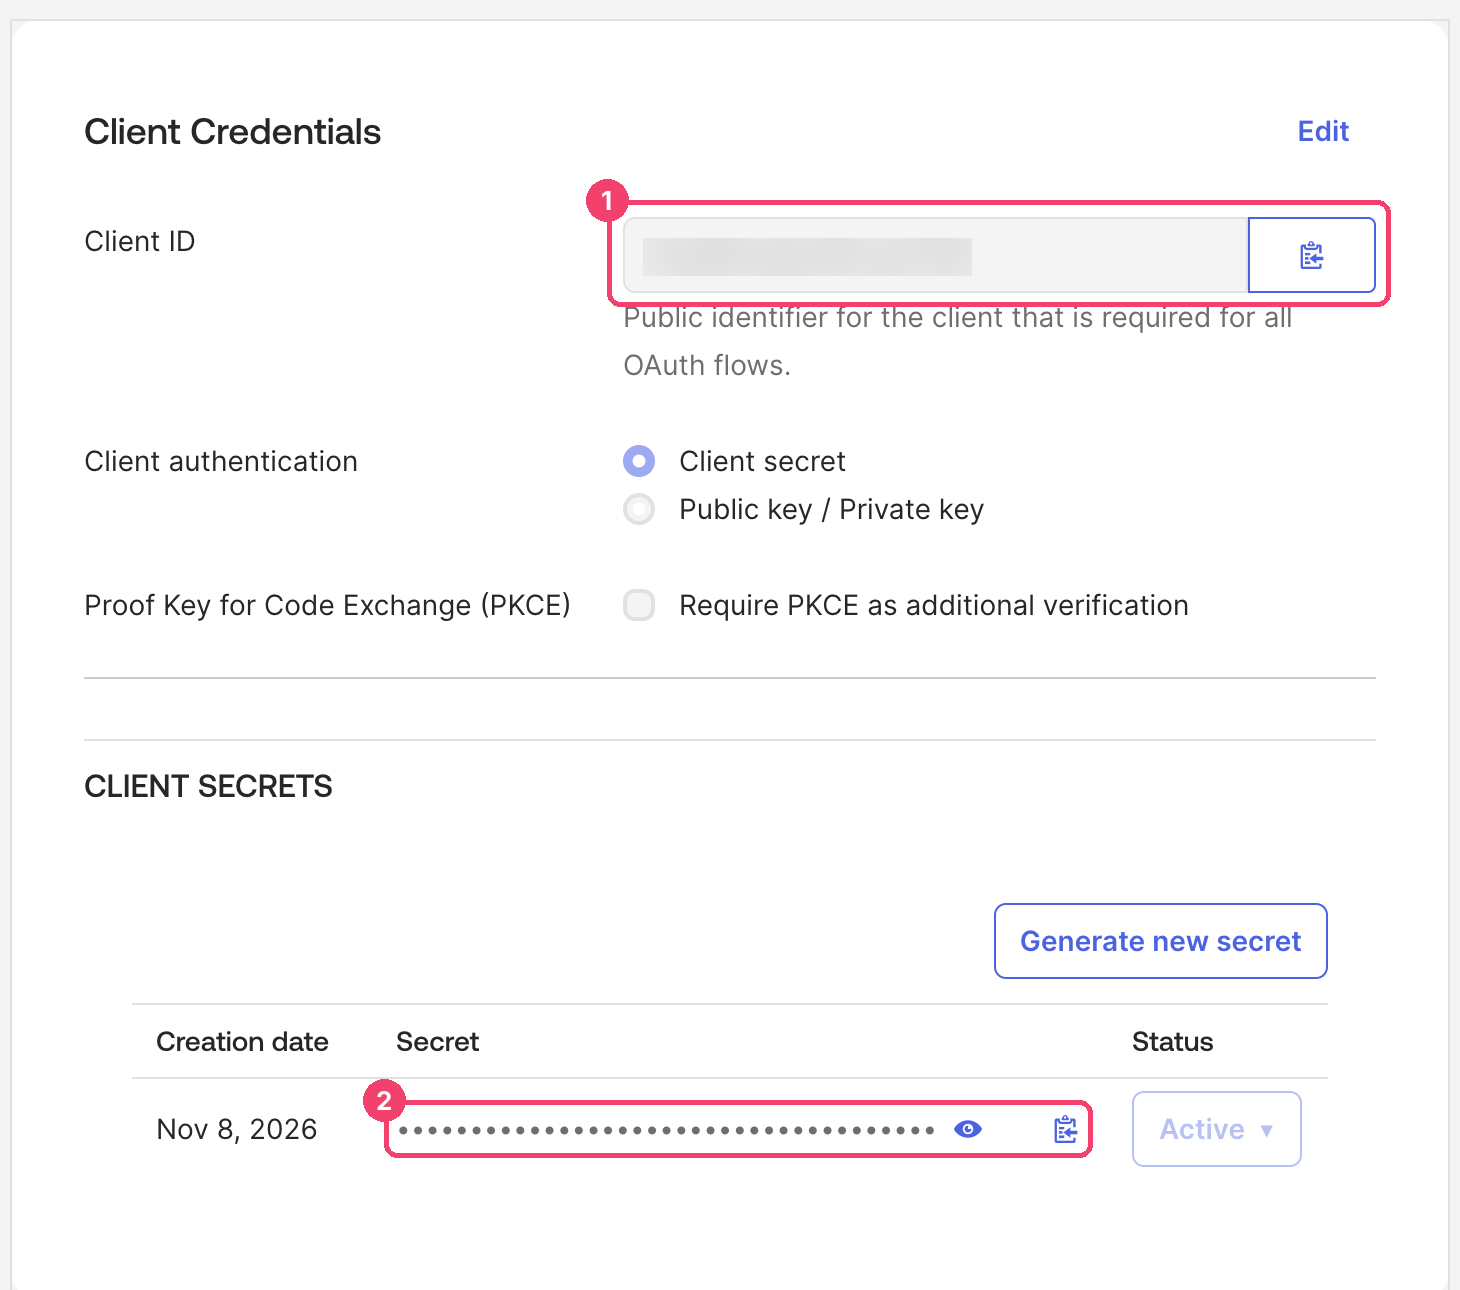
In the Okta app, open the General tab. In Client Credentials, copy the Client ID (1). In Client Secrets, click the copy icon next to the secret (2).
-
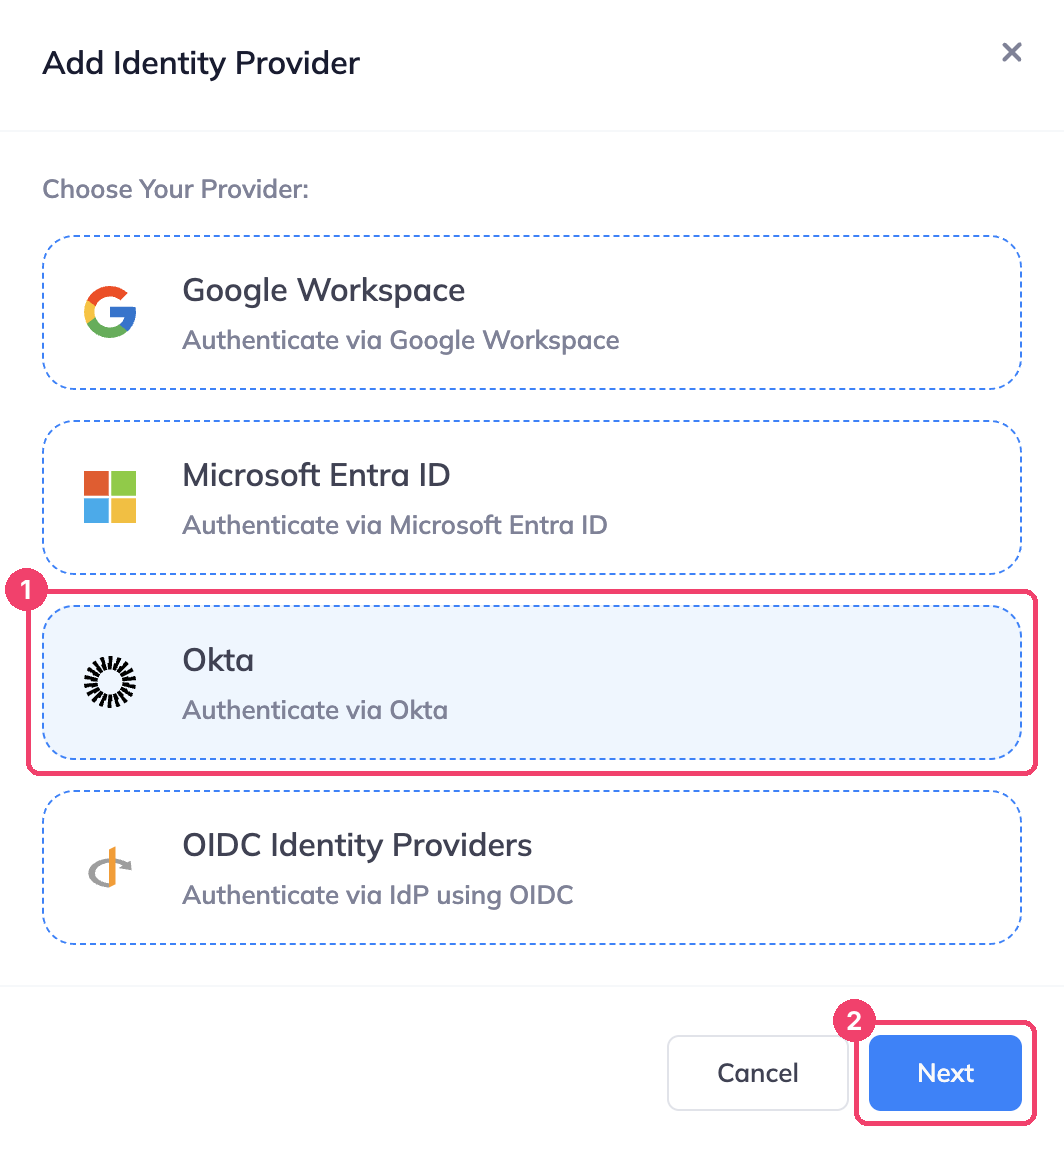
In Vipilink, go to Settings → Identity Providers and click Add Provider.
-
Choose Okta (1) and click Next (2).
-
Fill in the form:
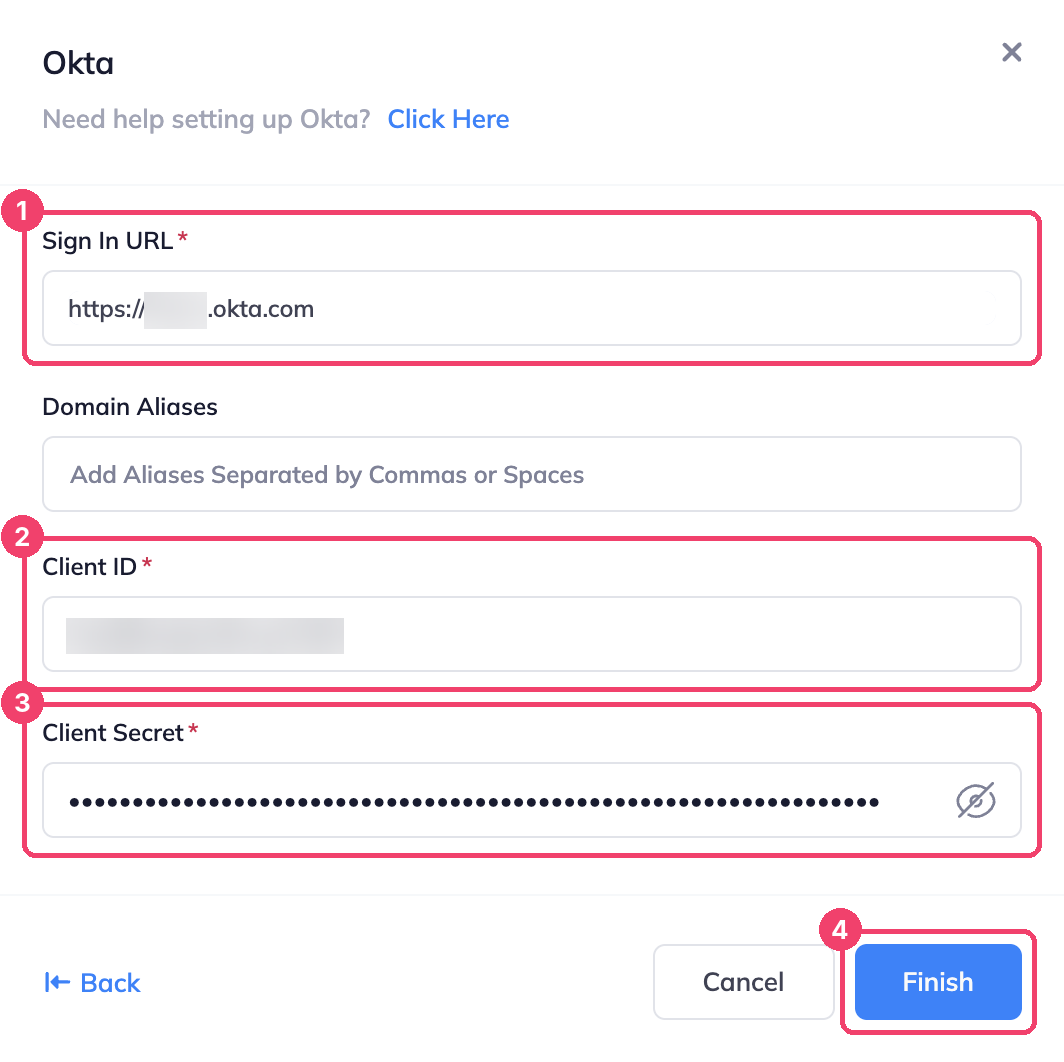
Field What to enter 1 Sign In URL Your Okta address, for example https://example.okta.com.2 Client ID The client ID from Okta. 3 Client Secret The client secret from Okta. Domain Aliases is optional: other email domains of your company that should sign in with Okta, for example
example.co.uknext toexample.com. -
Click Finish (4). Okta appears on the Identity Providers page.
Step 6: Test the sign-in
Open your workspace address in a private browser window. The sign-in page now has a Sign In With Okta button. Sign in with a user from the group you assigned in Step 4.
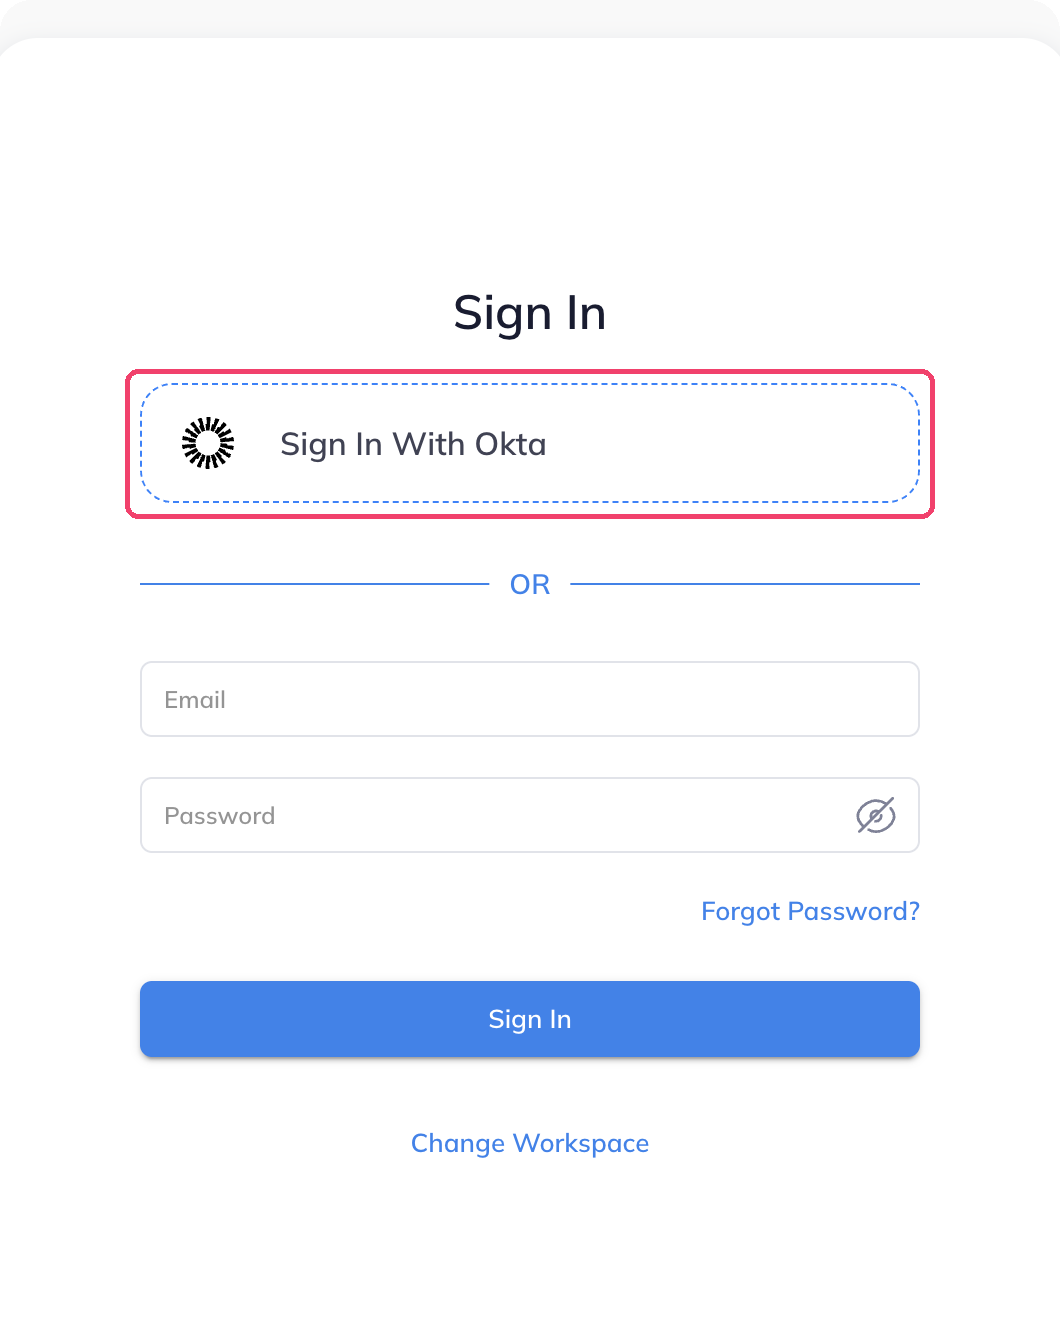
Sign-in in the agent works the same way.
Users can also click the Vipilink tile on their Okta dashboard.
SCIM provisioning
Enterprise plan
SCIM provisioning is part of the Enterprise plan. On other plans, Manage SCIM is greyed out.
With SCIM, Okta keeps your Vipilink users up to date. When you add someone to the group in Okta, Vipilink creates the user. When you change their name, Vipilink updates it. When you remove them, Vipilink deactivates the user.
SCIM uses a second Okta app, Vipilink Provisioning, next to the sign-in app from Step 1.
Turn on SCIM in Vipilink
-
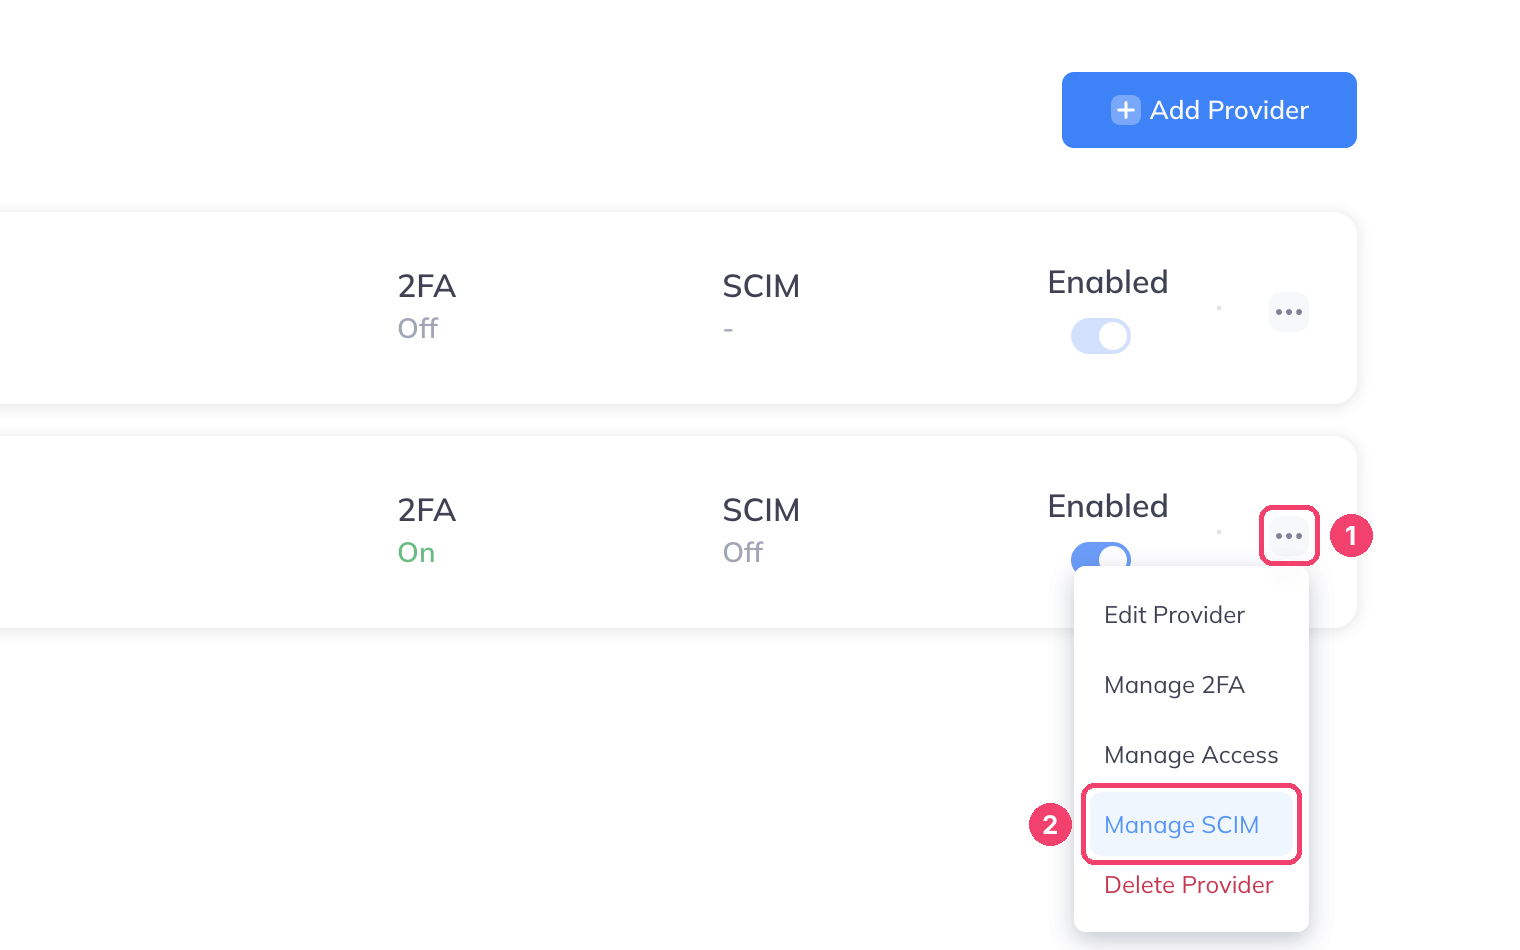
Go to Settings → Identity Providers. In the Okta card, click the ... menu (1) and choose Manage SCIM (2).
-
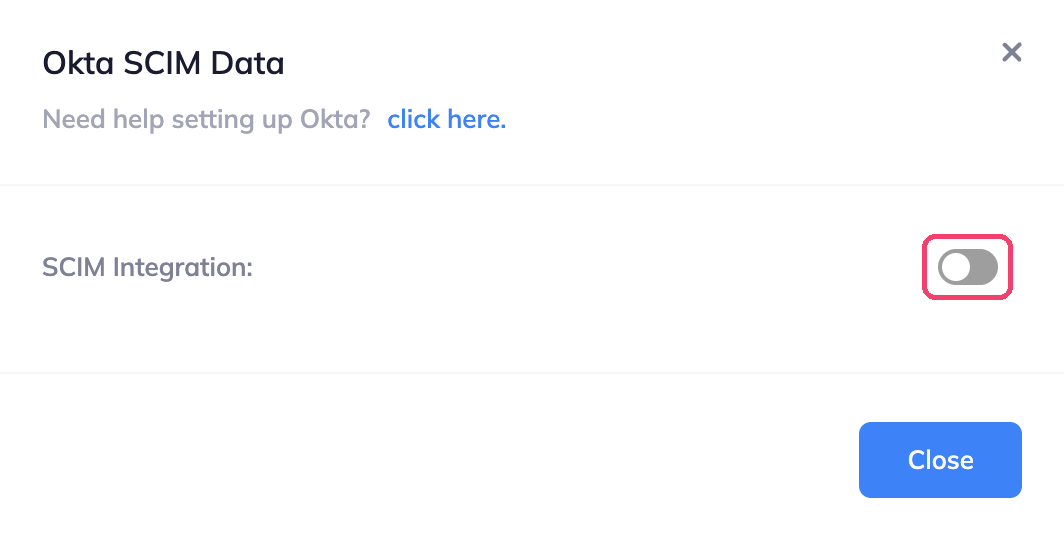
Turn on SCIM Integration.
-
Copy the URL and the Token (2) and keep them for the next steps. Copy the whole token, including
SCIMat the start.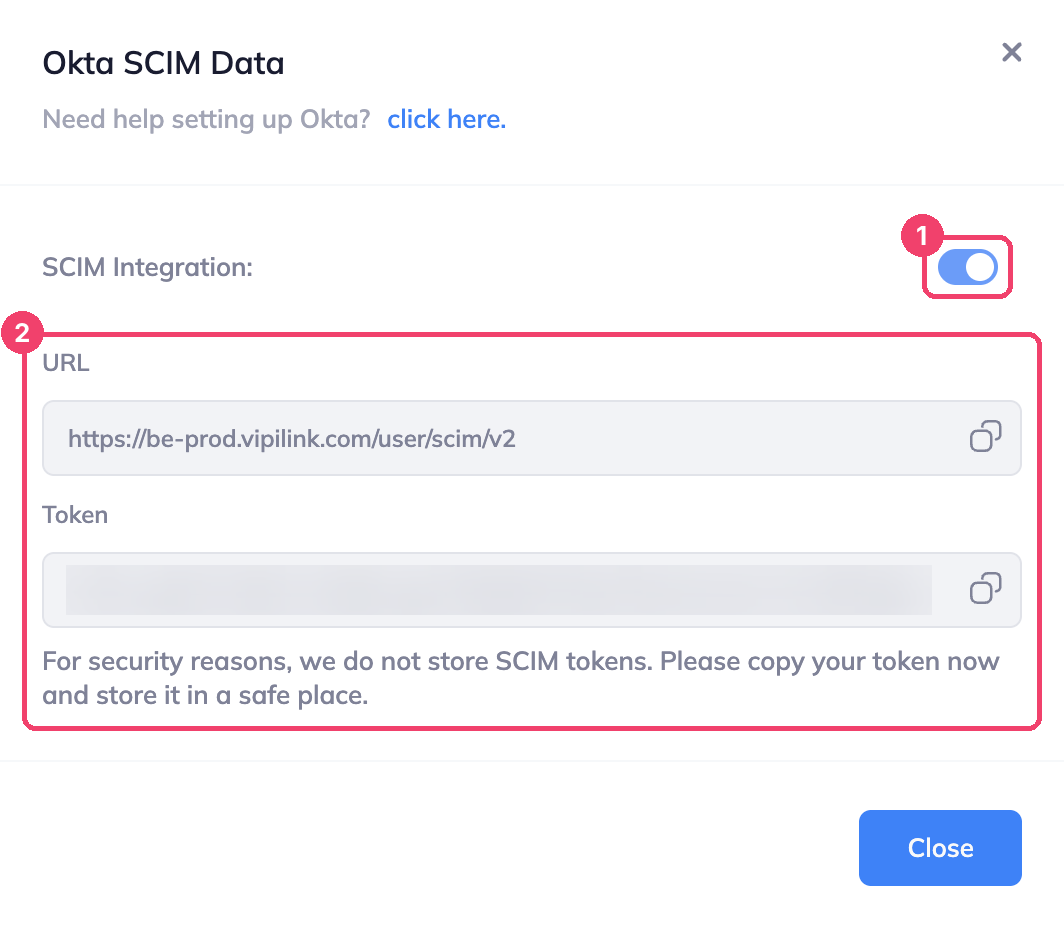
The token is shown only once
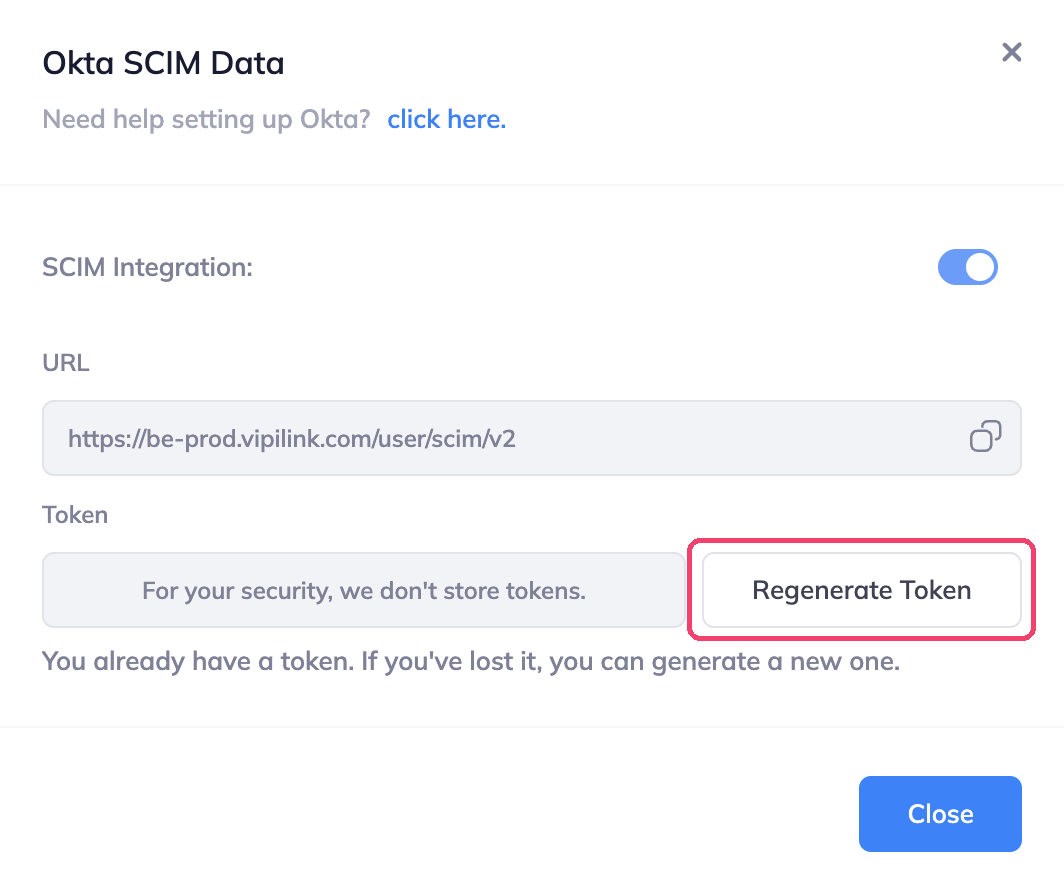
Vipilink doesn't store the token. If you lose it, open Manage SCIM again and click Regenerate Token. Then paste the new token into Okta. The old token stops working.
Create the provisioning app in Okta
-
In the Okta admin console, go to Applications and Resources → Applications and click Browse App Catalog.

-
Search for
SCIM 2.0 Test App (Header Auth)(1) and choose it from the results (2).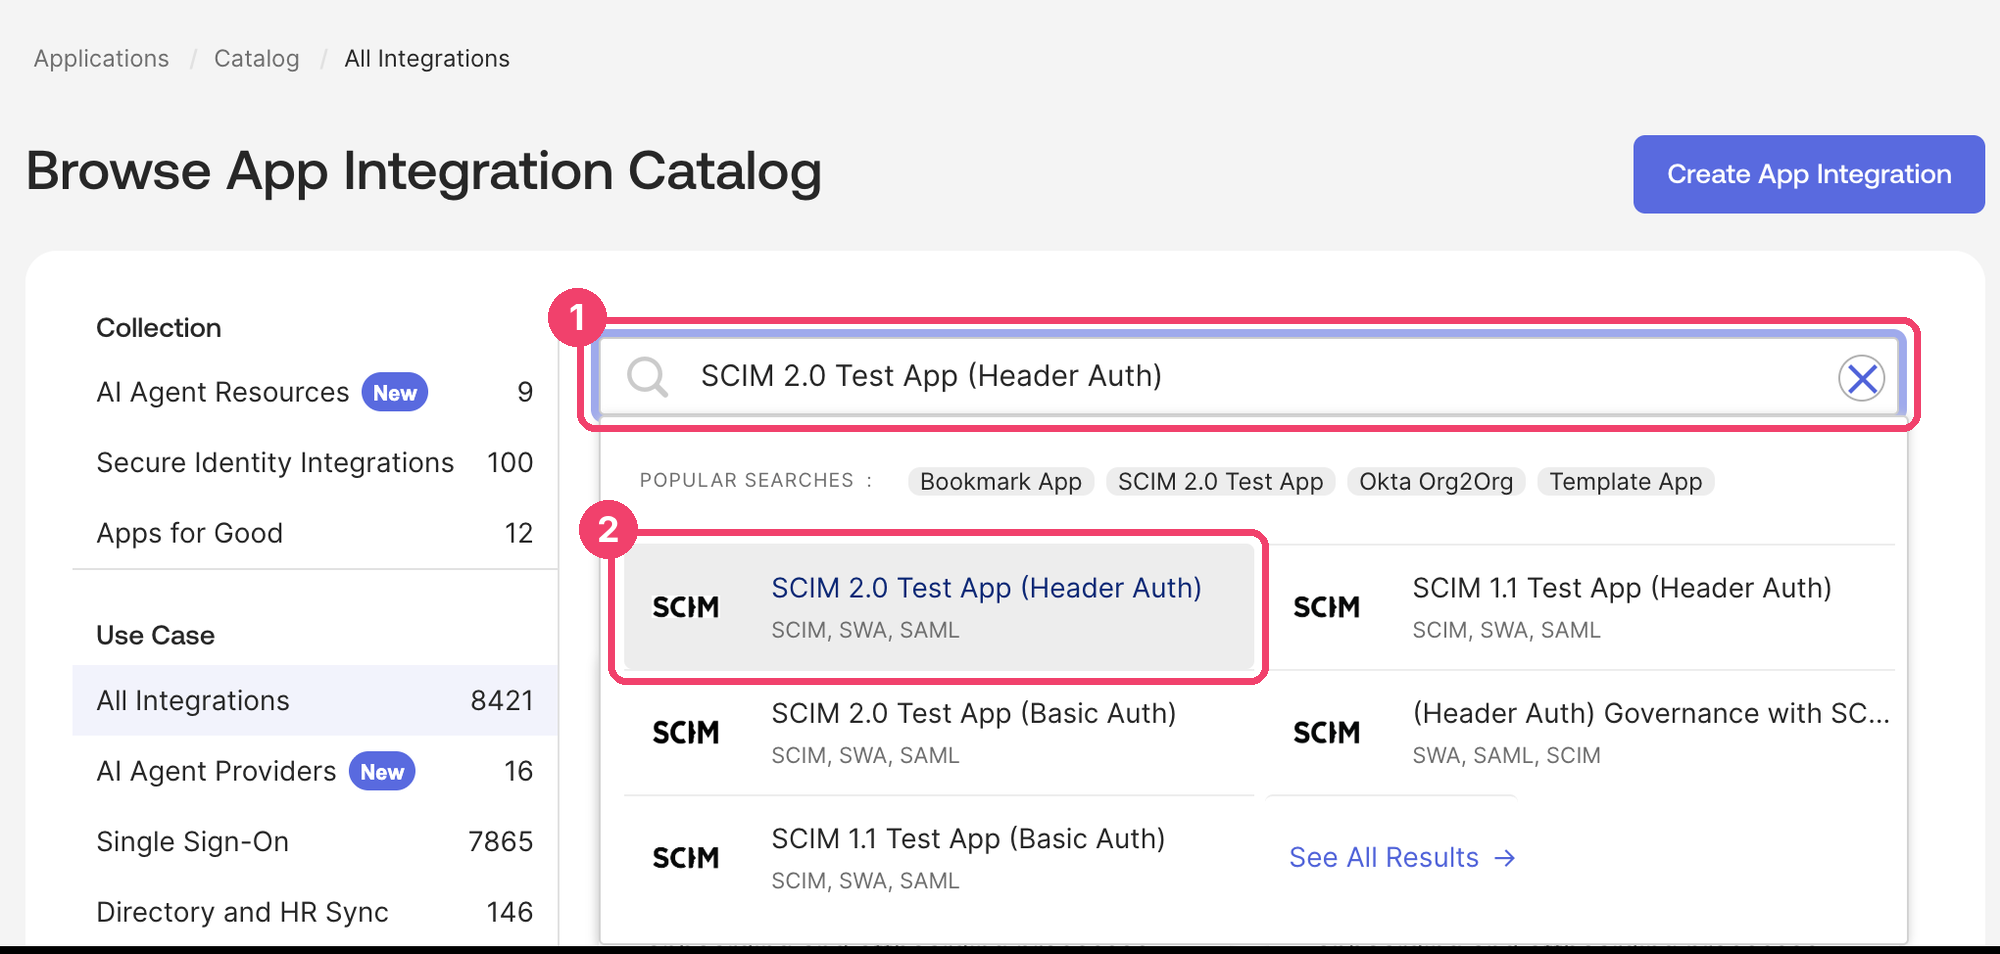
-
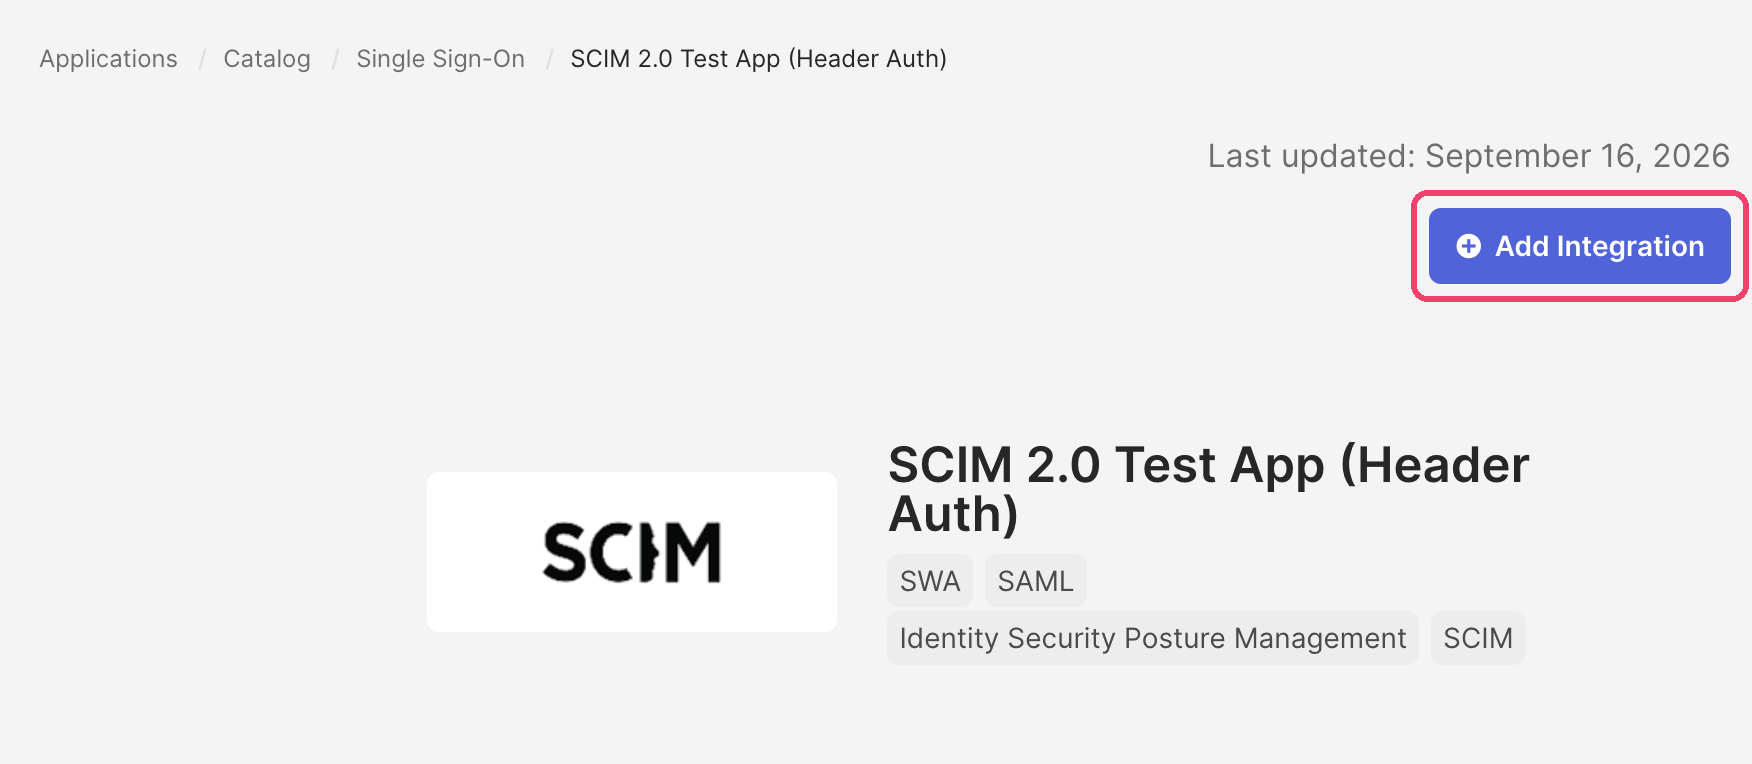
Click Add Integration.
-
Enter an Application label, for example
Vipilink Provisioning(1). Select Do not display application icon to users (2): this app is only for provisioning, users sign in with the app from Step 1. Click Next (3).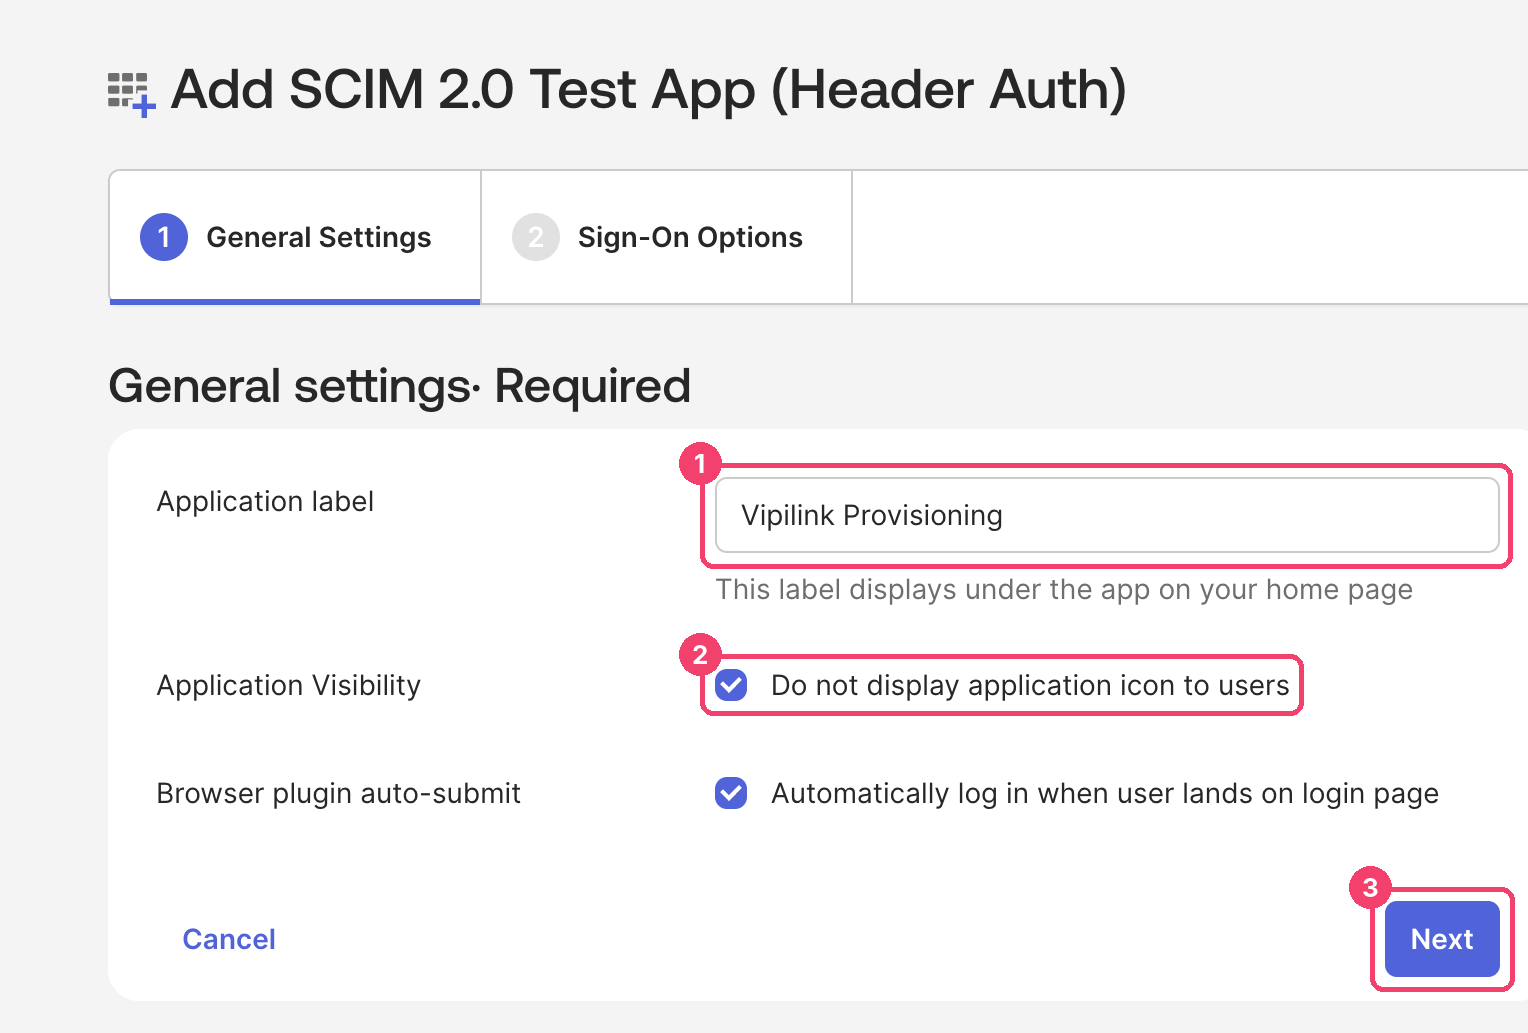
-
Leave the Sign-On Options as they are and click Done.

Connect Okta to Vipilink
-
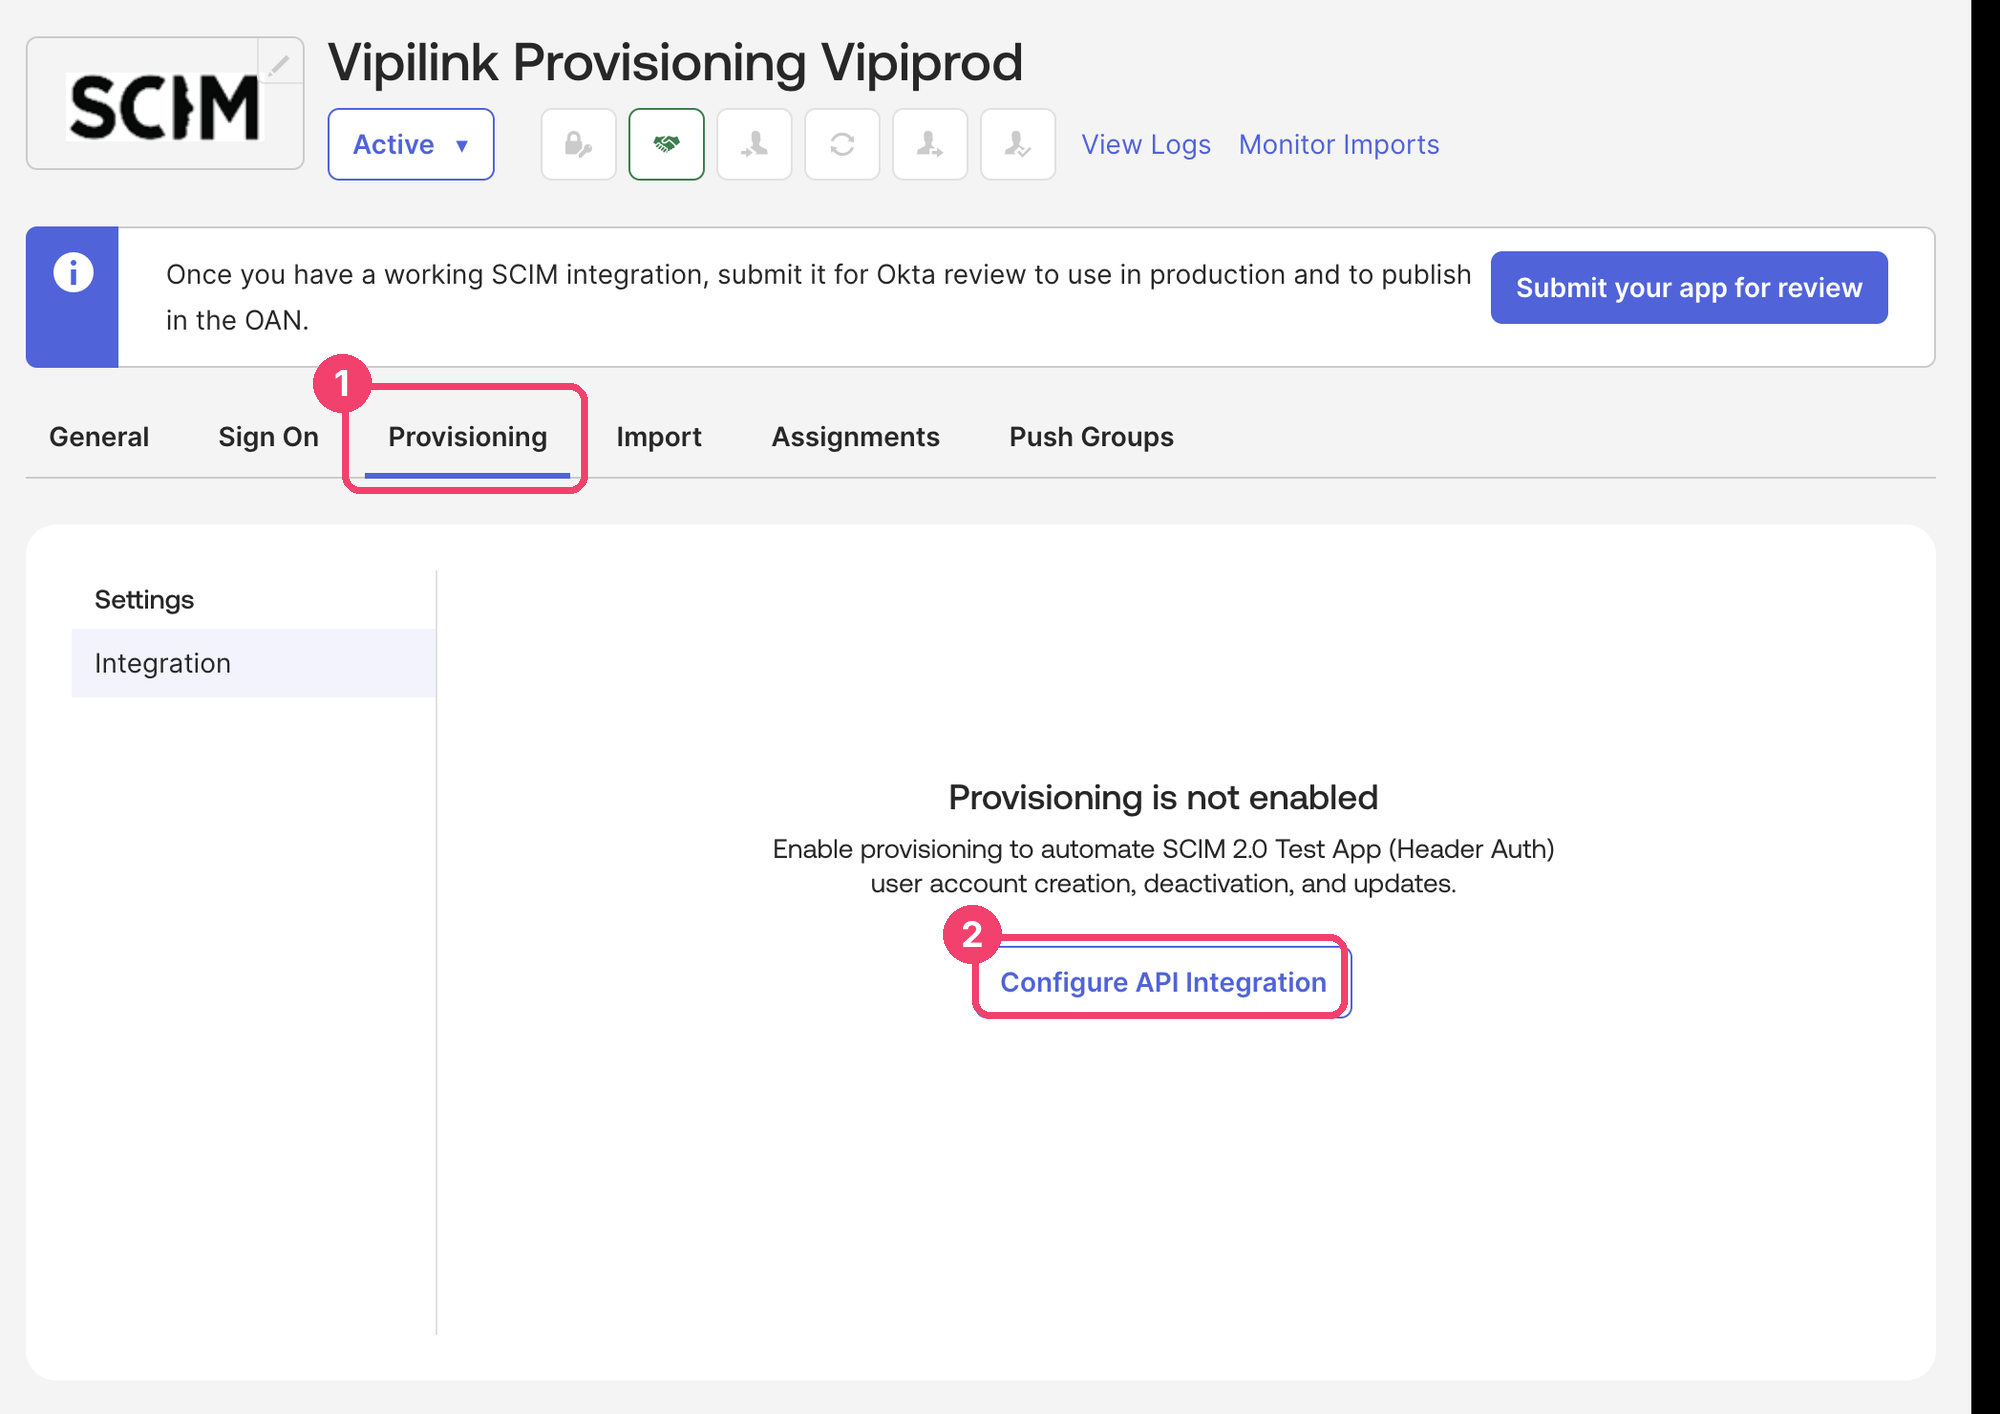
In the provisioning app, open the Provisioning tab (1) and click Configure API Integration (2).
-
Fill in the form:
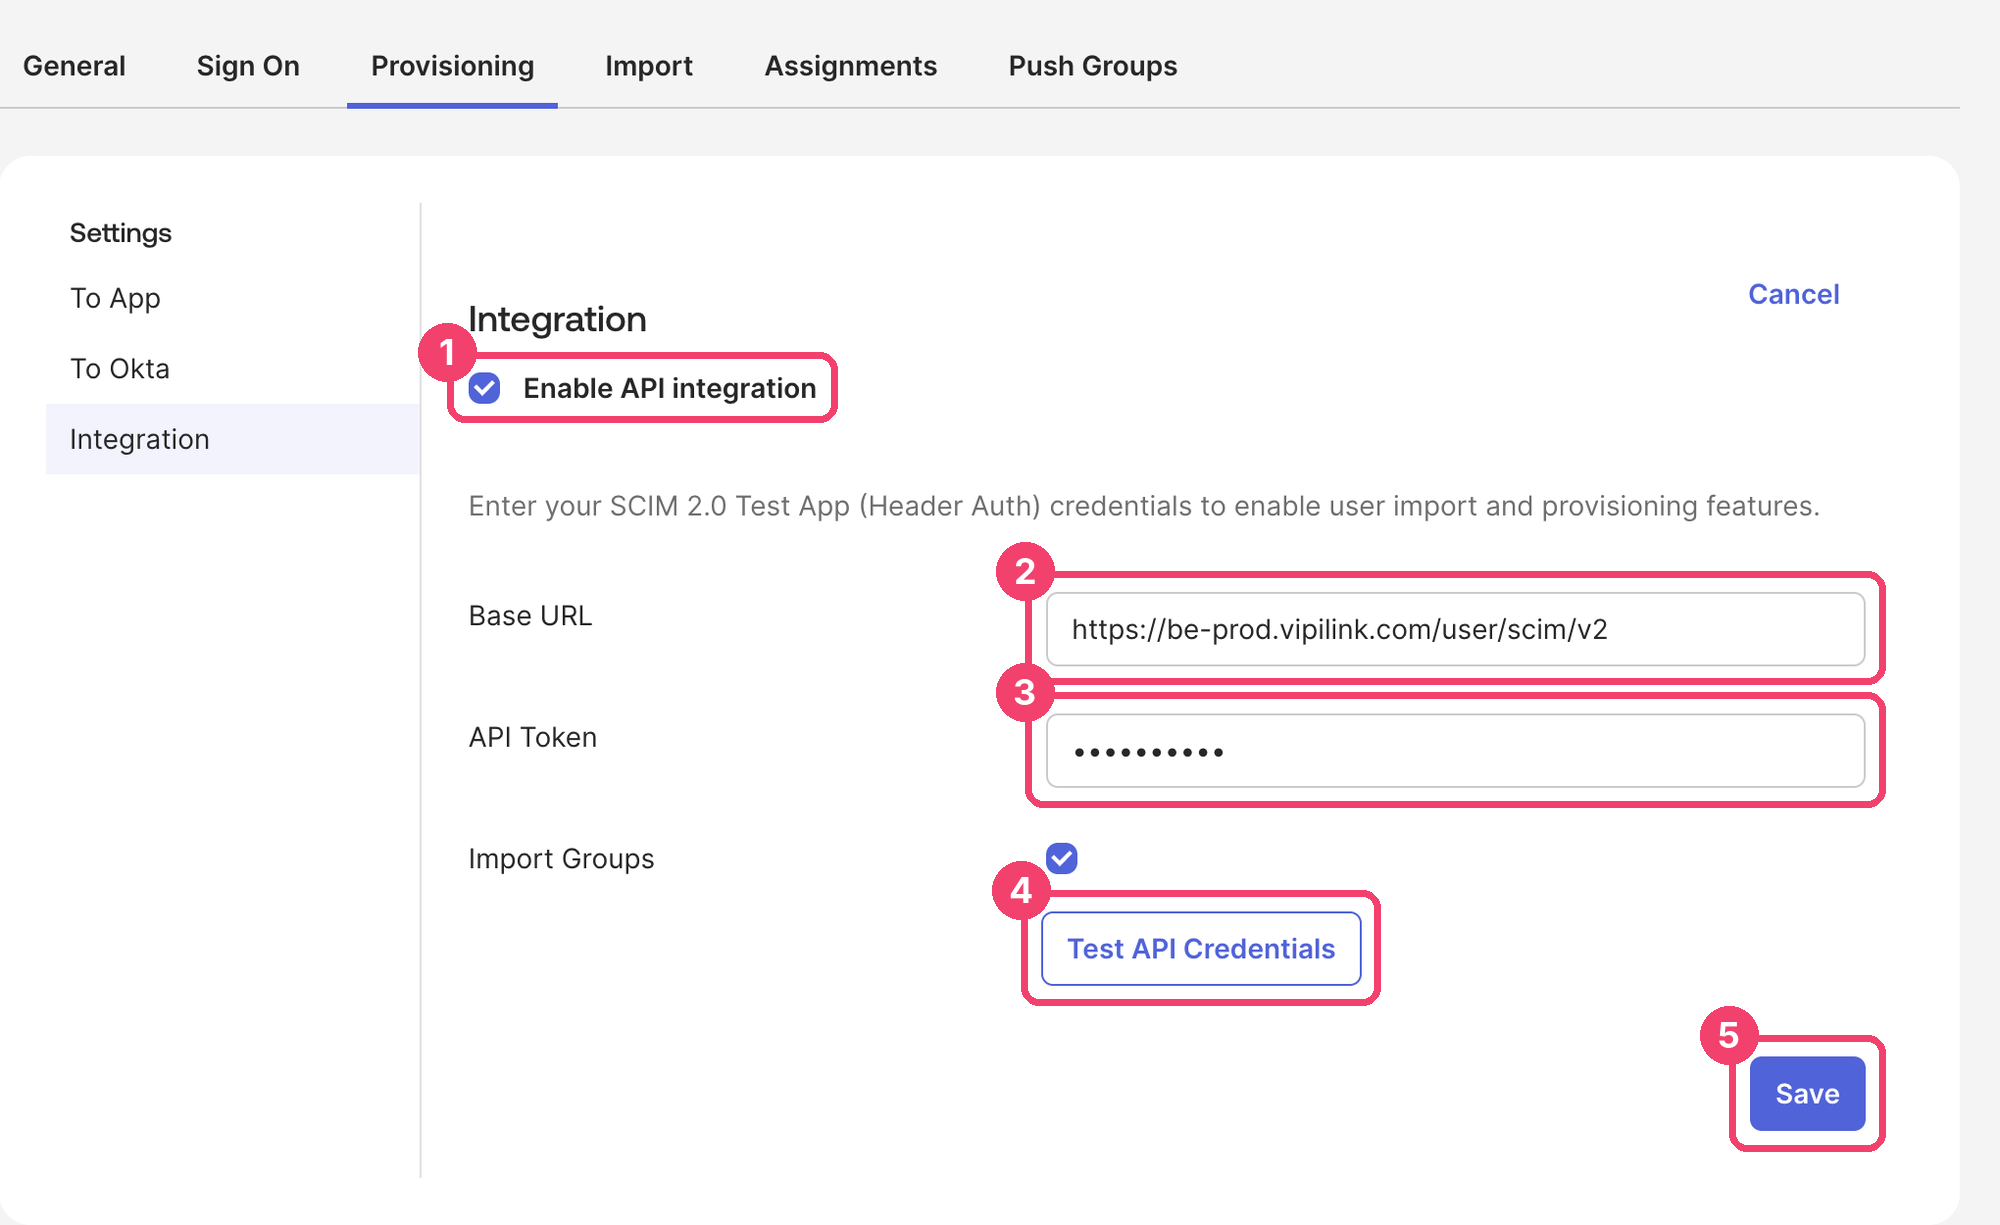
Field Value 1 Enable API integration Selected 2 Base URL https://be-prod.vipilink.com/user/scim/v2(the URL from Vipilink)3 API Token The whole token from Vipilink, including SCIMat the start -
Click Test API Credentials (4). When the test succeeds, click Save (5).
Choose what Okta does
- On the Provisioning tab, click To App and then Edit.
-
Select Enable for:
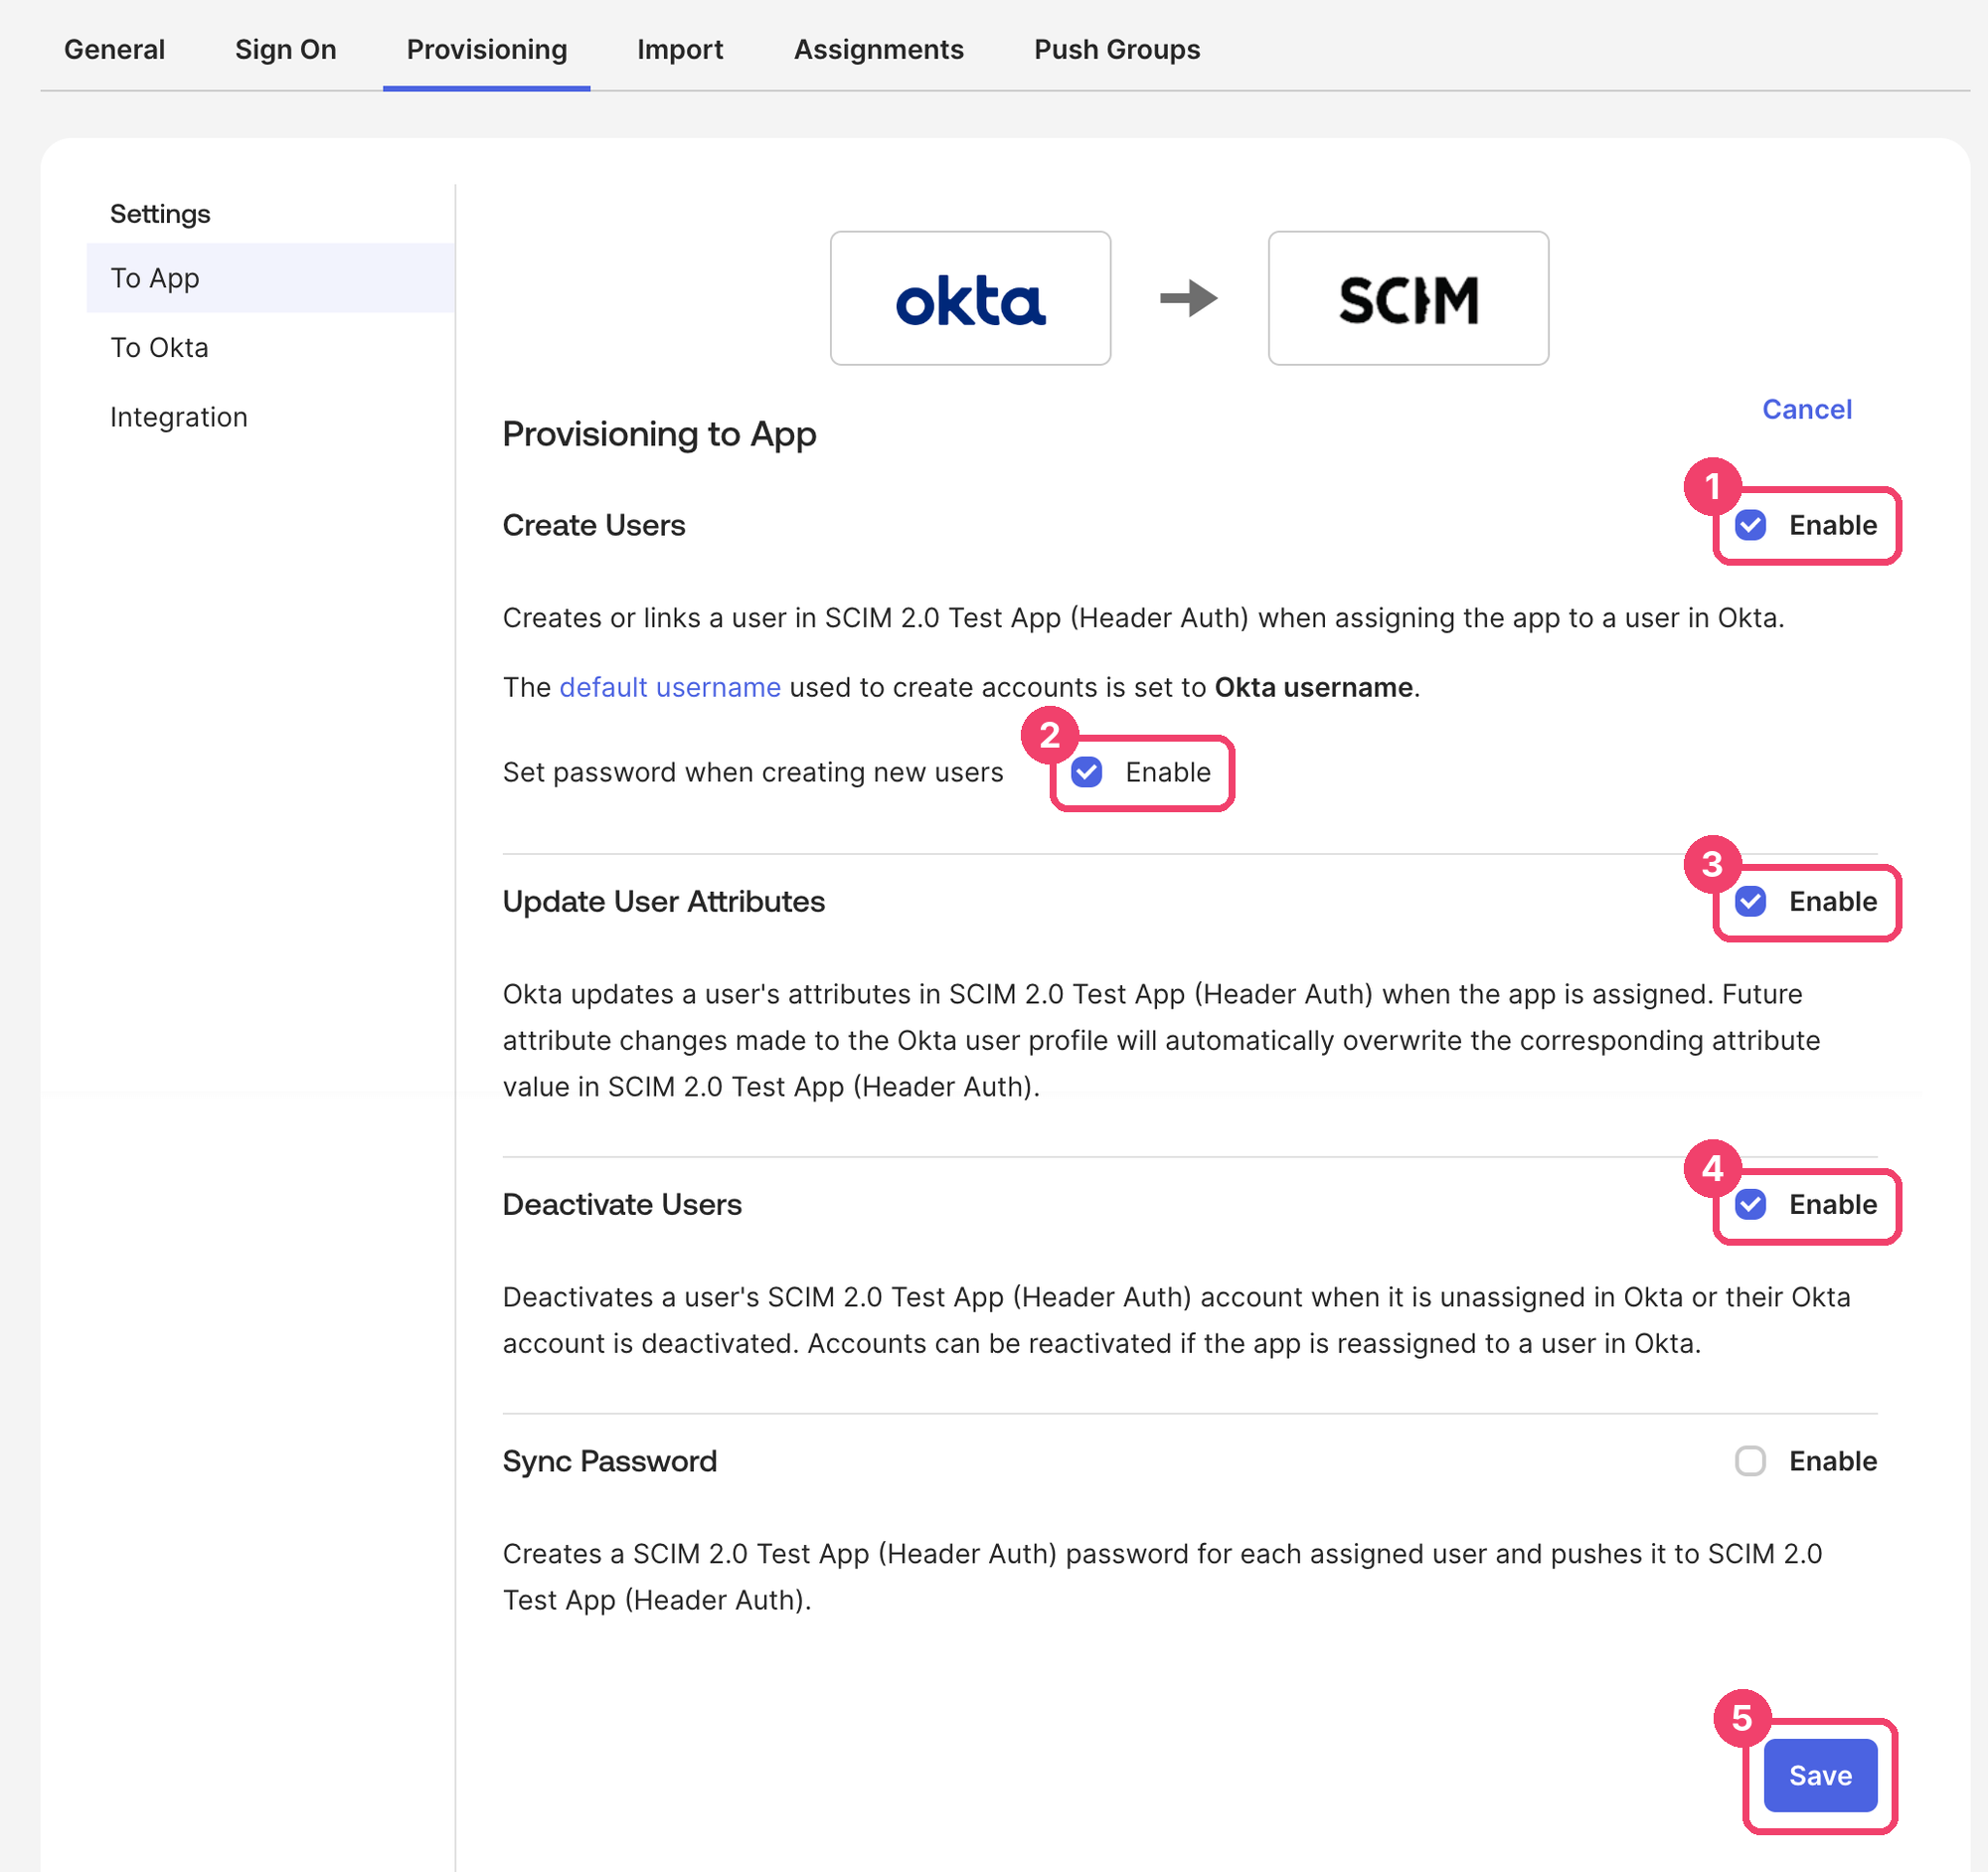
Setting 1 Create Users 2 Set password when creating new users 3 Update User Attributes 4 Deactivate Users Leave Sync Password off.
-
Click Save (5).
-
Scroll down to Attribute Mappings and check that Given name and Family name are mapped to
user.firstNameanduser.lastName.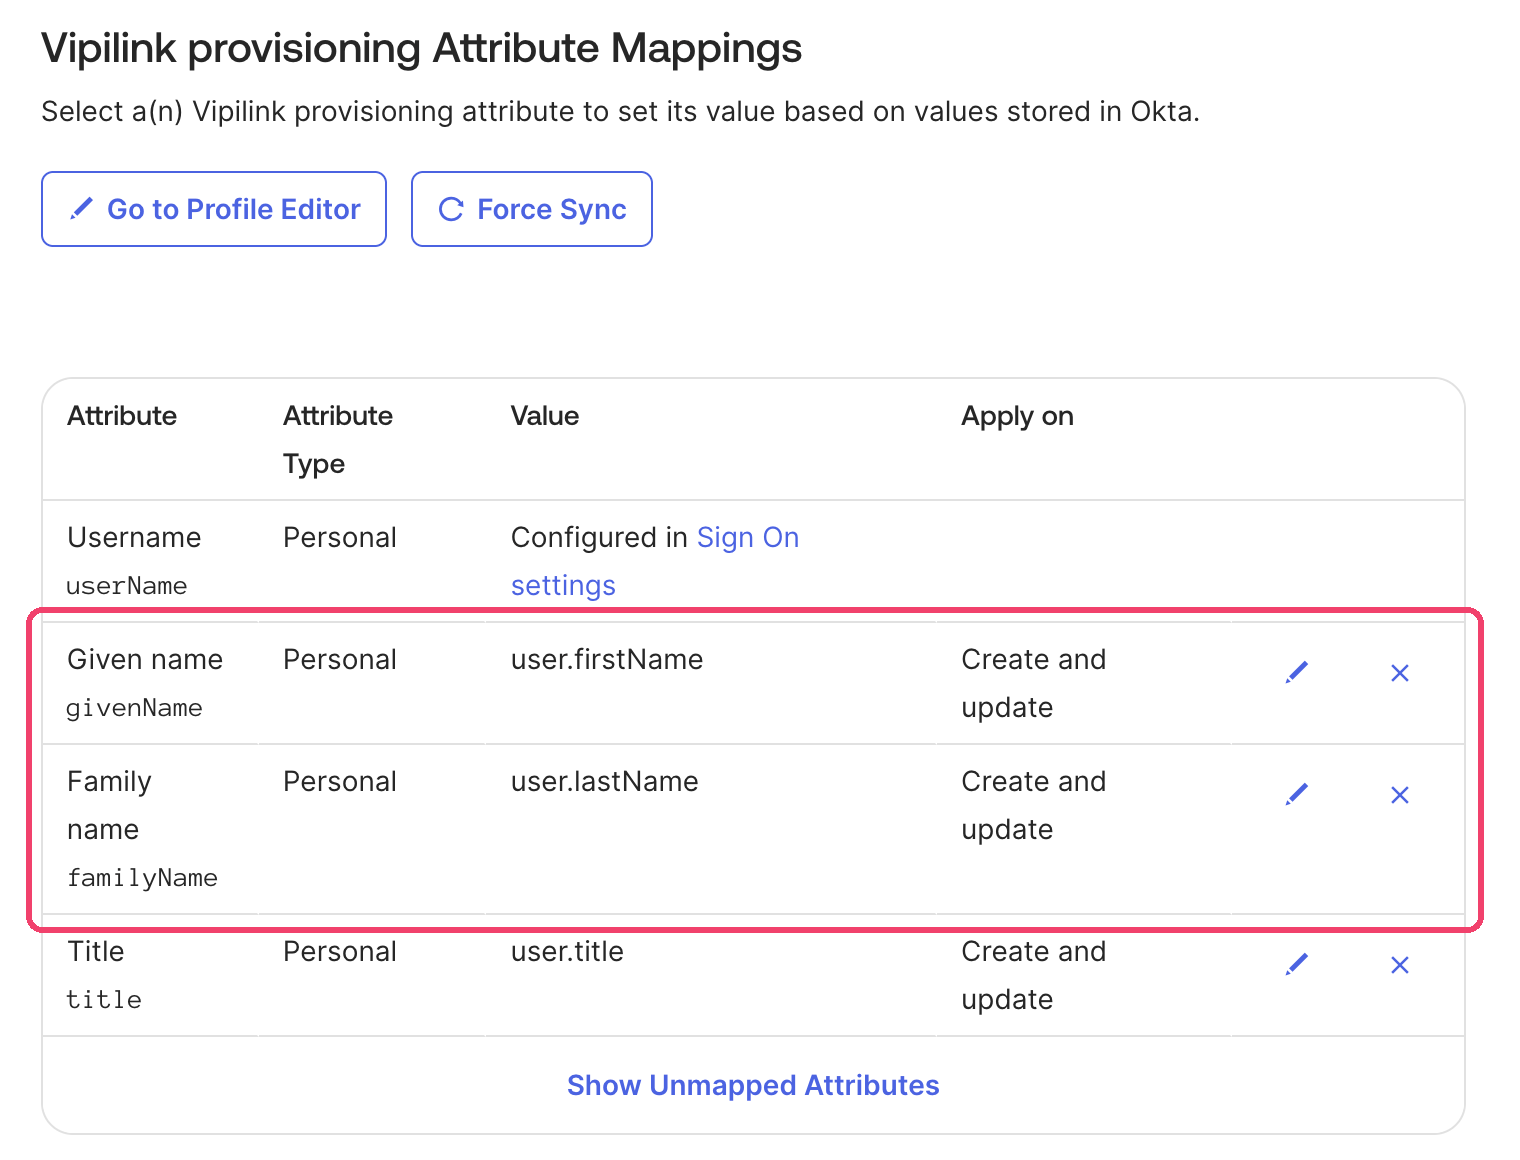
Vipilink doesn't support Push Groups yet, so you can skip that tab.
Assign the group
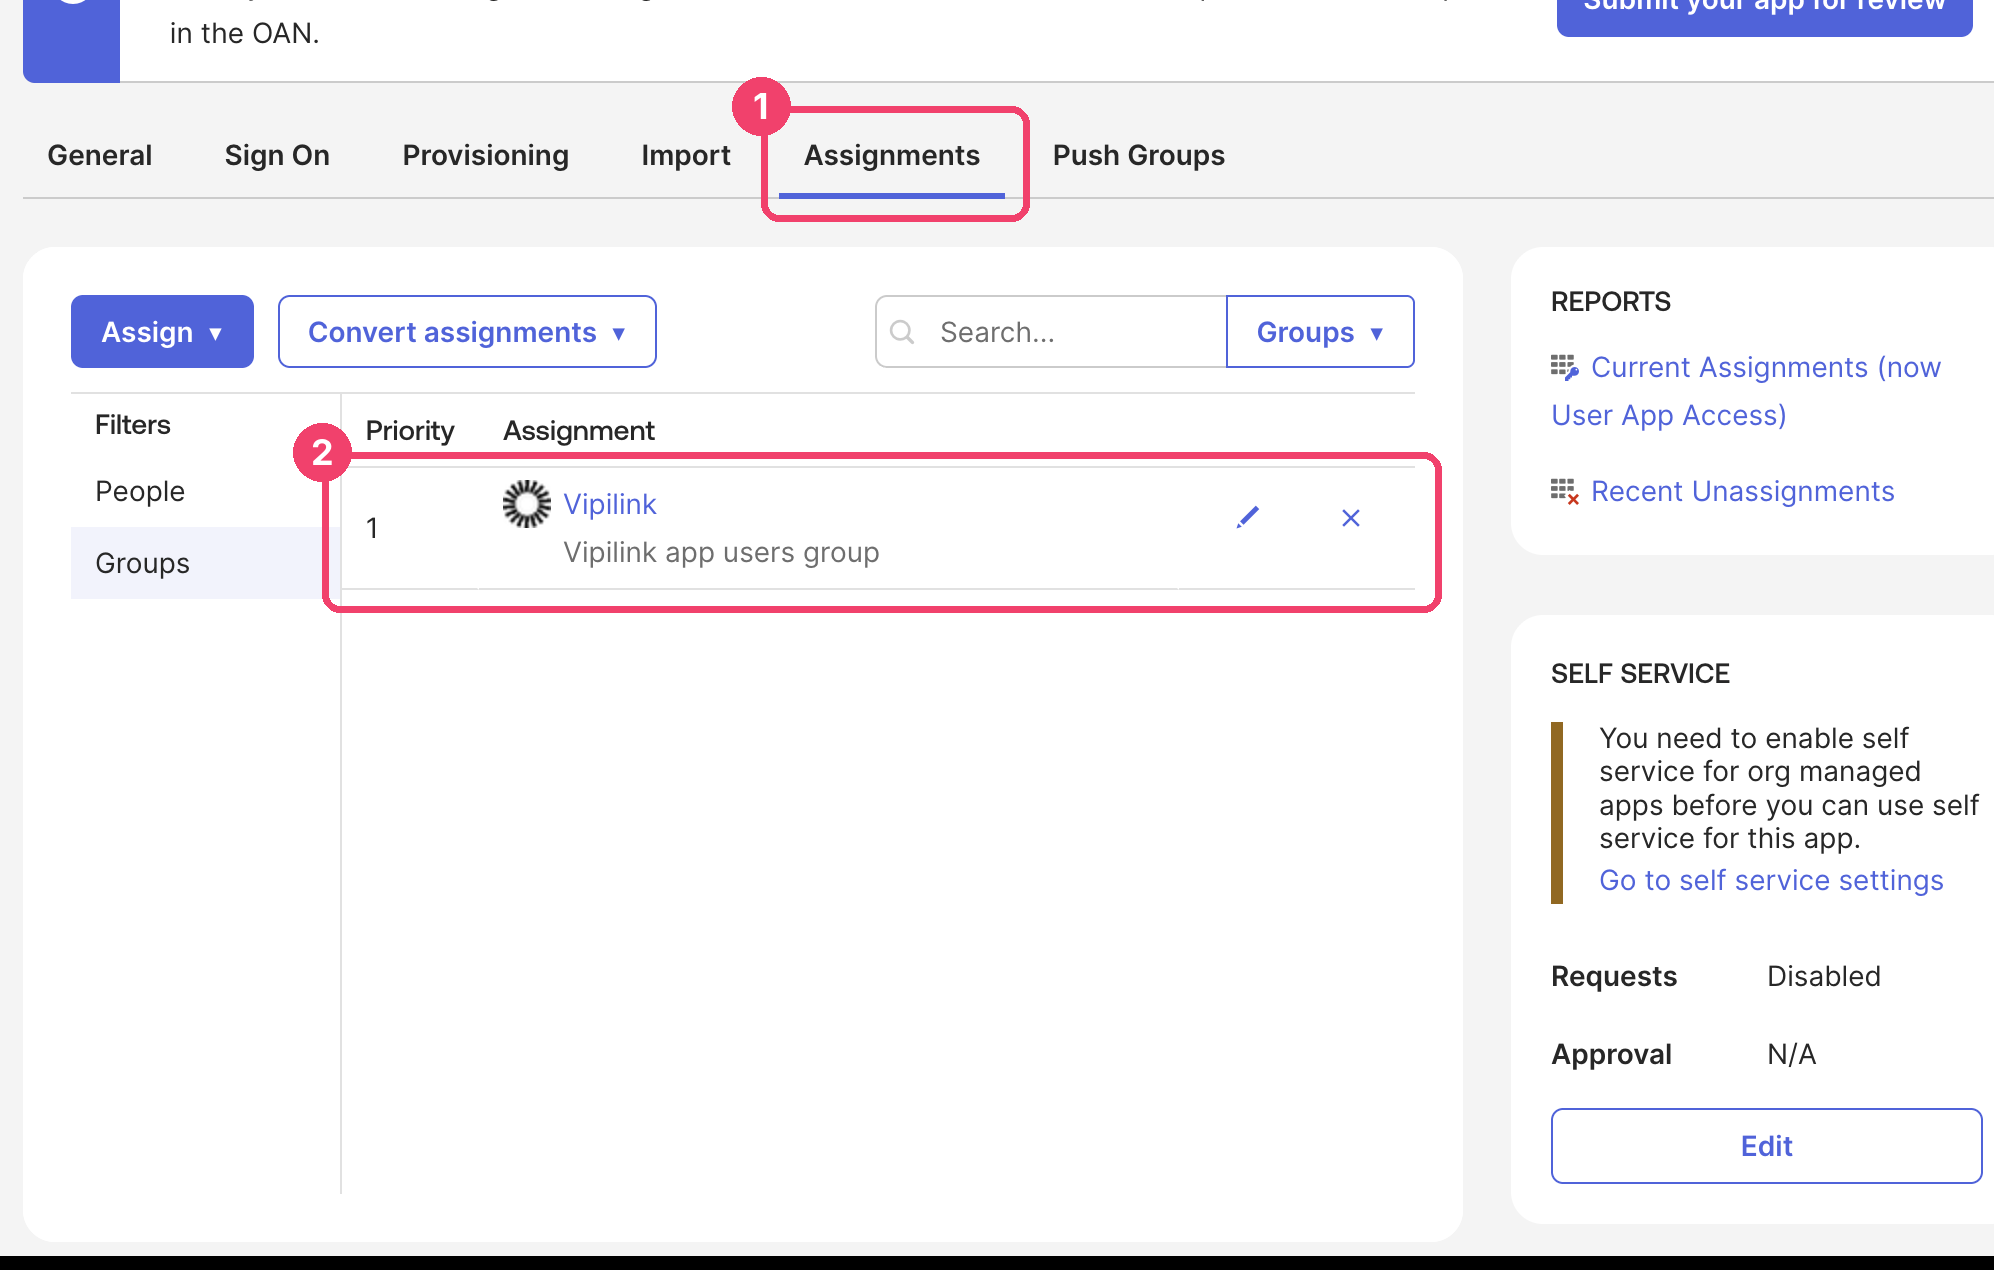
On the Assignments tab (1) of the provisioning app, assign the same group as in Step 4 (2). Okta now creates a Vipilink user for everyone in the group, and keeps them up to date from then on.
Two-factor authentication and access
In the Okta card's ... menu you can also:
- Manage 2FA: ask Okta users for a code from an authenticator app. See Two-factor authentication.
- Manage Access: choose which Vipilink groups can sign in with Okta. See Access groups.