IPSec site-to-site configuration guide with WatchGuard
1. Login to vipilink portal and create network
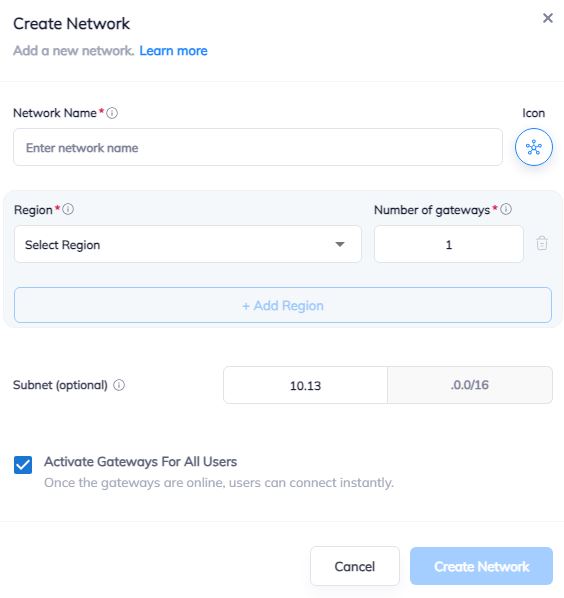
1.1 Go to Networks section and create a new network.
1.2 Define the network name.
1.3 Select the region and gateways number.
1.4 Choose the subnet.
1.5 Activate gateways for all users section is active by default. If you want to disable this function - just remove the mark.
2. Create the IPsec tunnel in the Vipilink portal
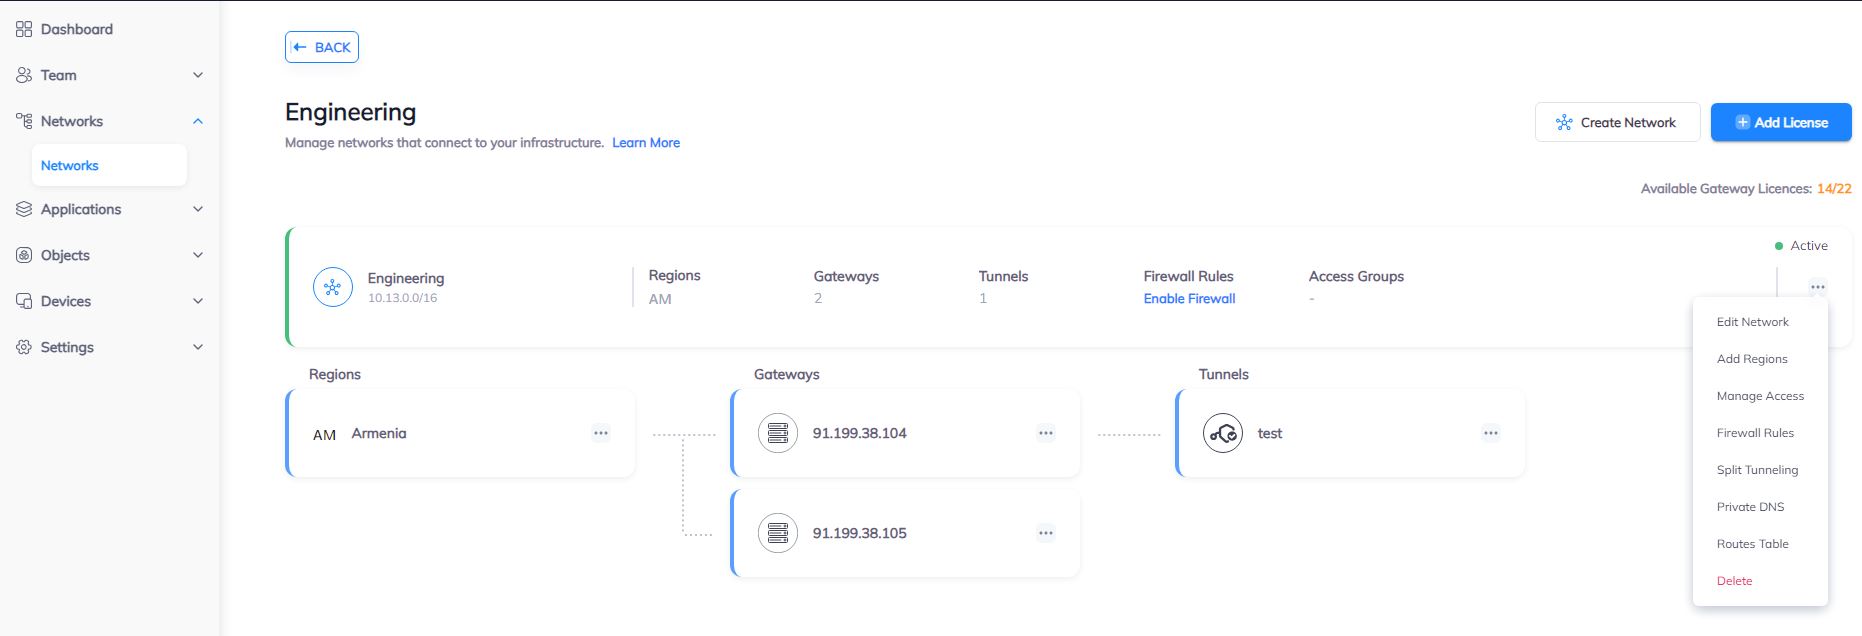
2.1 Go to Networks section and click on the subnet that you created in Step-1.
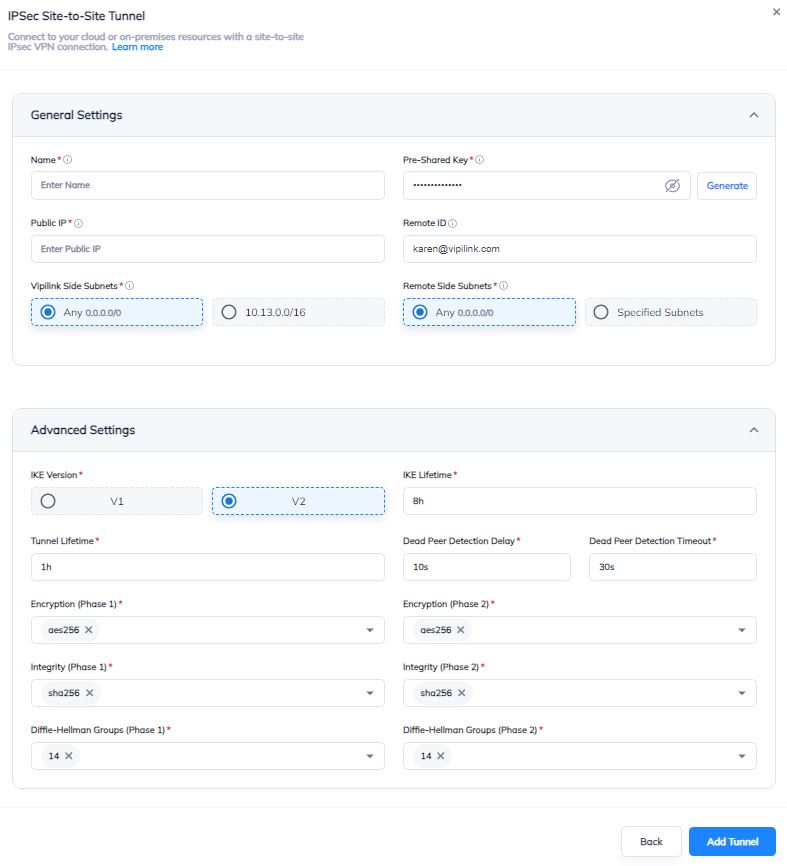
2.2 Click on Gateway and add a Tunnel. Choose IPSec Site-to-Site Tunnel and press to continue.
2.3 Choose between a Single-Tunnel and Dual-Tunnel.
2.4 General Settings Values
-
Name
-
Public IP
-
Vipilink Side Subnets
-
Pre-Shared Key
-
Remote ID
-
Remote Side Subnets
2.5 Advanced Settings Values
-
Ike Version
-
Tunnel Lifetime
-
Encryption (Phase 1)
-
Integrity (Phase 1)
-
Diffie-Helman Groups (Phase 1)
-
Ike Lifetime
-
Dead Peer Detection Delay
-
Dead Peer Detection Timeout
-
Encryption (Phase 2)
-
Integrity (Phase 2)
-
Diffie-Helman Groups (Phase 2)
2.6 You can also manage a Network, Regions, Access, Firewall Rules, Routes Table, enable Split Tunneling and Private DNS.
3. Create the IPsec tunnel on WatchGuard
3.1 Log in to WatchGuard Fireware Web UI and navigate to VPN/BOVPN Virtual Interfaces to add a new interface.
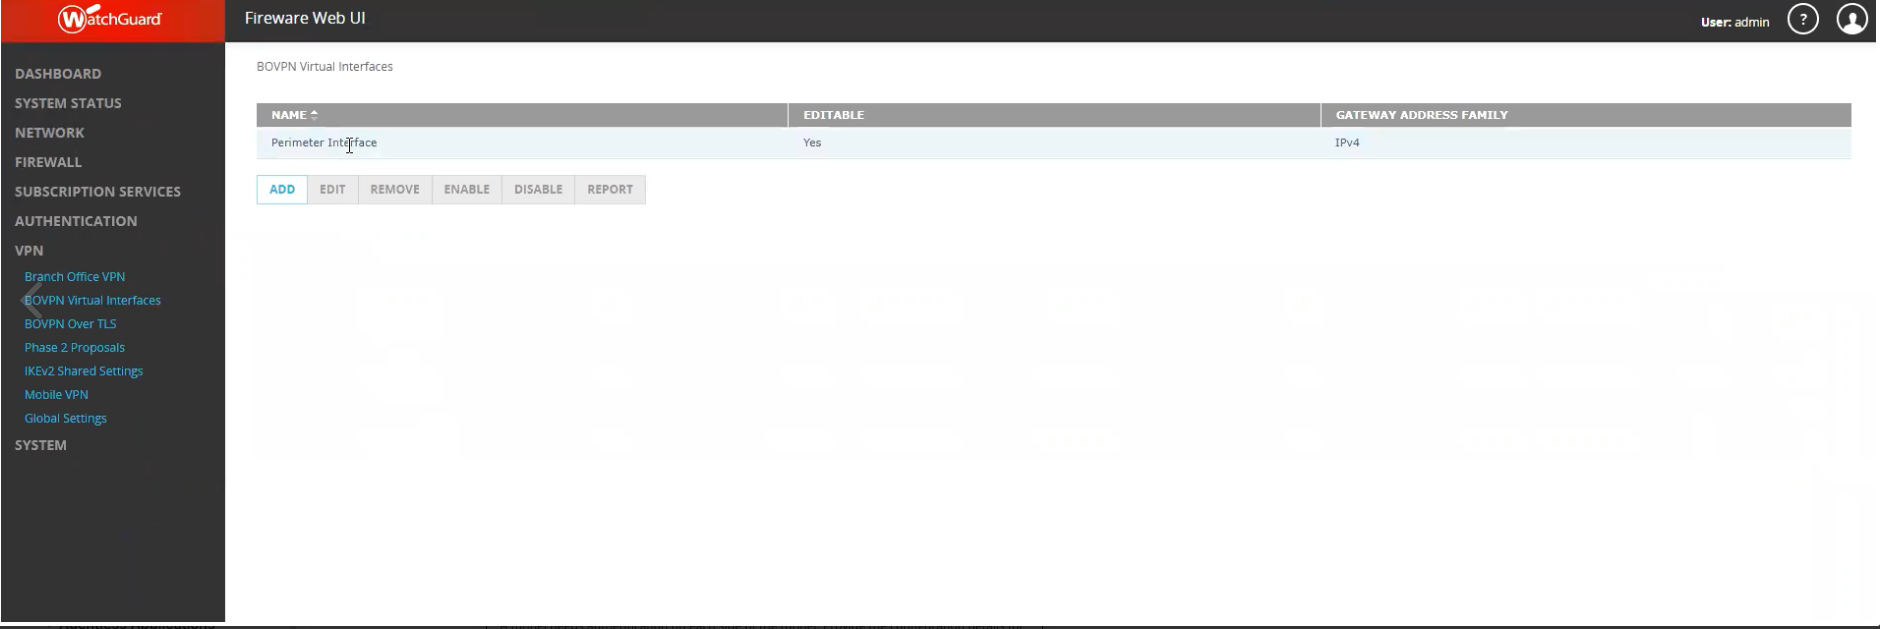
3.2 Add a name to virtual interface and under Remote Endpoint Type select Cloud VPN or Third-Party Gateway.
3.3 Under Gateway Address Family select IPv4 Addresses.
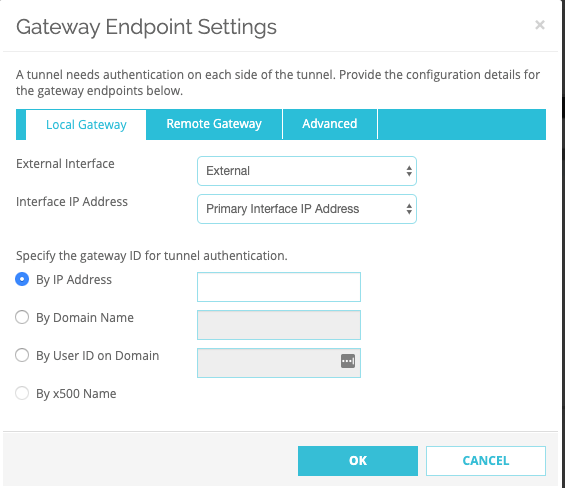
3.4 Gateway Endpoint Settings Values are
Local Gateway
-
External Interface - External
-
Interface IP Address - Primary Interface IP Address
-
Specify the gateway ID for tunnel authentication - By IP Address
Remote Gateway
- Select Static IP Address - enter the Vipilink Gateway IP Address
- By IP Address - enter the Vipilink Gateway IP Address
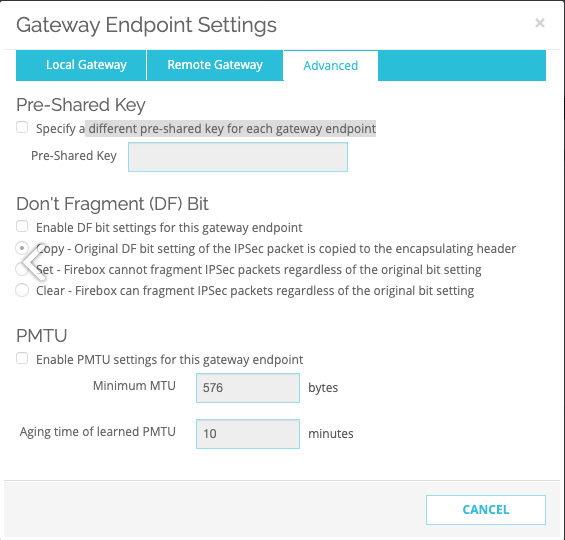
Advanced
- Specify a different pre-shared key for each gateway endpoint - marked
- Pre-Shared Key - enter your PSK
3.5 Phase 1 Settings values are
-
Version - IKEv2
-
Mode - Main
-
NAT Traversal - Check
-
Keep-alive interval - 20 seconds
-
IKE Keep-alive - Check
-
Message Interval - 30 seconds
-
Max failures - 5
-
Dead Peer Detection (RFC3706) - Check
-
Traffic idle timeout - 20 seconds
-
Max retries - 5
3.6 Go to Transform Settings and select Add. Values are
-
Authentication - SHA2-256
-
Encryption - AES(256-bit)
-
SA Life - 8 hours
-
Key Group - Diffie-Hellman Group 14
4.1 Go to VPN/BOVPN Virtual Interfaces. Click the VPN Routes and add a new route.
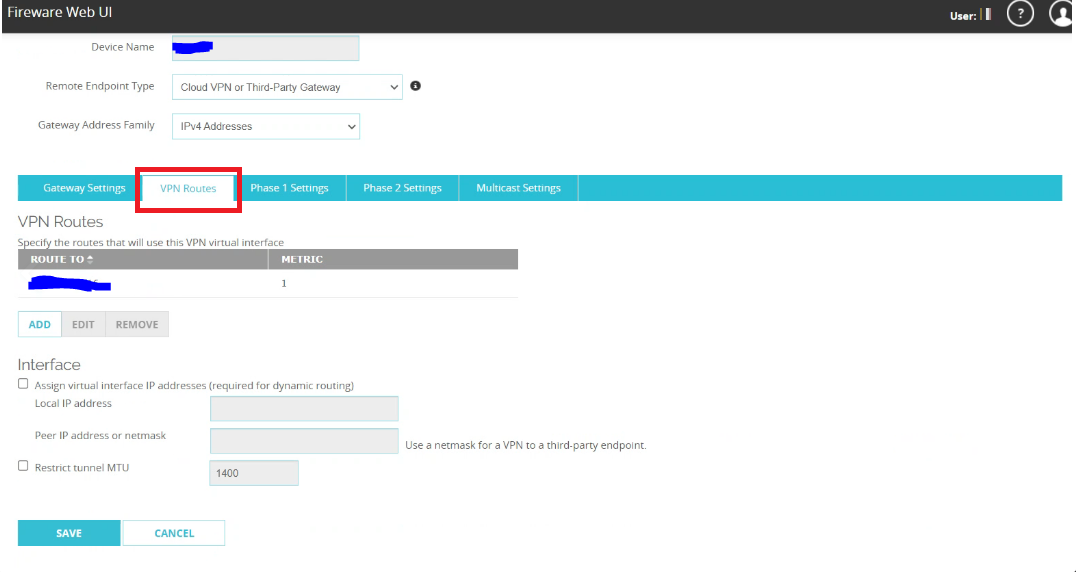
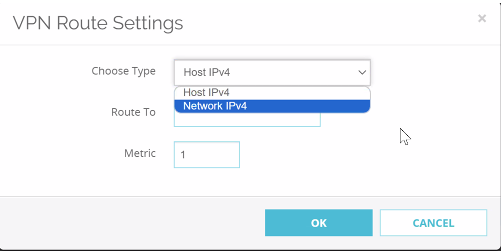
4.2 VPN Route Settings values are
-
Choose Type - Network IPv4
-
Route To - Vipilink Local Subnet
-
Metric - 1
5.1 Go to VPN/BOVPN Virtual Interfaces/Phase 2 Settings and define the values
-
Enable Perfect Forward Secrecy - check
-
Key Group - Diffie-Helman Group 14
-
IPSec Proposals - ESP-AES256-SHA256
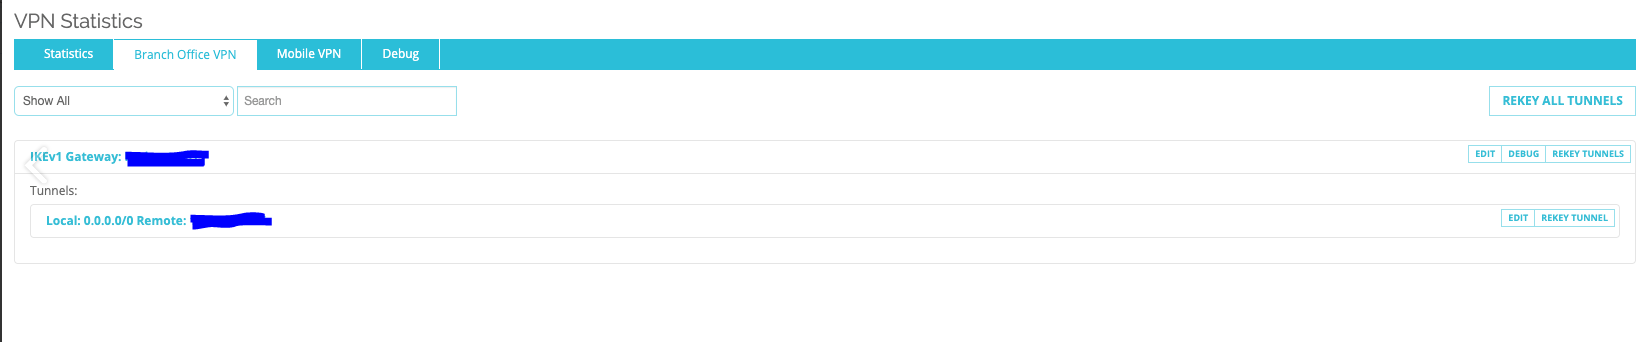
6.1 To check the tunnel status go to System Status/VPN Statistics/Branch Office VPN.
7.1 Verify connectivity between local and remote networks.
-
Use tools like ping or traceroute to check the connection
-
Ensure that resources on the remote network (e.g., shared folders, servers) are accessible from the local network.