IPSec site-to-site configuration guide with Ubiquiti UniFi Security Gateway (USG)
1. Login to vipilink portal and create network
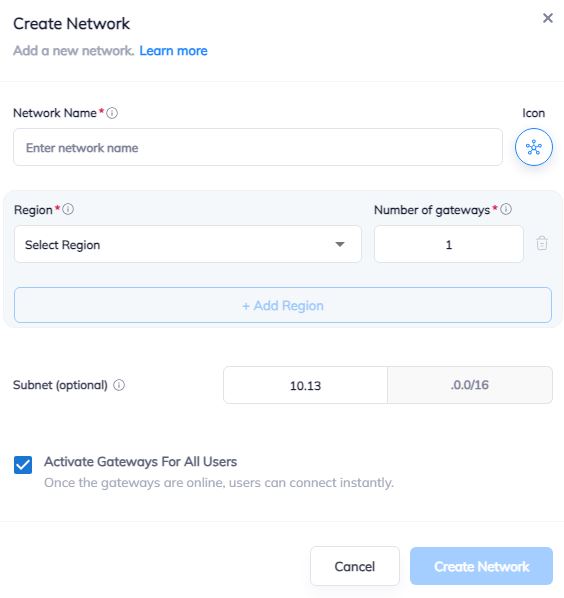
1.1 Go to Networks section and create a new network.
1.2 Define the network name.
1.3 Select the region and gateways number.
1.4 Choose the subnet.
1.5 Activate gateways for all users section is active by default. If you want to disable this function - just remove the mark.
2. Create the IPsec tunnel in the Vipilink portal
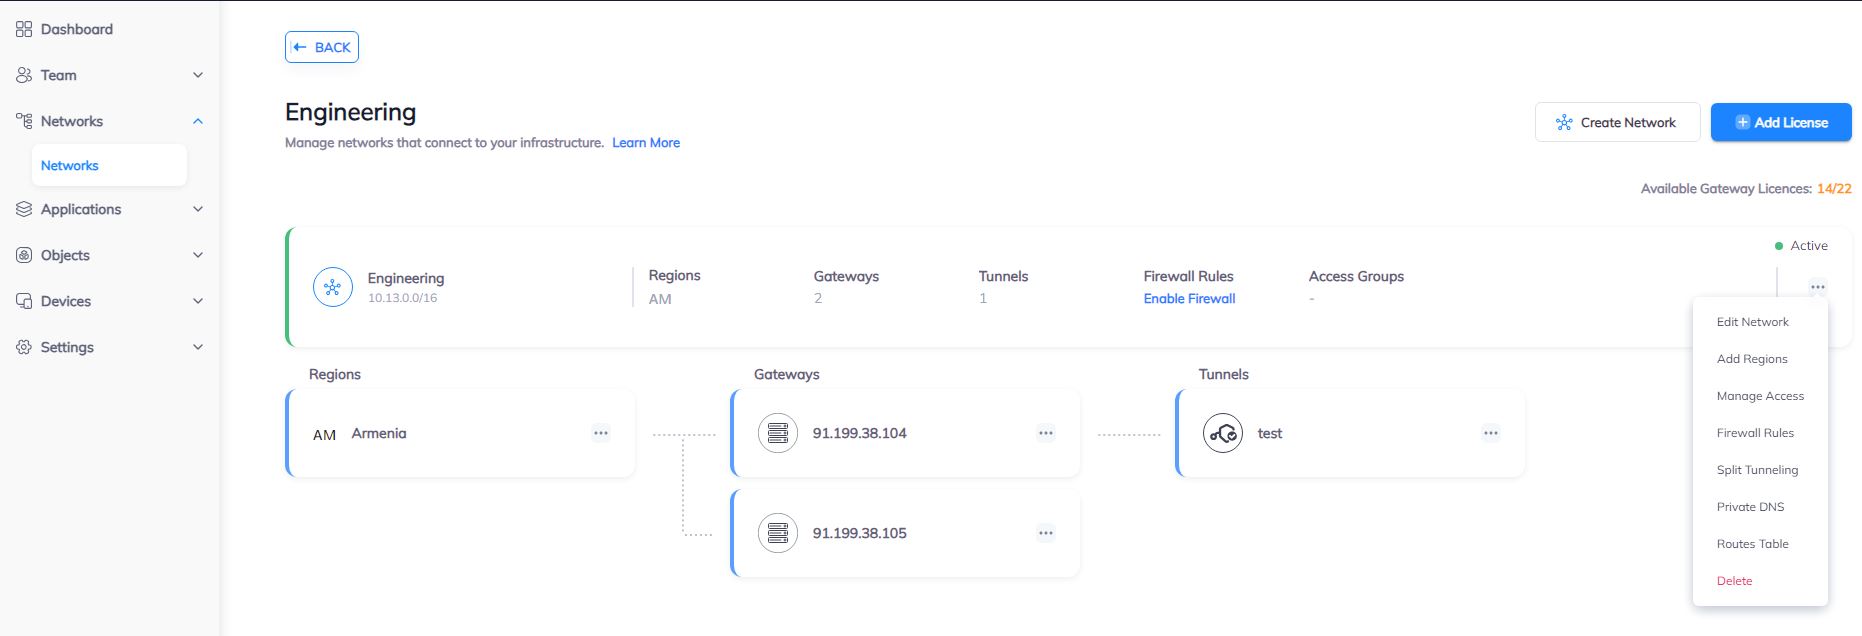
2.1 Go to Networks section and click on the subnet that you created in Step-1.
2.2 Click on Gateway and add a Tunnel. Choose IPSec Site-to-Site Tunnel and press to continue.
2.3 Choose between a Single-Tunnel and Dual-Tunnel.
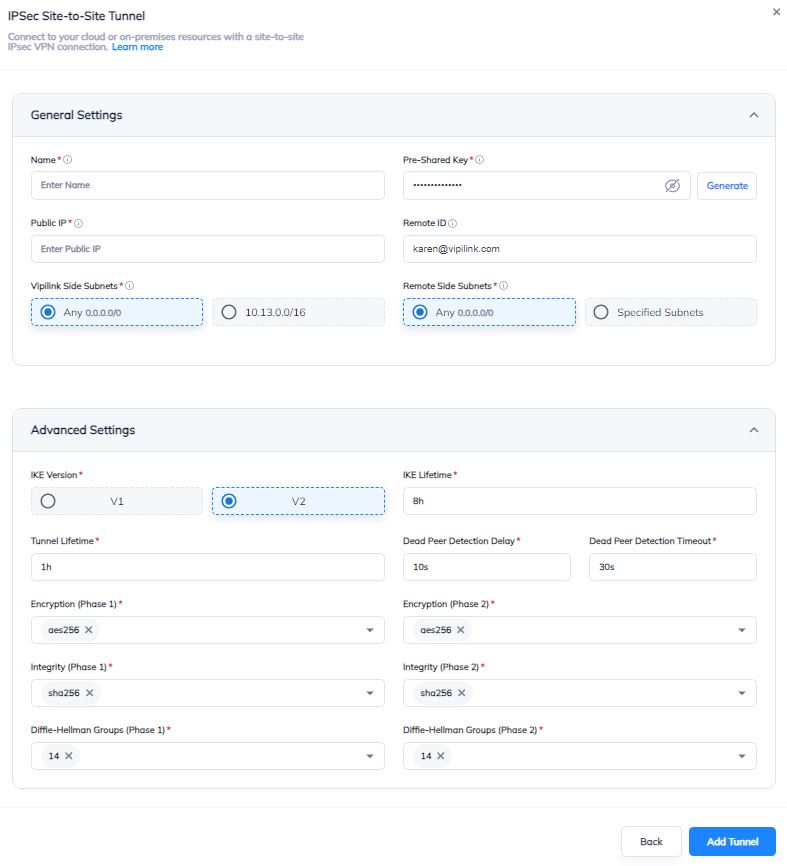
2.4 General Settings Values
-
Name
-
Public IP
-
Vipilink Side Subnets
-
Pre-Shared Key
-
Remote ID
-
Remote Side Subnets
2.5 Advanced Settings Values
-
Ike Version
-
Tunnel Lifetime
-
Encryption (Phase 1)
-
Integrity (Phase 1)
-
Diffie-Helman Groups (Phase 1)
-
Ike Lifetime
-
Dead Peer Detection Delay
-
Dead Peer Detection Timeout
-
Encryption (Phase 2)
-
Integrity (Phase 2)
-
Diffie-Helman Groups (Phase 2)
2.6 You can also manage a Network, Regions, Access, Firewall Rules, Routes Table, enable Split Tunneling and Private DNS.
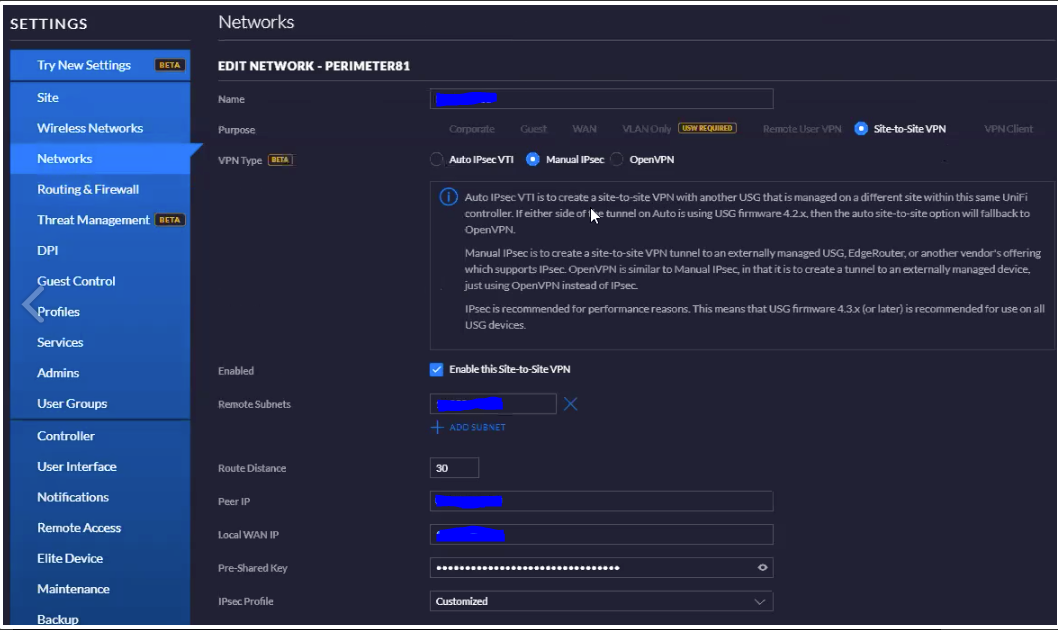
3. Create the IPsec tunnel on UniFi Security Gateway
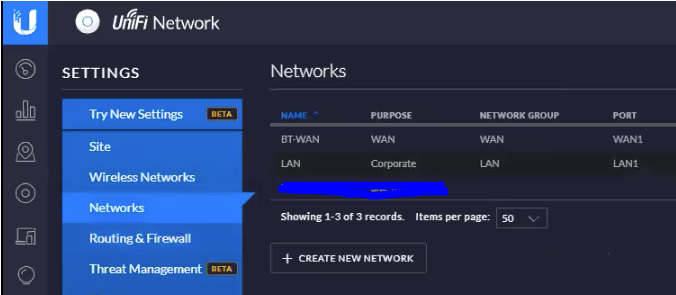
3.1 Log in to Ubiquiti USG Web Interface and navigate to SETTINGS/Networks/CREATE NEW NETWORK to add a new network.
3.2 Parameters for a new network
-
Name - Define a name for the network
-
Purpose - Site-to-Site VPN
-
VPN Type - Manual IPsec
-
Enabled - Enable this Site-to-Site VPN
-
Remote Subnets - Vipilink local subnet
-
Route Distance - 30
-
Peer IP - Vipilink public IP address
-
Local WAN IP - Ubiquiti USG public IP address
-
Pre-Shared Key - Enter your PSK
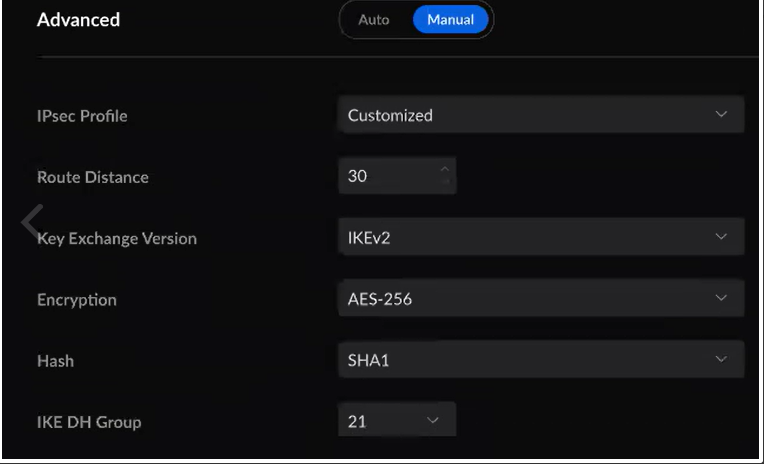
3.3 Parameters in the Advanced section
-
IPsec Profile - Customized
-
Route Distance - 30
-
Key Exchange Version - IKEv2
-
Encryption - AES-256
-
HASH - SHA1
-
IKE DH Group - 21
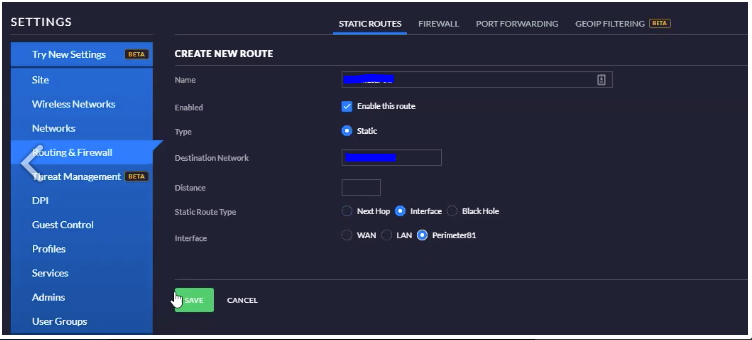
4.1 Navigate to SETTINGS/Routing & Firewall/STATIC ROUTES/CREATE NEW ROUTE and add a new route. The values are as follows
-
Name - Define the name of the route
-
Enabled - Enable this route
-
Type - Static
-
Destination Network - Vipilink local subnet
-
Distance - leave it blank
-
Static Route Type - Interface
-
Interface - Network created in step 3.2 and 3.3
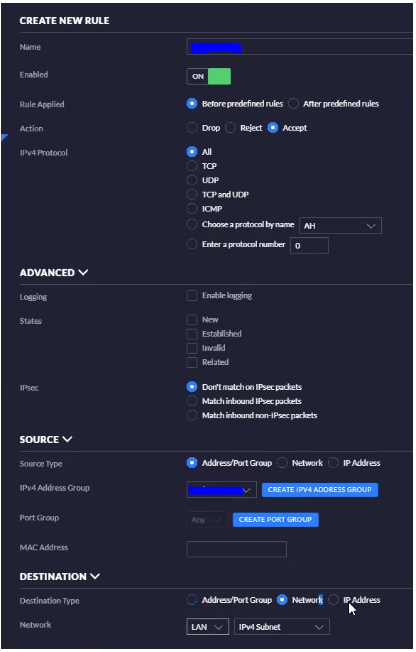
5.1 Create a firewall rule to allow traffic from Vipilink local subnet to the USG LAN. Go to SETTINGS/Routing & Firewall/FIREWALL/CREATE NEW RULE and add a new rule.
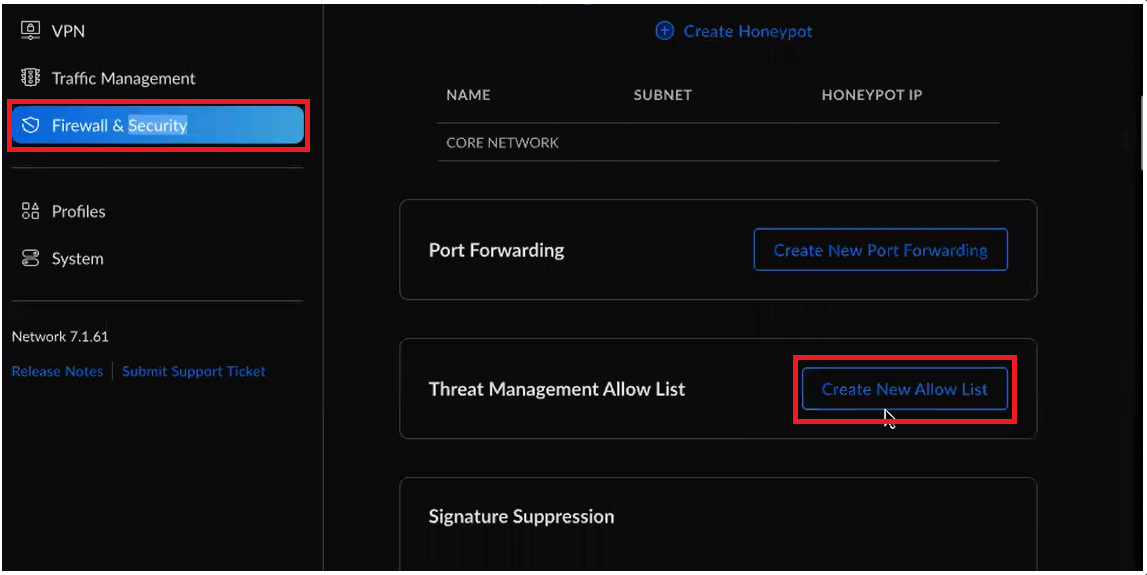
6.1 Navigate to SETTINGS/Firewall & Security/Threat Management Allow List and create an exception within Threat detection system to allow the tunnel to be established with the Vipilink Gateway.
7.1 Verify connectivity between local and remote networks.
-
Use tools like ping or traceroute to check the connection
-
Ensure that resources on the remote network (e.g., shared folders, servers) are accessible from the local network.