IPSec site-to-site configuration guide with pfSense
1. Login to vipilink portal and create network.
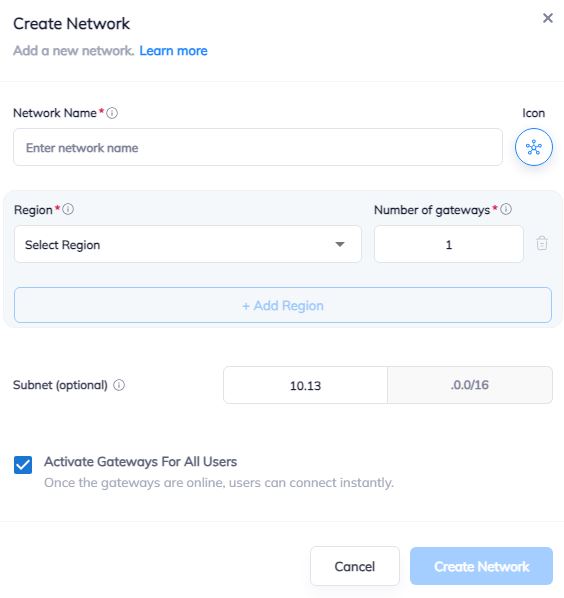
1.1 Go to Networks section and create a new network.
1.2 Define the network name.
1.3 Select the region and gateways number.
1.4 Choose the subnet.
1.5 Activate gateways for all users section is active by default. If you want to disable this function - just remove the mark.
2. Create the IPsec tunnel in the Vipilink portal.
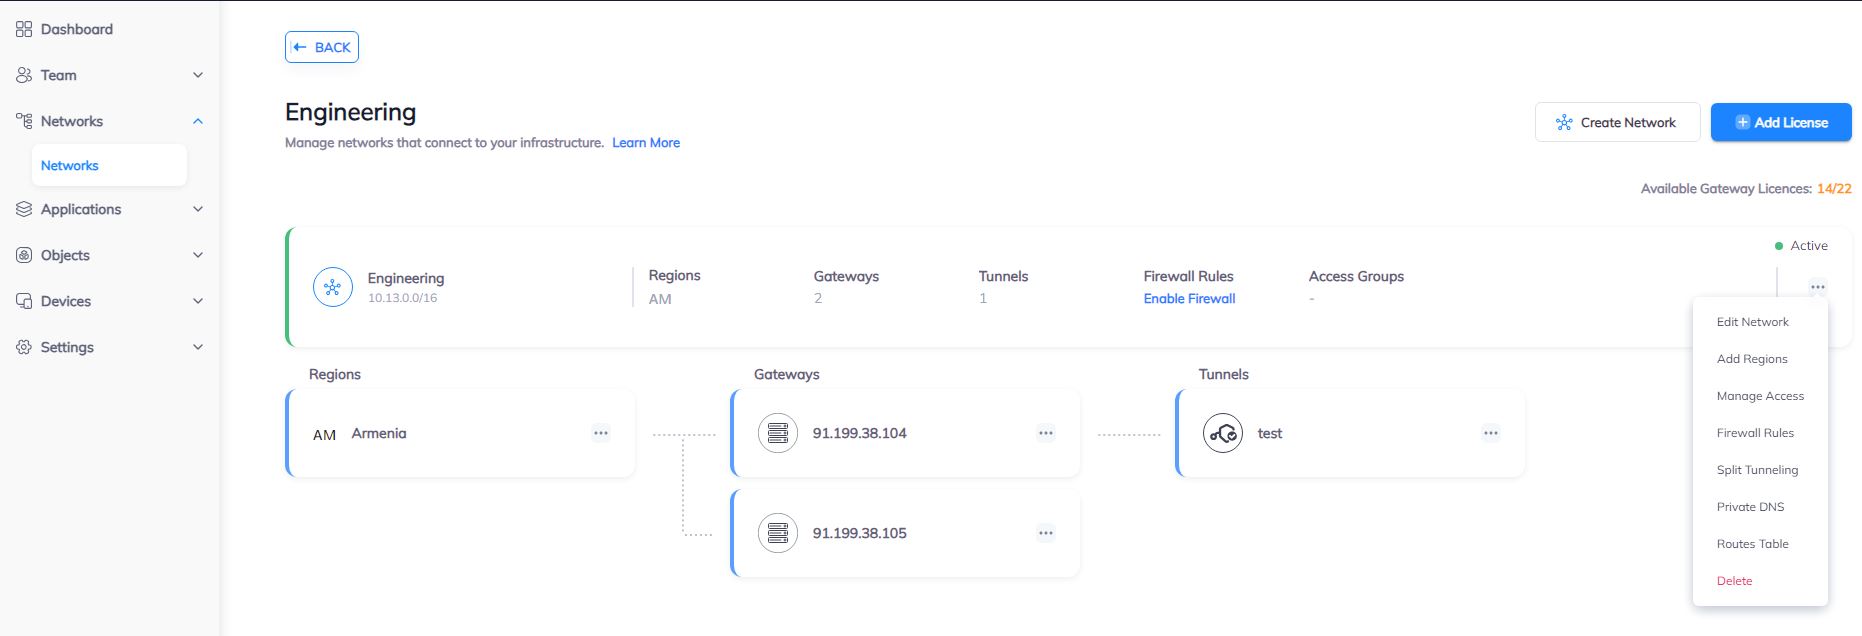
2.1 Go to Networks section and click on the subnet that you created in Step-1.
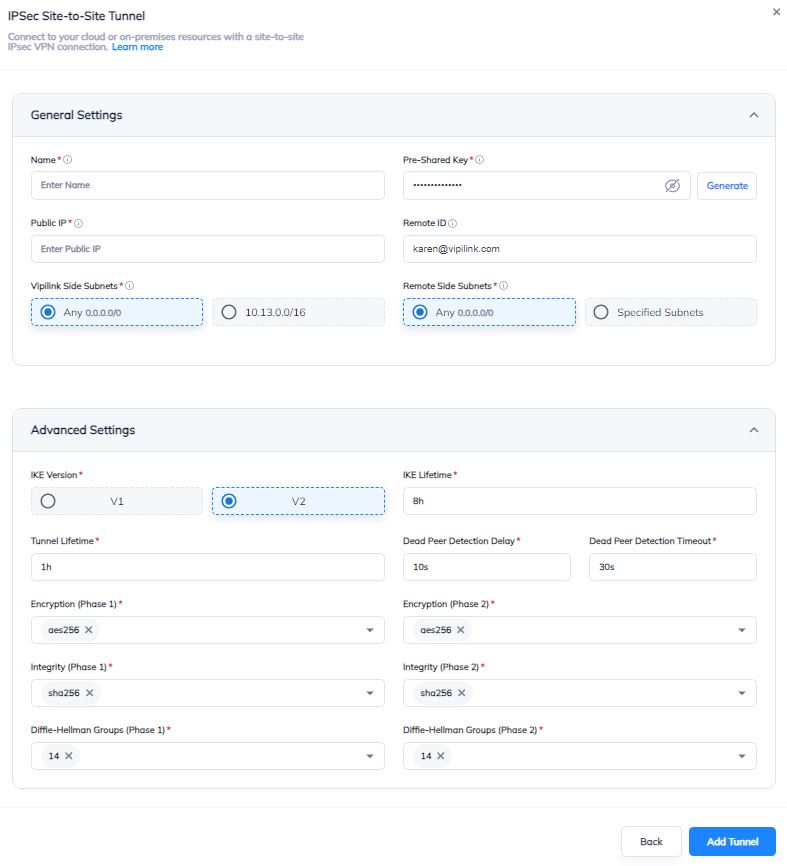
2.2 Click on Gateway and add a Tunnel. Choose IPSec Site-to-Site Tunnel and press to continue.
2.3 Choose between a Single-Tunnel and Dual-Tunnel.
2.4 General Settings Values
-
Name
-
Public IP
-
Vipilink Side Subnets
-
Pre-Shared Key
-
Remote ID
-
Remote Side Subnets
2.5 Advanced Settings Values
-
Ike Version
-
Tunnel Lifetime
-
Encryption (Phase 1)
-
Integrity (Phase 1)
-
Diffie-Helman Groups (Phase 1)
-
Ike Lifetime
-
Dead Peer Detection Delay
-
Dead Peer Detection Timeout
-
Encryption (Phase 2)
-
Integrity (Phase 2)
-
Diffie-Helman Groups (Phase 2)
2.6 You can also manage a Network, Regions, Access, Firewall Rules, Routes Table, enable Split Tunneling and Private DNS.
3. Create the IPsec tunnel on pfSense.
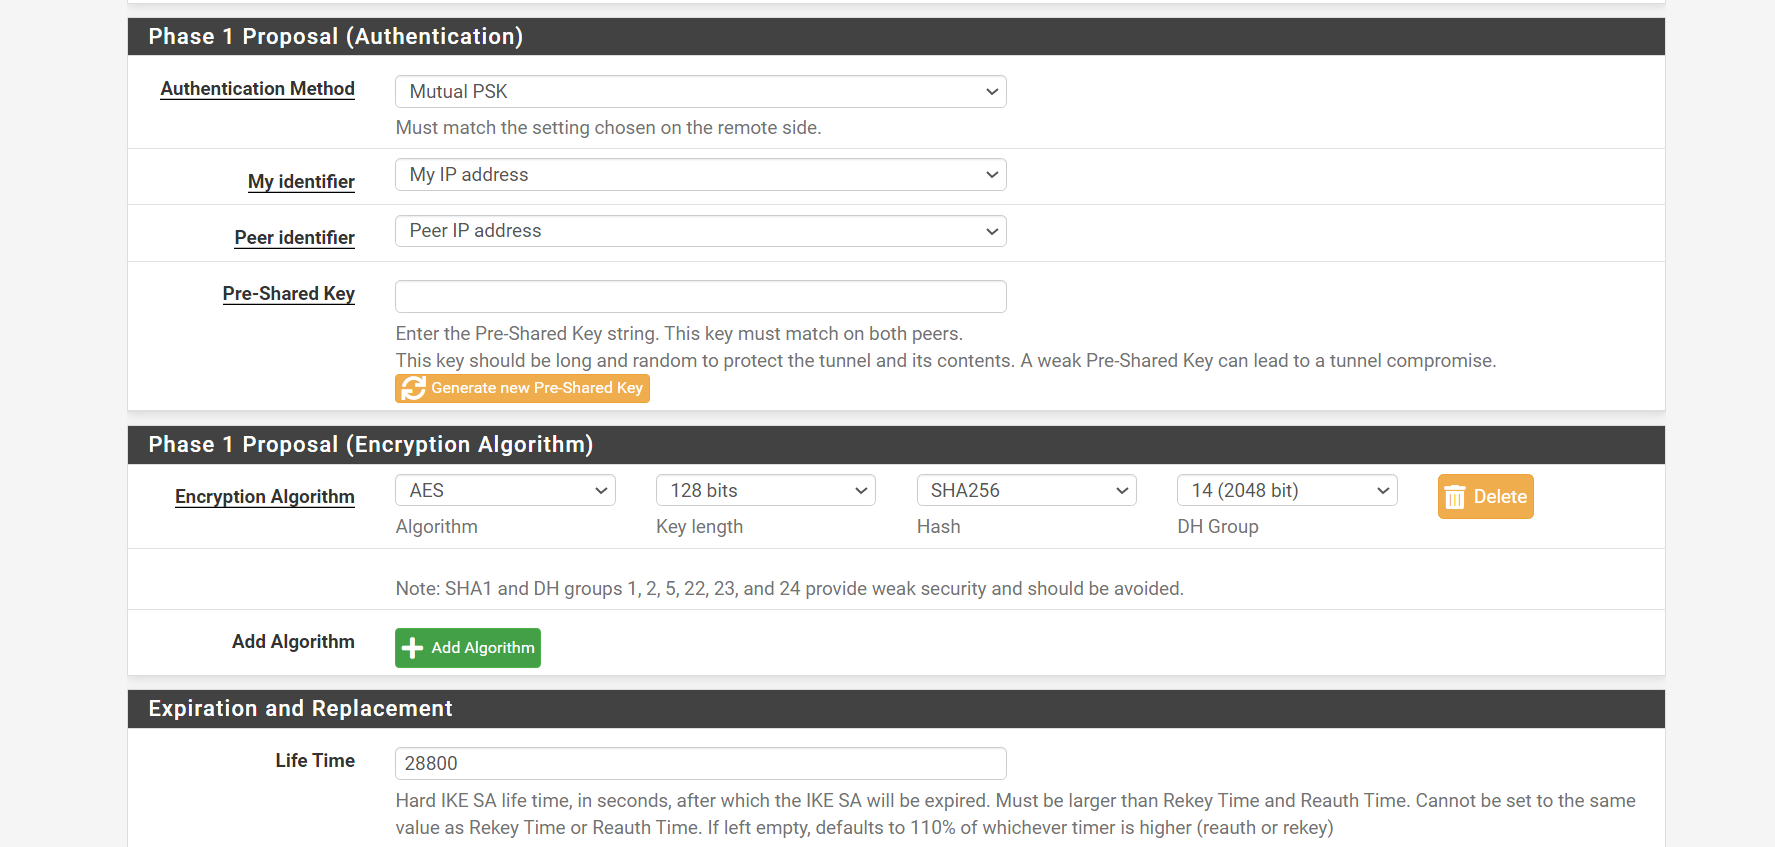
3.1 Log in to pfSense Web Interface and navigate to VPN/IPsec. Add P1 tunnel.
3.2 Phase 1 Values
-
Description
-
Key Exchange Version
-
Internet Protocol
-
Interface
-
Remote Gateway
-
Authentication Method
-
My identifier
-
Peer identifier
-
Pre-Shared Key
-
Encryption Algorithm
-
Life Time
-
Delay
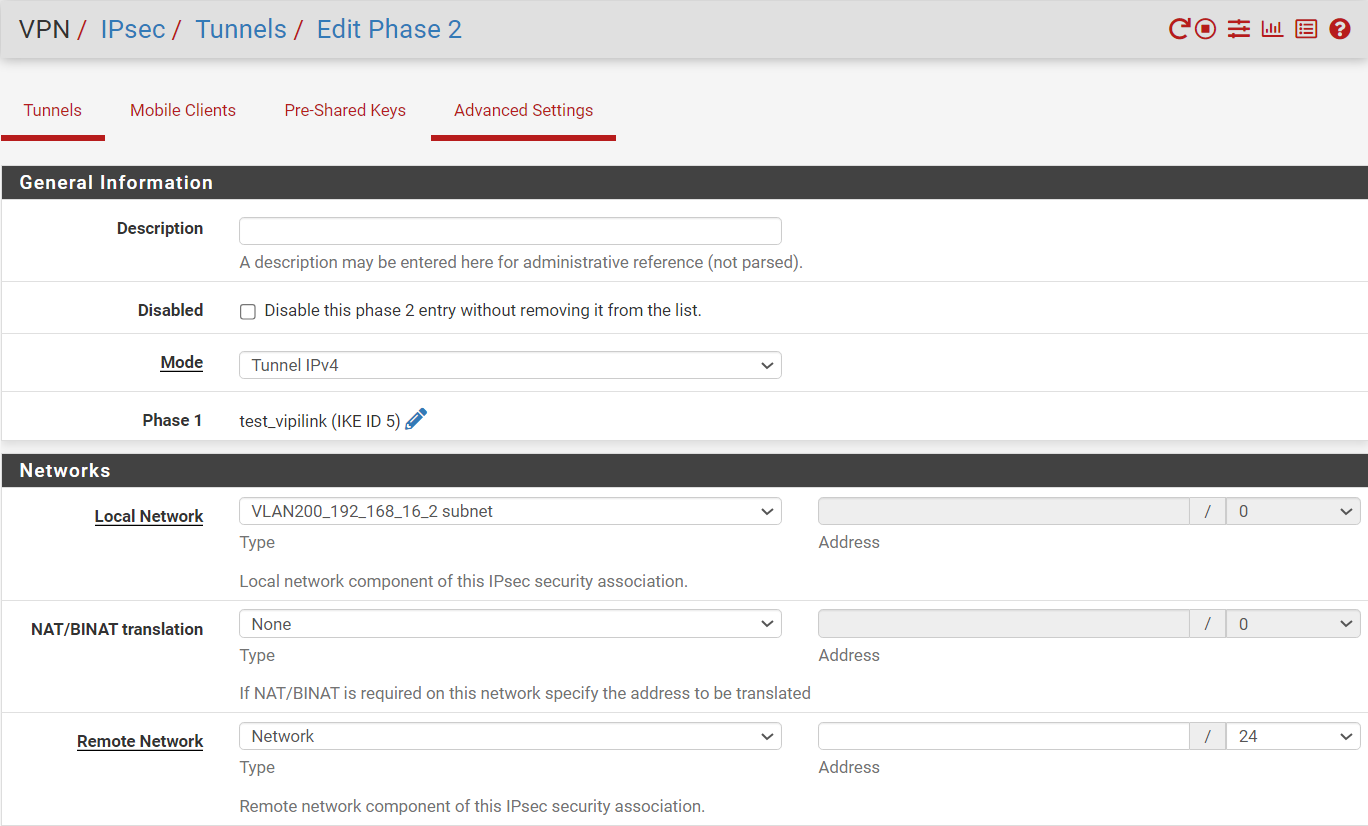
3.2 Phase 2 Values
-
Description
-
Mode
-
NAT/BINAT translation
-
Remote Network
-
Protocol
-
Encryption Algorithms
-
Hash Algorithms
-
PFS key group
-
Life Time
4. Check the tunnel status.
4.1 On pfSense webpage navigate to Status/IPsec. check the status of the phase 1 and phase2 tunnels.
4.2 Test connectivity using ping or traceroute utilities.