IPSec site-to-site configuration guide with Check Point
1. Login to vipilink portal and create network
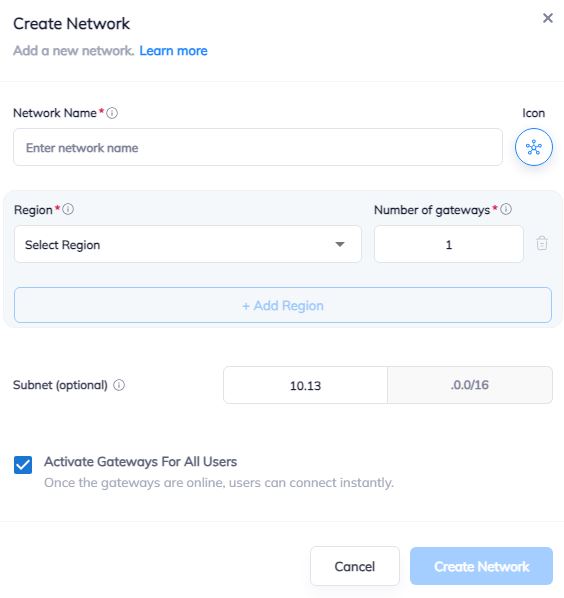
1.1 Go to Networks section and create a new network.
1.2 Define the network name.
1.3 Select the region and gateways number.
1.4 Choose the subnet.
1.5 Activate gateways for all users section is active by default. If you want to disable this function - just remove the mark.
2. Create the IPsec tunnel in the Vipilink portal
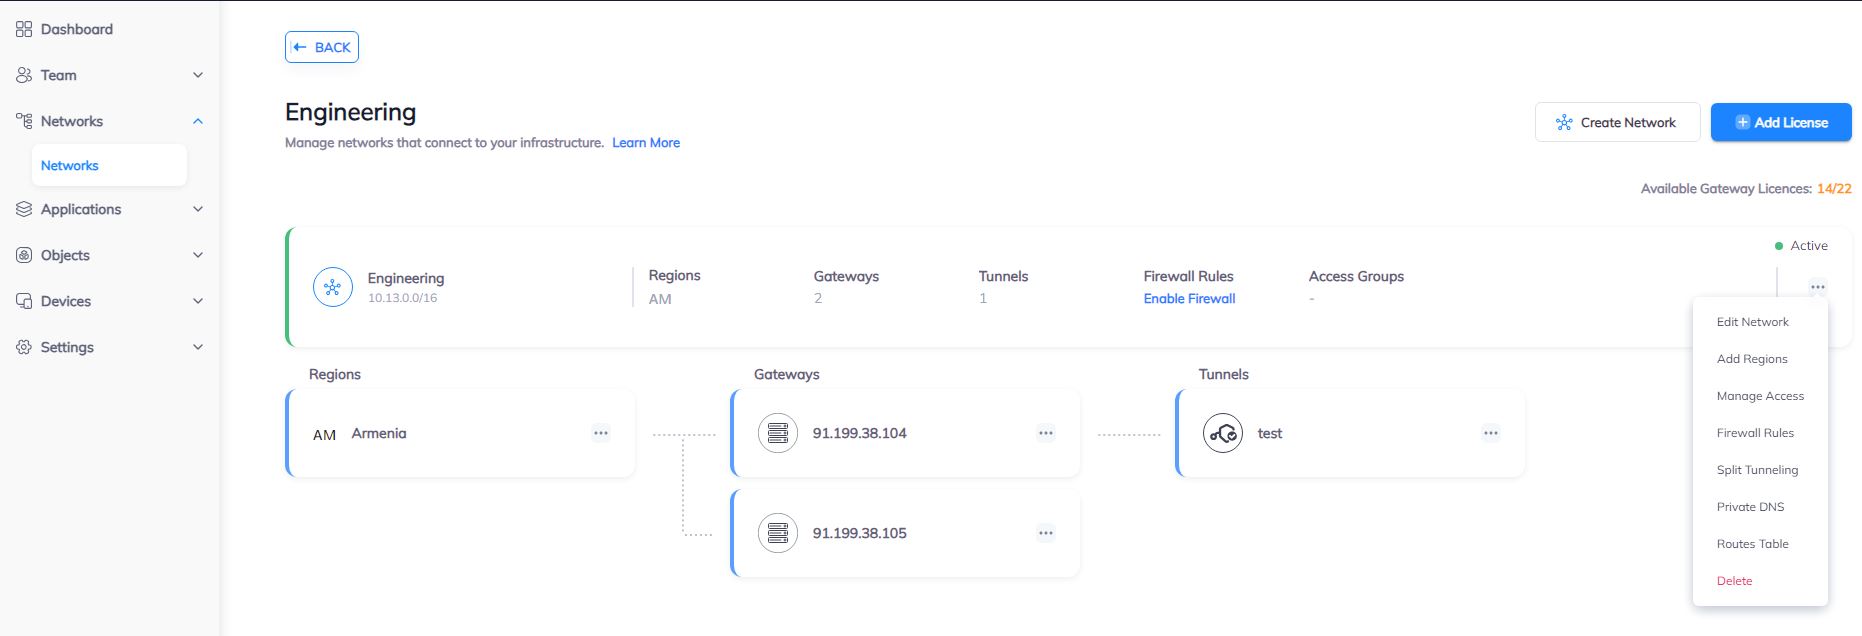
2.1 Go to Networks section and click on the subnet that you created in Step-1.
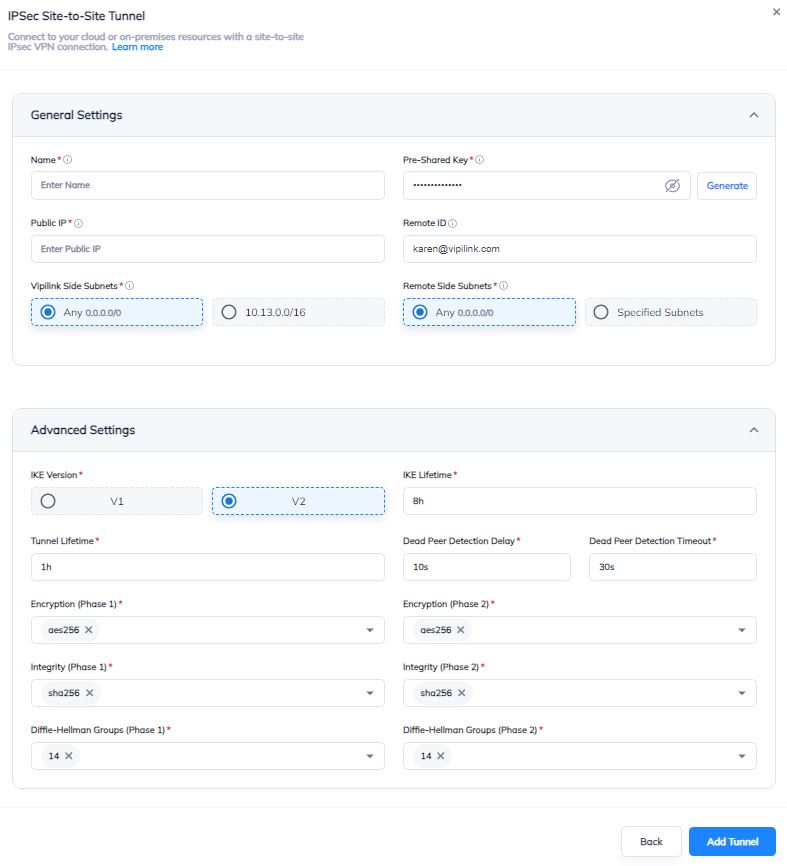
2.2 Click on Gateway and add a Tunnel. Choose IPSec Site-to-Site Tunnel and press to continue.
2.3 Choose between a Single-Tunnel and Dual-Tunnel.
2.4 General Settings Values
-
Name
-
Public IP
-
Vipilink Side Subnets
-
Pre-Shared Key
-
Remote ID
-
Remote Side Subnets
2.5 Advanced Settings Values
-
Ike Version
-
Tunnel Lifetime
-
Encryption (Phase 1)
-
Integrity (Phase 1)
-
Diffie-Helman Groups (Phase 1)
-
Ike Lifetime
-
Dead Peer Detection Delay
-
Dead Peer Detection Timeout
-
Encryption (Phase 2)
-
Integrity (Phase 2)
-
Diffie-Helman Groups (Phase 2)
2.6 You can also manage a Network, Regions, Access, Firewall Rules, Routes Table, enable Split Tunneling and Private DNS.
3. Create the IPsec tunnel on Check Point
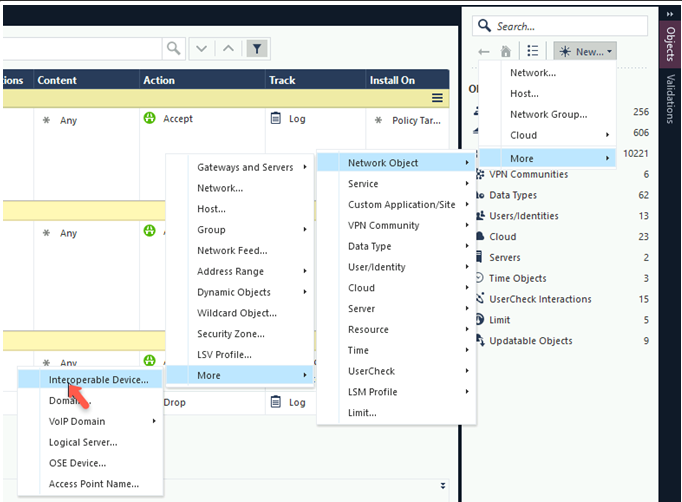
3.1 Log in to SmartConsole and navigate to SECURITY POLICIES. Click on New and select More/Network Object/More/Interoperable Device
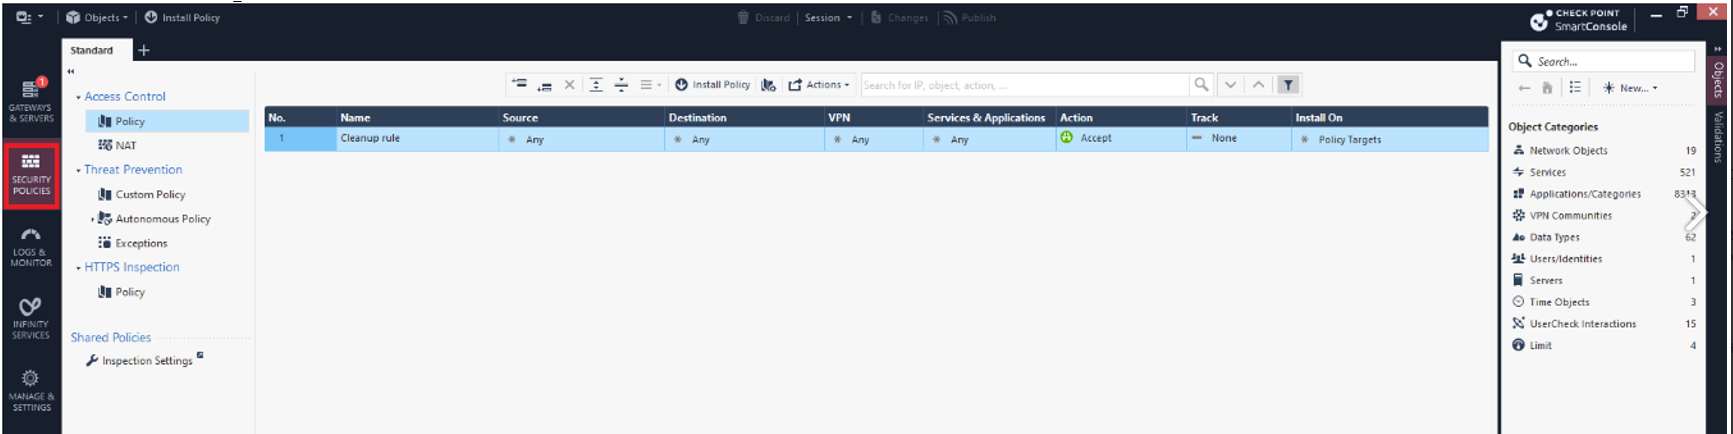
3.2 You will see Interoperable Device window.
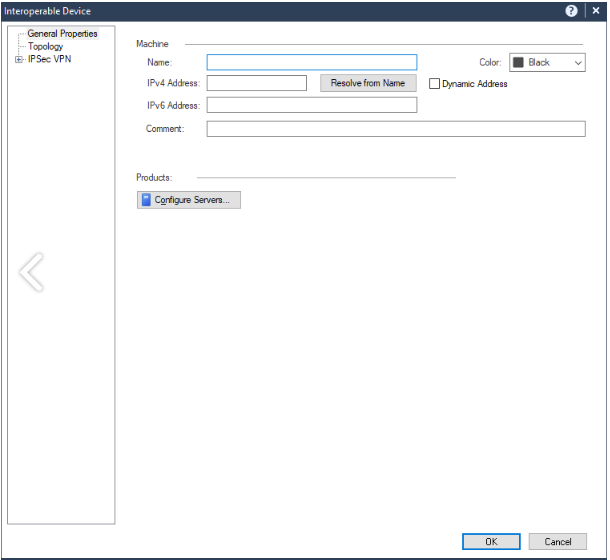
The values are
-
Name - Vipilink_Gateway
-
IPv4 Address - Public IP of Vipilink Gateway
-
IPv6 Address - leave it blank
-
Comment -
3.3 Clicl OK.
4. Create Topologies for internal and external connection
4.1 Create topology for internal connection. Open the object that you have created in Step 3 and go to Topology. Create a new one.

General Tab Values
-
Name - Vipilink Network
-
IP Address - Local Subnet of Vipilink
-
Net Mask - Subnet Mask of Network
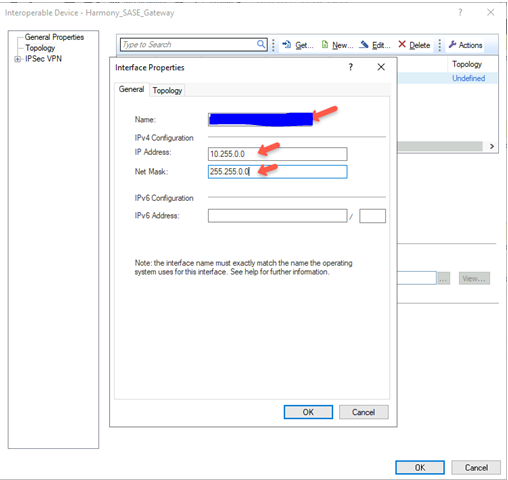
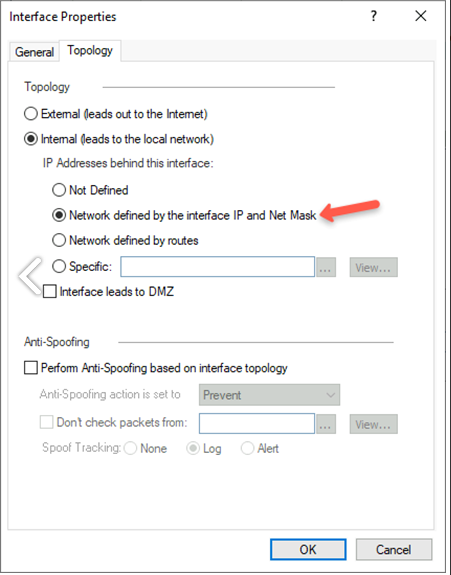
In Topology Tab select Internal (leads to the local network) and after choose Network defined by the interface IP and Net Mask
4.2 Create a topology for an external connection. Again go to Topology and add a New one.
General Tab Values
-
Name - Vipilink Gatewa
-
IP Address - Public IP of Vipilink Gateway
-
Net Mask - 255.255.255.255 (/32)
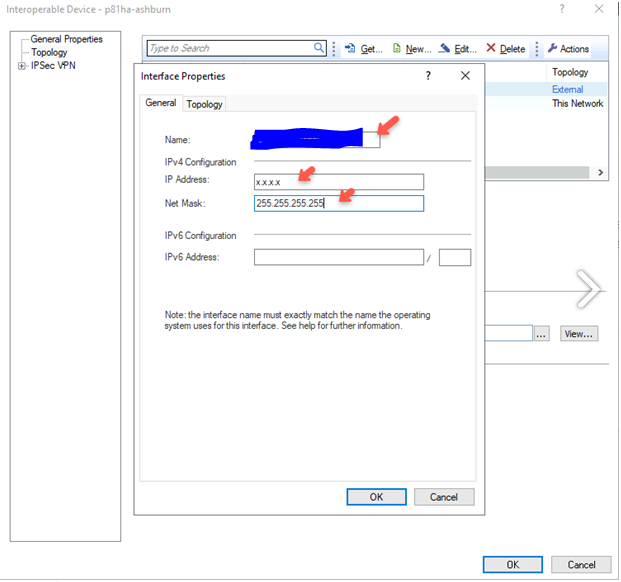
In Topology Tab select External (leads to the Internet). Click OK and again OK.

5. Create VPN Star community
5.1 Click on Security Policies and go to Access Tools/VPN Communities. Select an object, click New and go to More/VPN Community/Star Community. Then the new window will appear.
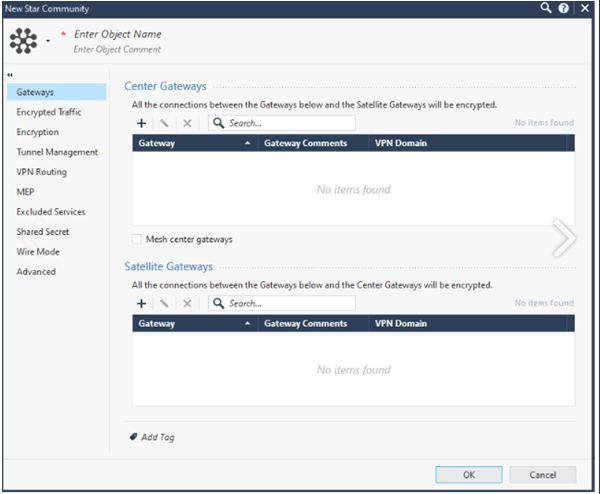
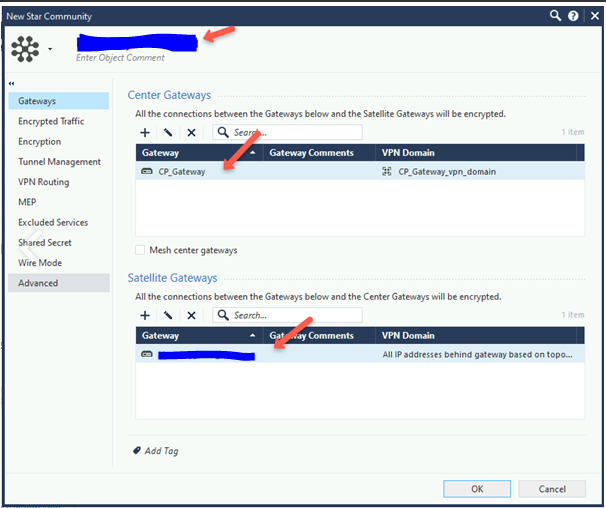
5.2 Define the object name ov VPN Star Community at the top left of the window.
5.3 Add a Check Point Gateway to Centre Gateways section.
5.4 Add already created Interoperable Device Object to Satellite Gateways section.
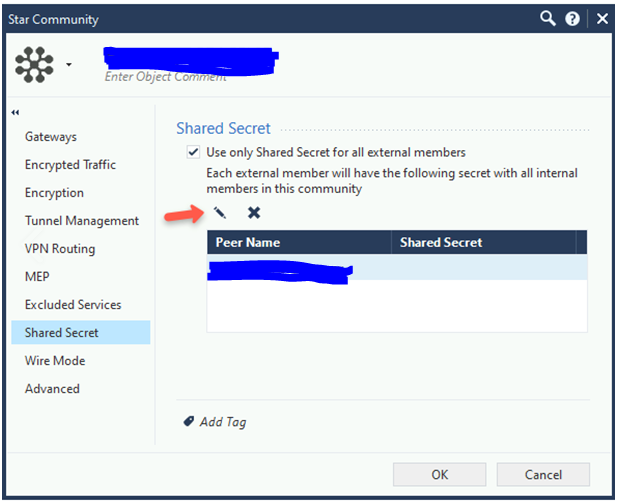
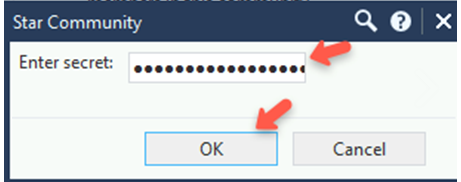
5.5 Go to *Shared Secret and put appropriate key.
Click OK.
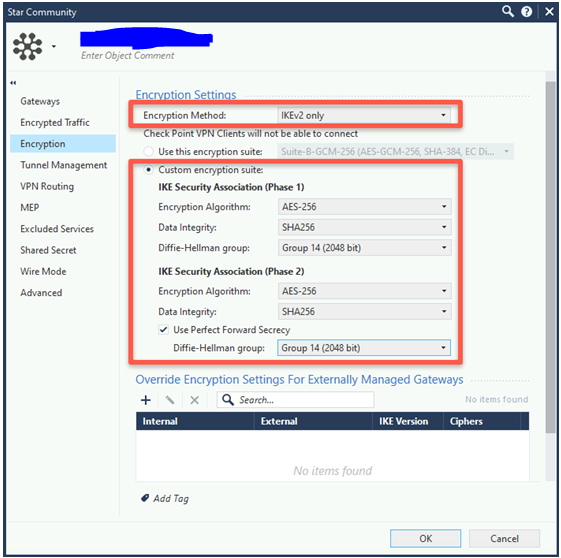
5.6 Go to Encryption and specify the values
-
Encryption Method: IKEv2 only
-
Custom encryption suite - checked
IKE Security Association (Phaese 1) Values
-
Encryption Algorithm: AES256
-
Data Integrity: SHA256
-
Diffie-Hellman Group: Group 14 (2048 bit)
IKE Security Association (Phaese 2) Values
-
Encryption Algorithm: AES256
-
Data Integrity: SHA256
-
Use Perfect Forward Secrecy: Checked
-
Diffie-Hellman Group: Group 14 (2048 bit)
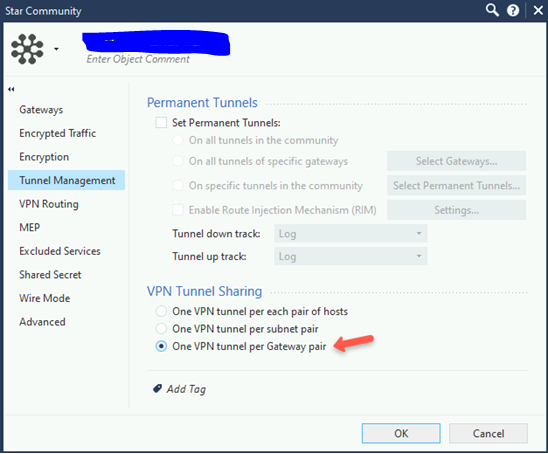
5.7 Enter to Tunnel Management. In the VPN Tunnel Sharing section select One VPN tunnel per Gateway pair.
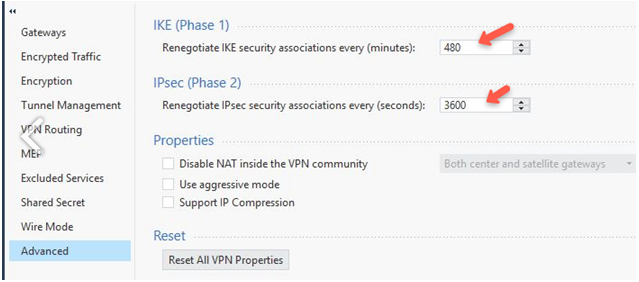
5.8 Go to Advanced and choose the Renegotiate IKE security associations every (minutes) and Renegotiate IPsec security associations every (seconds) values.
5. Add Firewall Rule
5.1 Create a rule to allow incoming traffic from Vipilink Local Network.