IPSec site-to-site configuration guide with Barracuda
1. Login to vipilink portal and create network
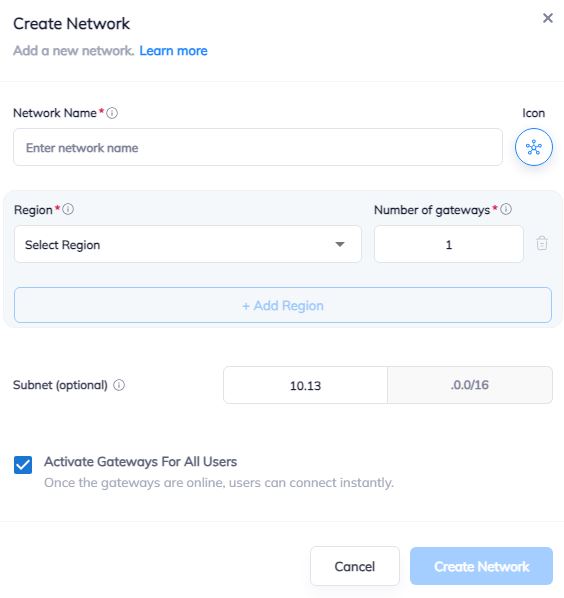
1.1 Go to Networks section and create a new network.
1.2 Define the network name.
1.3 Select the region and gateways number.
1.4 Choose the subnet.
1.5 Activate gateways for all users section is active by default. If you want to disable this function - just remove the mark.
2. Create the IPsec tunnel in the Vipilink portal
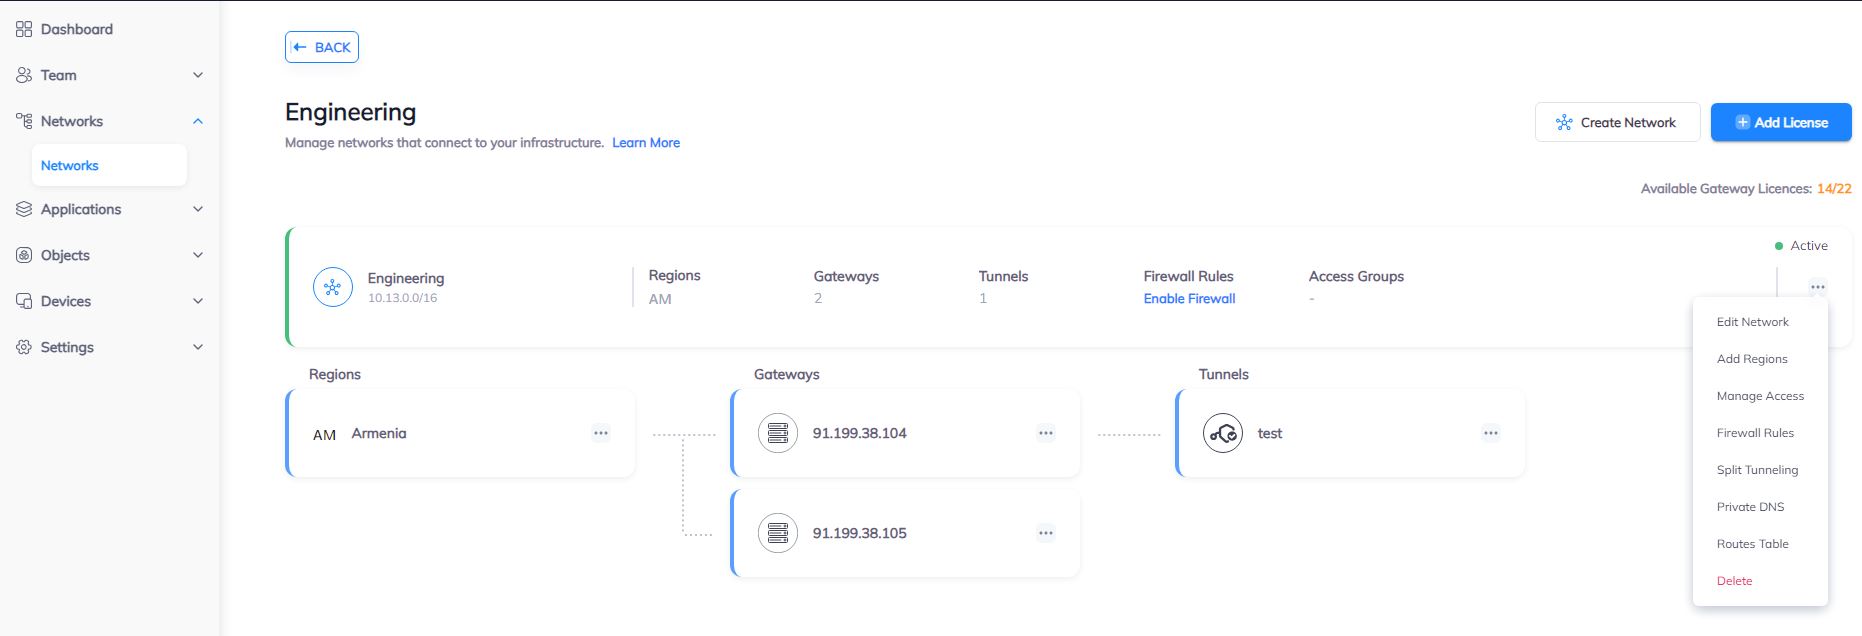
2.1 Go to Networks section and click on the subnet that you created in Step-1.
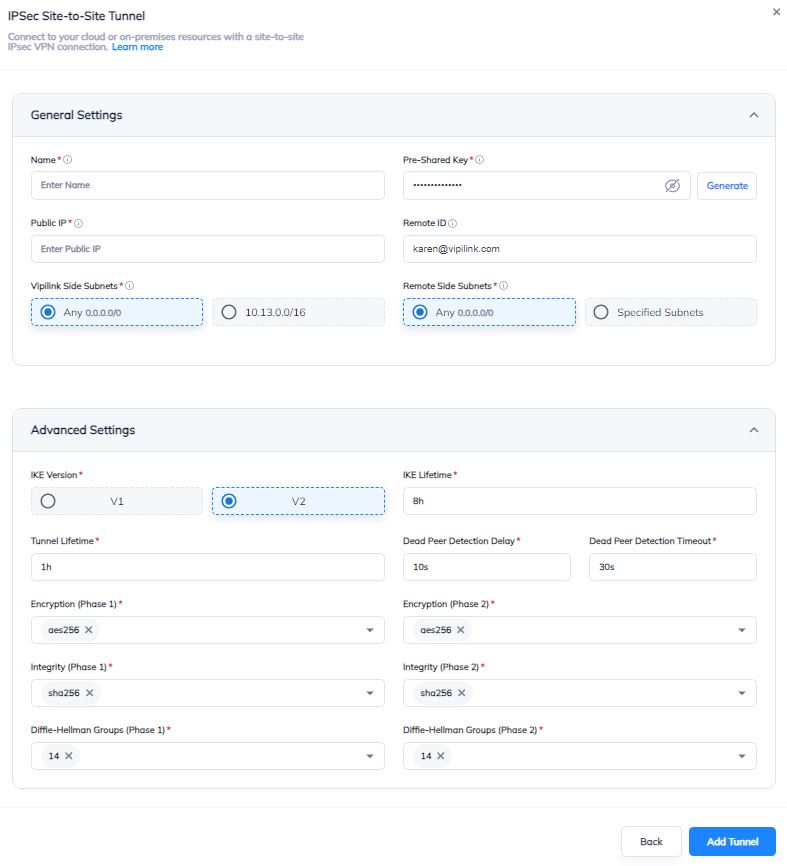
2.2 Click on Gateway and add a Tunnel. Choose IPSec Site-to-Site Tunnel and press to continue.
2.3 Choose between a Single-Tunnel and Dual-Tunnel.
2.4 General Settings Values
-
Name
-
Public IP
-
Vipilink Side Subnets
-
Pre-Shared Key
-
Remote ID
-
Remote Side Subnets
2.5 Advanced Settings Values
-
Ike Version
-
Tunnel Lifetime
-
Encryption (Phase 1)
-
Integrity (Phase 1)
-
Diffie-Helman Groups (Phase 1)
-
Ike Lifetime
-
Dead Peer Detection Delay
-
Dead Peer Detection Timeout
-
Encryption (Phase 2)
-
Integrity (Phase 2)
-
Diffie-Helman Groups (Phase 2)
2.6 You can also manage a Network, Regions, Access, Firewall Rules, Routes Table, enable Split Tunneling and Private DNS.
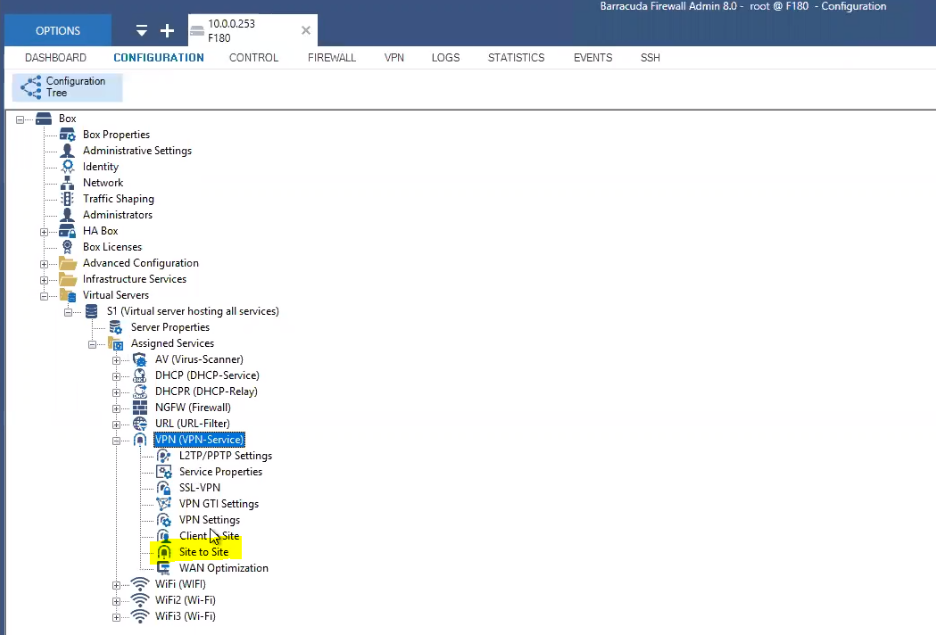
3. Create the IPsec tunnel on Barracuda
3.1 Log in to Management Interface and navigate to Configuration/Virtual Servers/Your Virtual Server/Assigned Services/VPN (VPN Service/Site to Site). Select IPsec IKEv2 Tunnels and create a new tunnel.
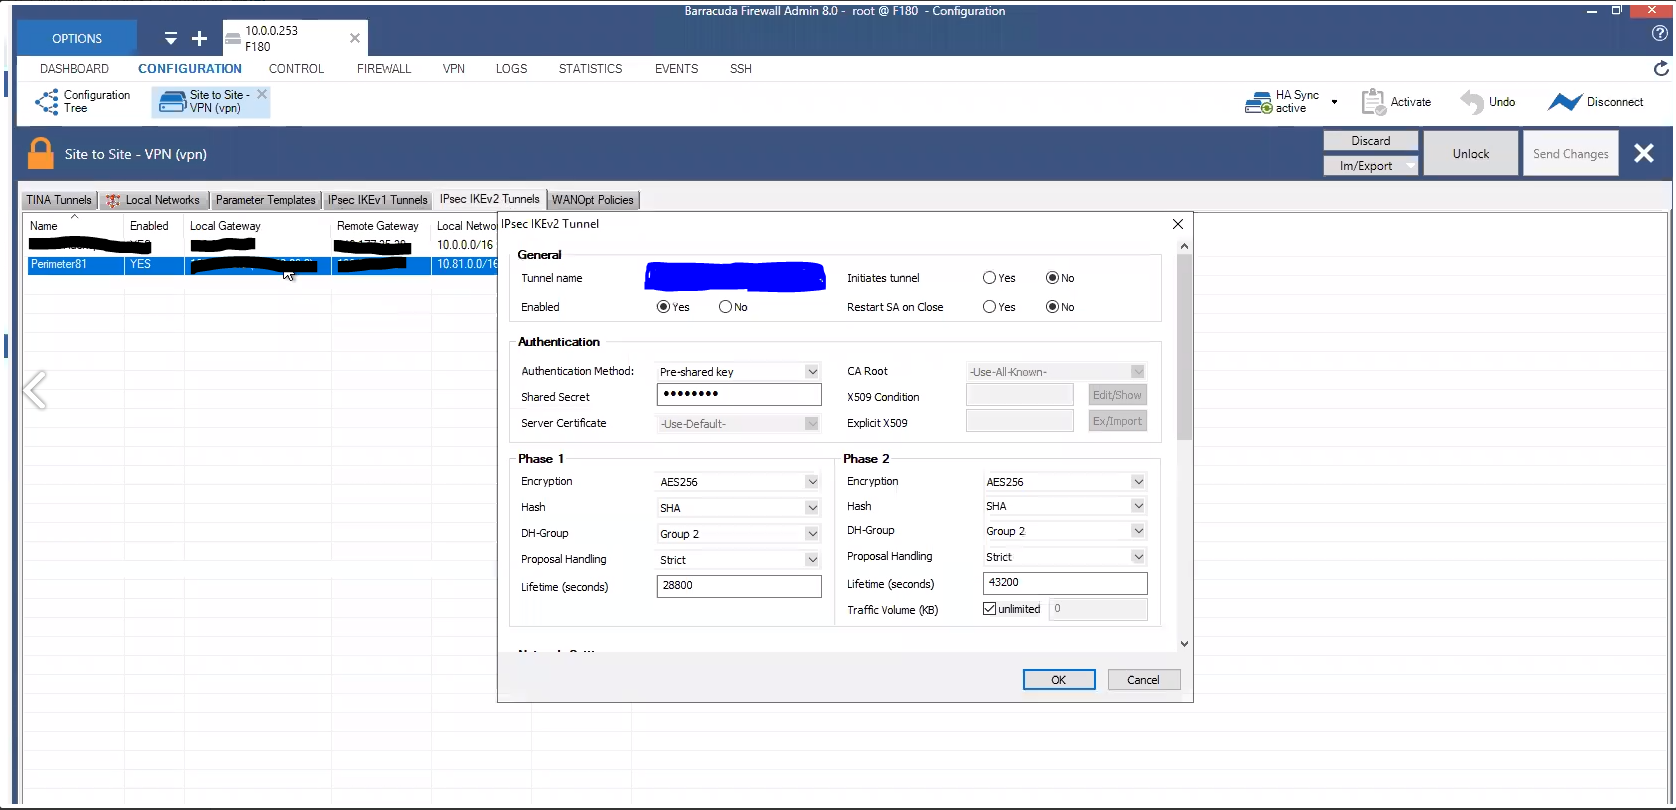
3.2 Define the tunnel name and the Pre-shared key.
3.3 Choose Phase 1 and Phase 2 Proposals.
Phase 1 Values
-
Encryption - AES256
-
HASH - SHA256
-
DH-Group - 14
-
Proposal Handling - Strict
-
Lifetime (seconds) - 28800
Phase 2 Values
-
Encryption - AES256
-
Hash - SHA256
-
DH-Group - 14
-
Proposal handling - Strict
-
Lifetime (seconds) - 43200
-
Traffic Volume (KB) - unlimited
4. Setup the Network ##
4.1 Go to Configuration/Site to Site VPN (vpn) and add a new one.
IPsec IKEv2 Tunnel Values
-
Endpoint Type: IPv4
-
One VPN Tunnel per Subnet Pair: Unchecked
-
Universal Traffic Selectors: Unchecked
-
Force UDP Encapsulation: Unchecked
-
IKE Reauthentication: Checked
-
Next Hop Routing: 0.0.0.0
-
Interface Index: 0

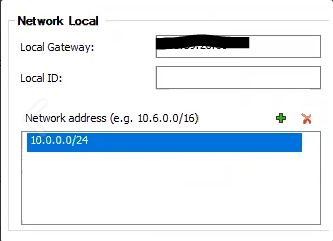
Network Local Values
-
Local Gateway: Public IP of Barracuda Firewall
-
Local ID: Public IP of Barracuda Firewall
-
Network address: Local Subnets of Barracuda Firewall
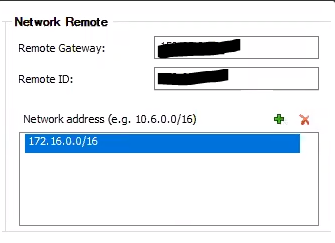
Network Remote Values
-
Remote Gateway: Public IP of Vipilink Gateway
-
Remote ID: Public IP of Vipilink Gateway
-
Network Address: Local Subnet of Vipilink
Dead Peer Detection Values
-
Action: Restart
-
Delay (seconds): 30

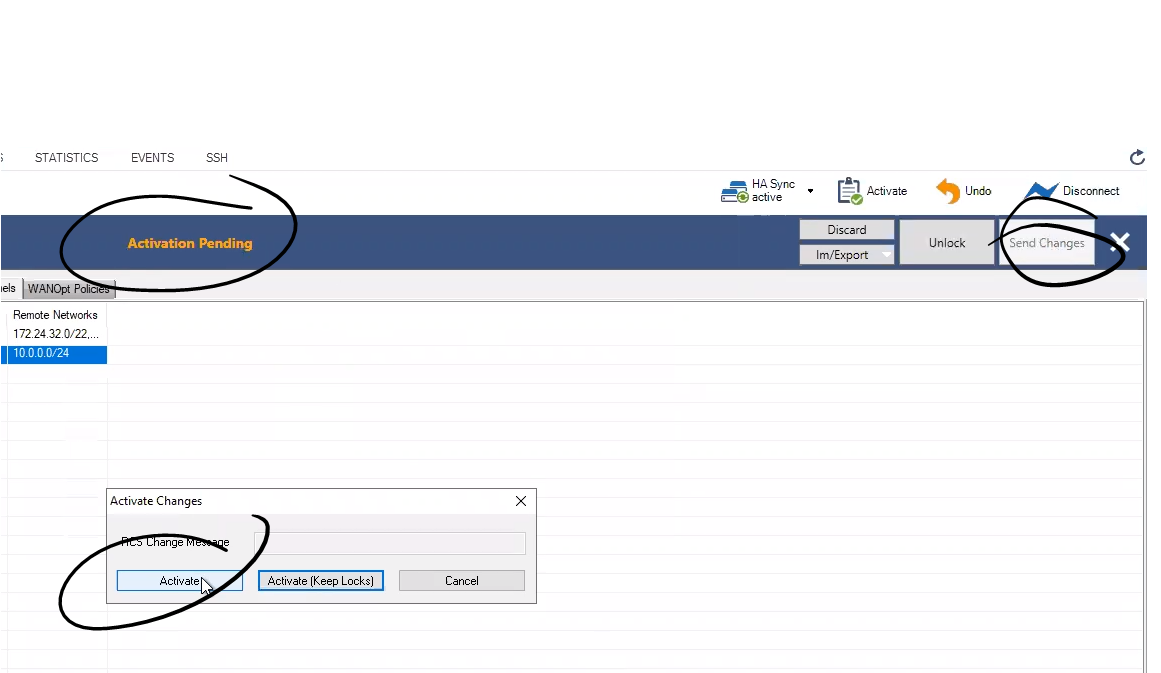
4.2 Click OK to confirm the setting. To commit changes also click on Send Changes, Activation Pending and Activate buttons.
5. Configure firewall and static routes. ##
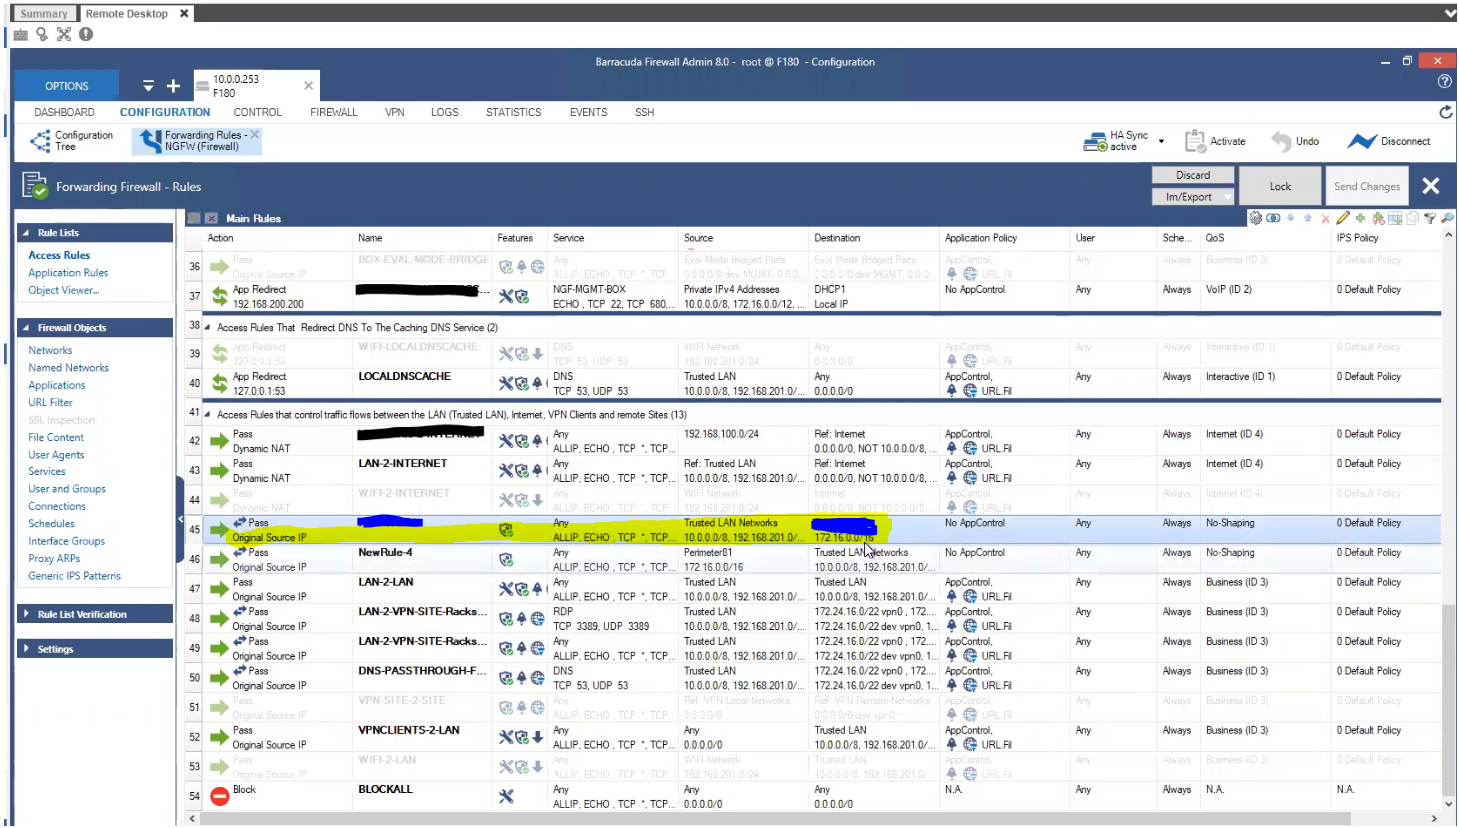
5.1 Go to Firewall/Forwarding Rules and create a rule to allow traffic from Vipilink Public IP to pass.
5.2 Check is the added Access Rule is correct.
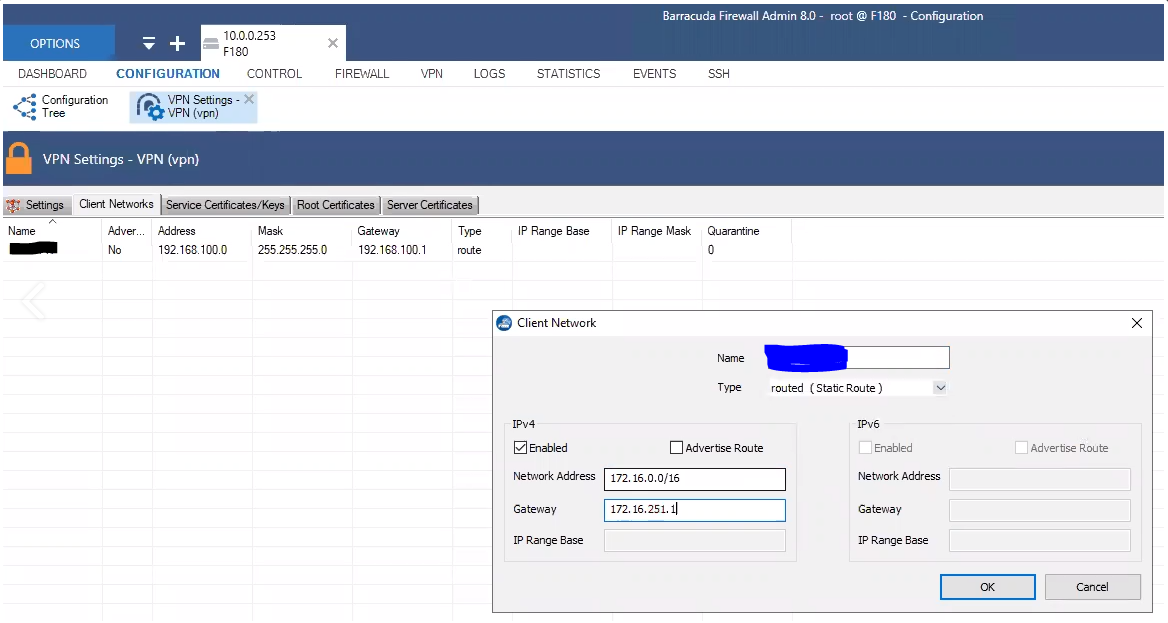
5.3 Add static route. Go to Configuration/Client Networks and add a new network. The values are
-
Network Address: Vipilink Local Subnet
-
Gateway: Barracuda Local IP
-
Name: to_Vipilink
5.4 Click Ok.
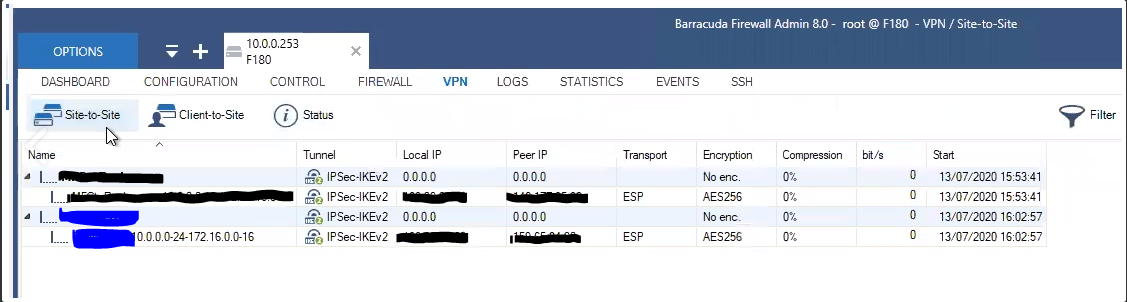
- Check the status of tunnel. Go to VPN/Site-to-Site. If it is active, you will see it in the list.